How to Do Cat Eye Nails: A Complete Step-by-Step Guide
There’s a reason cat eye nails keep coming back around as one of the most requested salon looks. That single streak of shimmer that shifts and glows depending on how you tilt your hand looks genuinely impressive, almost like it took hours of intricate freehand work. In reality, the effect comes down to a specific type of polish and a small magnet, and once you understand how the two interact, it’s a technique you can absolutely pull off at home.
This guide walks through exactly what’s happening chemically to create that shimmer, what you actually need before you start, the full step-by-step application process, how to create different pattern styles, and what to do when the effect just isn’t showing up the way it’s supposed to.
How to Do Cat Eye Nails: The Basic Method

Cat eye nails are created by applying a magnetic gel polish, then holding a magnet close to the wet polish before curing it under a UV or LED lamp. The magnet pulls tiny metallic particles suspended in the polish toward it, creating a streak or pattern that catches and reflects light differently depending on the viewing angle, similar to the optical effect seen in a cat’s eye gemstone.
The entire process happens one nail at a time, since the polish needs to stay wet while the magnet is held over it, and it needs to be cured relatively quickly afterward to lock the pattern in place before it settles back down or smudges.
What You’ll Need Before You Start

A handful of specific supplies make this technique possible, and most of them are things you’ll only need to buy once.
Magnetic gel polish is the core requirement, formulated with tiny metallic particles suspended throughout the color that respond to a magnet’s pull while the polish is still wet and uncured. A dedicated cat eye magnet, sometimes sold as a single-line magnet or a multi-pattern magnet with different shapes built into one tool, is what actually creates the visible effect. A UV or LED gel lamp is necessary for curing the polish, since this is a gel-based technique rather than something that works with regular air-dry lacquer.
Beyond those core items, a standard gel manicure kit rounds things out: a base coat, a top coat formulated for gel, a lint-free wipe and cleanser for removing the sticky residue left after curing, and the usual nail prep tools like a buffer and cuticle pusher.
What Makes Cat Eye Gel Polish Actually Work
The shimmer effect comes down to genuinely clever formulation. Magnetic gel polish suspends extremely fine metallic particles, often iron-based, throughout the pigmented gel base. While the polish is still liquid, those particles are free to move, and a magnet held close enough exerts enough pull to drag them toward it, arranging them into whatever pattern the magnet’s internal shape dictates.
Once the polish is cured under a lamp, the gel hardens completely, locking those particles into whatever position they were pulled into. Because the particles reflect light differently depending on their arrangement and the angle they’re viewed from, the finished nail shows that signature streak of brightness that seems to shift and move as you turn your hand, exactly the same optical principle, called chatoyancy, behind cat’s eye gemstones and tiger’s eye stone.
Do You Need a Special Magnet for Cat Eye Nails?
Yes, cat eye nails specifically require a magnet designed for this technique, since the internal magnetic pattern built into these tools is what determines the shape and direction of the shimmer effect. A random household magnet typically isn’t strong enough or precisely shaped to pull the metallic particles into a clean, defined line or pattern, which is why dedicated cat eye magnets, sold specifically for this nail art technique, are worth the investment if you want consistent, professional-looking results.
Step-by-Step: How to Apply Cat Eye Nail Polish

Start with properly prepped nails, pushed-back cuticles, a buffed nail surface, and a thin layer of base coat cured under your lamp according to the product’s recommended time.
Apply one thin, even coat of magnetic gel polish to a single nail. Working one nail at a time is essential here, since you need to hold the magnet over the wet polish immediately, before it has any chance to begin setting.
Hold the magnet close to the nail surface, without actually touching the wet polish, positioning it at whatever angle matches the pattern direction you want. Most cat eye effects look best with the magnet held at a slight angle rather than perfectly flat, which helps create that natural, slightly curved streak of light rather than a flat, static line.
Hold the magnet in place for several seconds, generally somewhere around five to ten seconds depending on the specific polish formula, giving the metallic particles enough time to respond and arrange themselves into the pattern. Then cure the nail under your UV or LED lamp for the time specified on your polish, which locks the pattern permanently into the hardened gel.
Repeat this same process, one nail at a time, across the whole hand. Once all nails are cured, wipe away the tacky residue layer with cleanser and a lint-free wipe, then finish with a glossy gel top coat, cured once more under the lamp, to seal and protect the finished design.
Can You Get the Cat Eye Effect With Regular Gel Polish?
No, the cat eye effect specifically requires magnetic gel polish formulated with metallic particles, since standard gel polish without those particles has nothing for the magnet to pull or arrange. Attempting the technique with regular polish simply won’t produce any shimmer or movement, regardless of how long or how close you hold the magnet.
Different Cat Eye Patterns and How to Create Them
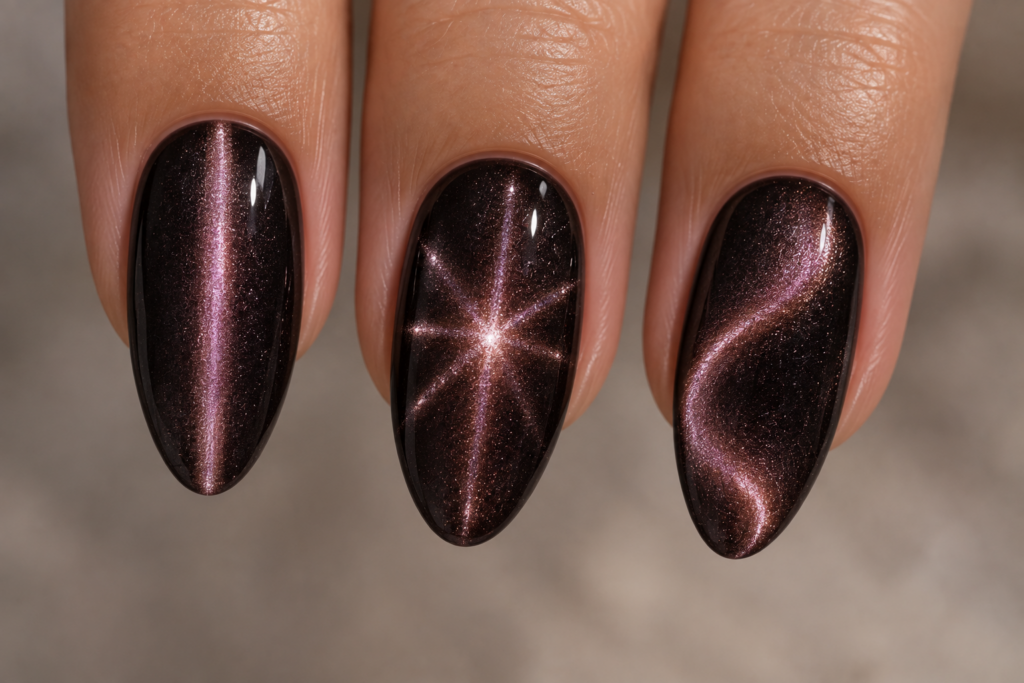
Not every cat eye nail looks the same, and the specific pattern comes down entirely to the internal shape of the magnet you’re using.
A straight-line magnet creates the classic, single streak of light running across the nail, the most traditional and widely recognized cat eye look. A starburst or diamond-pattern magnet, sometimes called a galaxy magnet, creates a more dramatic, multi-directional sparkle radiating outward from a central point, giving a bolder, more eye-catching effect than the classic single line. Wave or curved-pattern magnets create a softer, more organic-looking streak that moves gently across the nail rather than sitting in one straight direction.
Layering multiple magnetic polish colors, curing each one separately before applying the next, can also create a multidimensional, almost holographic depth effect, since each layer’s shimmer interacts visually with the ones underneath it.
Common Mistakes and How to Fix a Cat Eye Manicure That Isn’t Working
A handful of recurring issues trip up most people the first few times they try this technique, and nearly all of them are fixable with small adjustments.
Holding the magnet too close, close enough to actually touch the wet polish, tends to smear and ruin the pattern rather than creating a clean effect. Holding it too far away, on the other hand, doesn’t give the magnet enough pull to move the particles meaningfully, resulting in a flat, shimmer-free finish that barely shows any pattern at all.
Applying the magnetic polish coat too thin means there aren’t enough particles present to create a visible effect, while applying it too thick can make the particles harder to pull into a clean, defined pattern. A single, even, medium-thickness coat tends to work best for most formulas.
Skipping the top coat is another common misstep. Cured magnetic polish on its own often looks slightly matte or dull, and a proper glossy gel top coat is what gives the finished cat eye effect its signature high-shine, almost wet-looking finish.
Why Isn’t My Cat Eye Effect Showing Up?
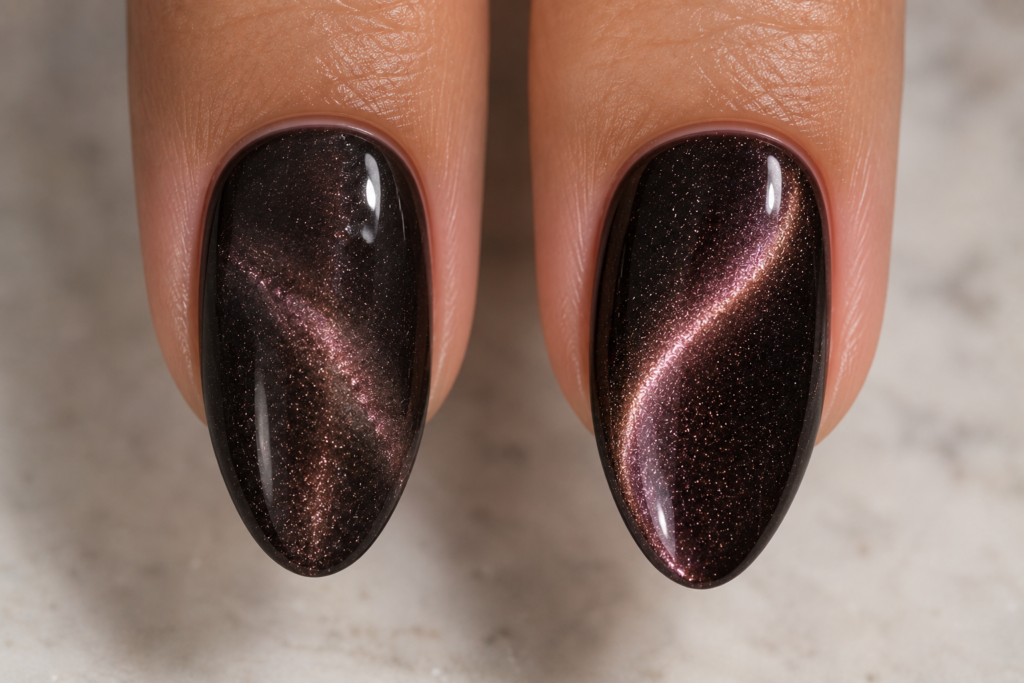
If the shimmer effect isn’t appearing, the most common causes are holding the magnet too far from the wet polish, not holding it in place long enough for the particles to respond, or applying the magnetic polish coat too thin for enough particles to be present in the first place. Double-checking magnet distance, holding time, and coat thickness usually resolves the issue, and testing on a single practice nail before doing a full set can help you dial in the right technique for your specific polish and magnet combination.
Frequently Asked Questions
1. Can you do cat eye nails on natural nails, or do you need acrylics or gel extensions?
Cat eye nails work perfectly well on natural nails, since the technique relies entirely on the magnetic gel polish and magnet rather than any specific nail base, making it just as achievable on a natural manicure as it is on extensions.
2. How long does a cat eye gel manicure typically last?
A properly applied cat eye gel manicure generally lasts about as long as any standard gel manicure, often two to three weeks, since the technique itself doesn’t affect durability, only the visual pattern created within the cured gel layer.
3. Do you need a UV lamp or will an LED lamp work for cat eye nails?
Either a UV or LED lamp can be used for cat eye nails, though it’s worth checking your specific magnetic polish’s instructions, since some formulas cure faster or more completely under one type of lamp versus the other, and using the correct cure time matters for both the finish and the durability of the manicure.
4. Can you remove and redo a cat eye pattern if you don’t like how it turned out?
Yes, if you catch it before curing, wiping off the wet polish and starting over is simple, but once the polish has been cured under the lamp, you’ll generally need to gently buff off that layer of magnetic polish and reapply, rather than being able to adjust the pattern after the fact.
5. Is cat eye nail polish more expensive than regular gel polish?
Magnetic gel polish and the dedicated magnet tool typically cost a bit more upfront than standard gel polish alone, mainly due to the specialized formulation and the additional magnet purchase, though the polish itself is generally used the same way as any other gel color once you own the tools.
6. Can you combine cat eye nails with other nail art techniques, like ombre or French tips?
Yes, cat eye effects can be combined with other nail art styles, such as applying the magnetic polish only to certain nails as an accent, pairing it with an ombre gradient, or using it as a shimmering tip over an otherwise solid color base for a subtler, blended look.
7. Why does my cat eye pattern look different on each nail even though I used the same technique?
Slight variations in magnet angle, holding time, and polish thickness between nails can all cause small differences in the final pattern, and since each nail is done individually, achieving perfectly identical results across all ten nails often takes some practice and consistency in technique.
8. Does nail shape affect how well the cat eye effect shows up?
Nail shape doesn’t significantly affect whether the magnetic effect works, though longer nail shapes do give the shimmering streak more surface area to move across, which can make the pattern appear more dramatic or elongated compared to very short nails.
9. Can you do cat eye nails at home without professional training?
Yes, cat eye nails are genuinely achievable at home with some practice, and the technique itself doesn’t require professional-level skill, though understanding the correct magnet distance, timing, and polish thickness through a bit of trial and error makes a noticeable difference in how clean and defined the final result looks.
10. Do different colors of cat eye polish create different intensities of shimmer?
Yes, darker base colors, particularly deep blues, purples, and blacks, tend to show the shimmering streak with the most contrast and drama, since the metallic particles stand out more strongly against a darker background, while lighter colors can still work but sometimes show a softer, more subtle version of the effect.