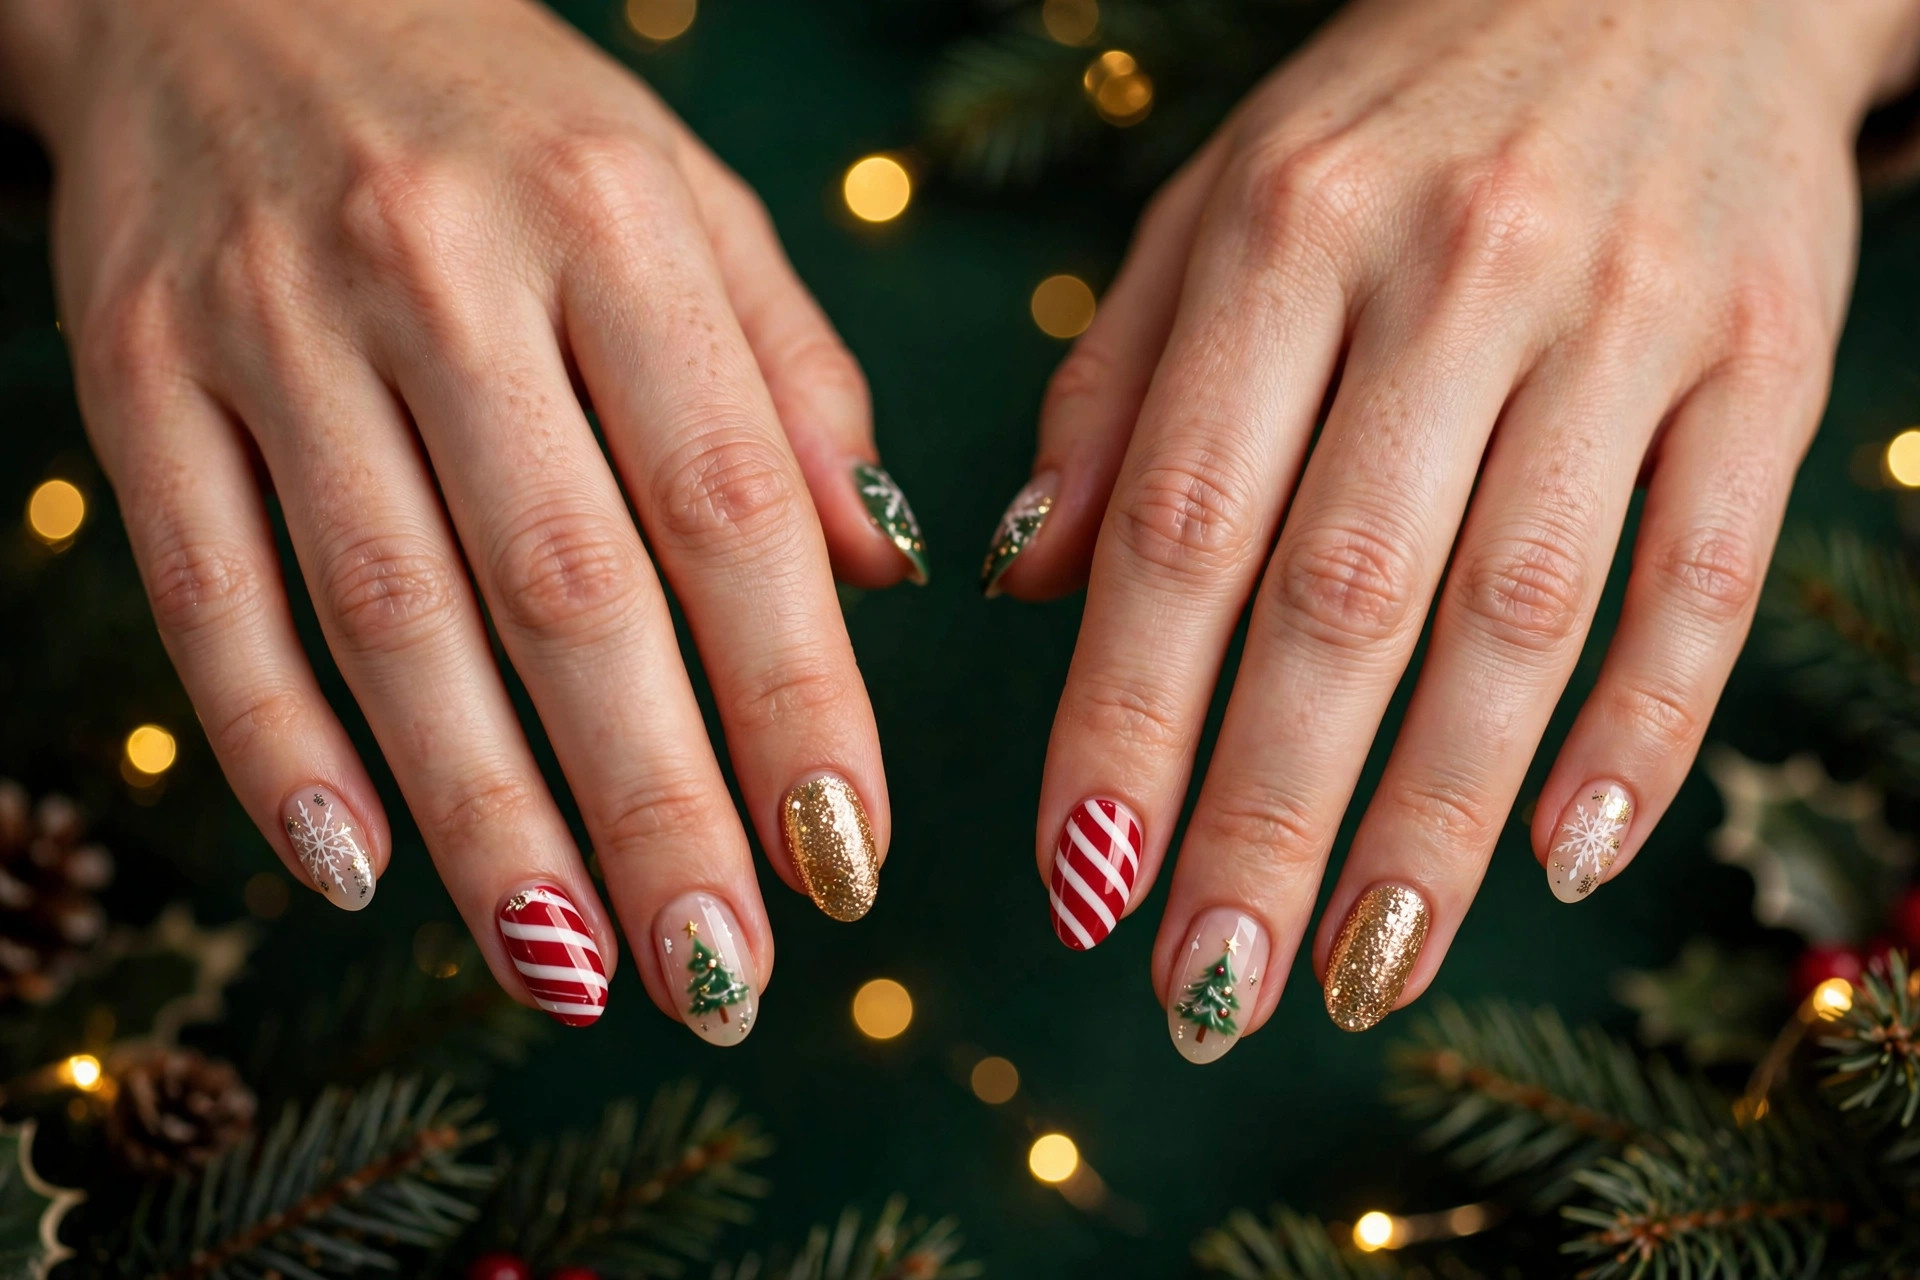
Christmas Nail Art: 25 Festive Designs to DIY
You want festive nails for December but you do not want to pay $60 for a salon set you will remove in January. Good news: Christmas nail art is one of the easiest seasonal looks to DIY, because most of the classic designs — snowflakes, candy cane stripes, tiny trees — are built from dots, stripes, and simple shapes you can do with a toothpick, a bobby pin, and two or three polishes you probably already own.
This guide gives you 25 Christmas nail art designs with real mini how-tos, not just inspiration photos. Every design includes a skill level (beginner to advanced), the key products you need, and exactly how long it takes. Pick one design, gather your supplies, and your nails can be holiday-ready in under an hour.
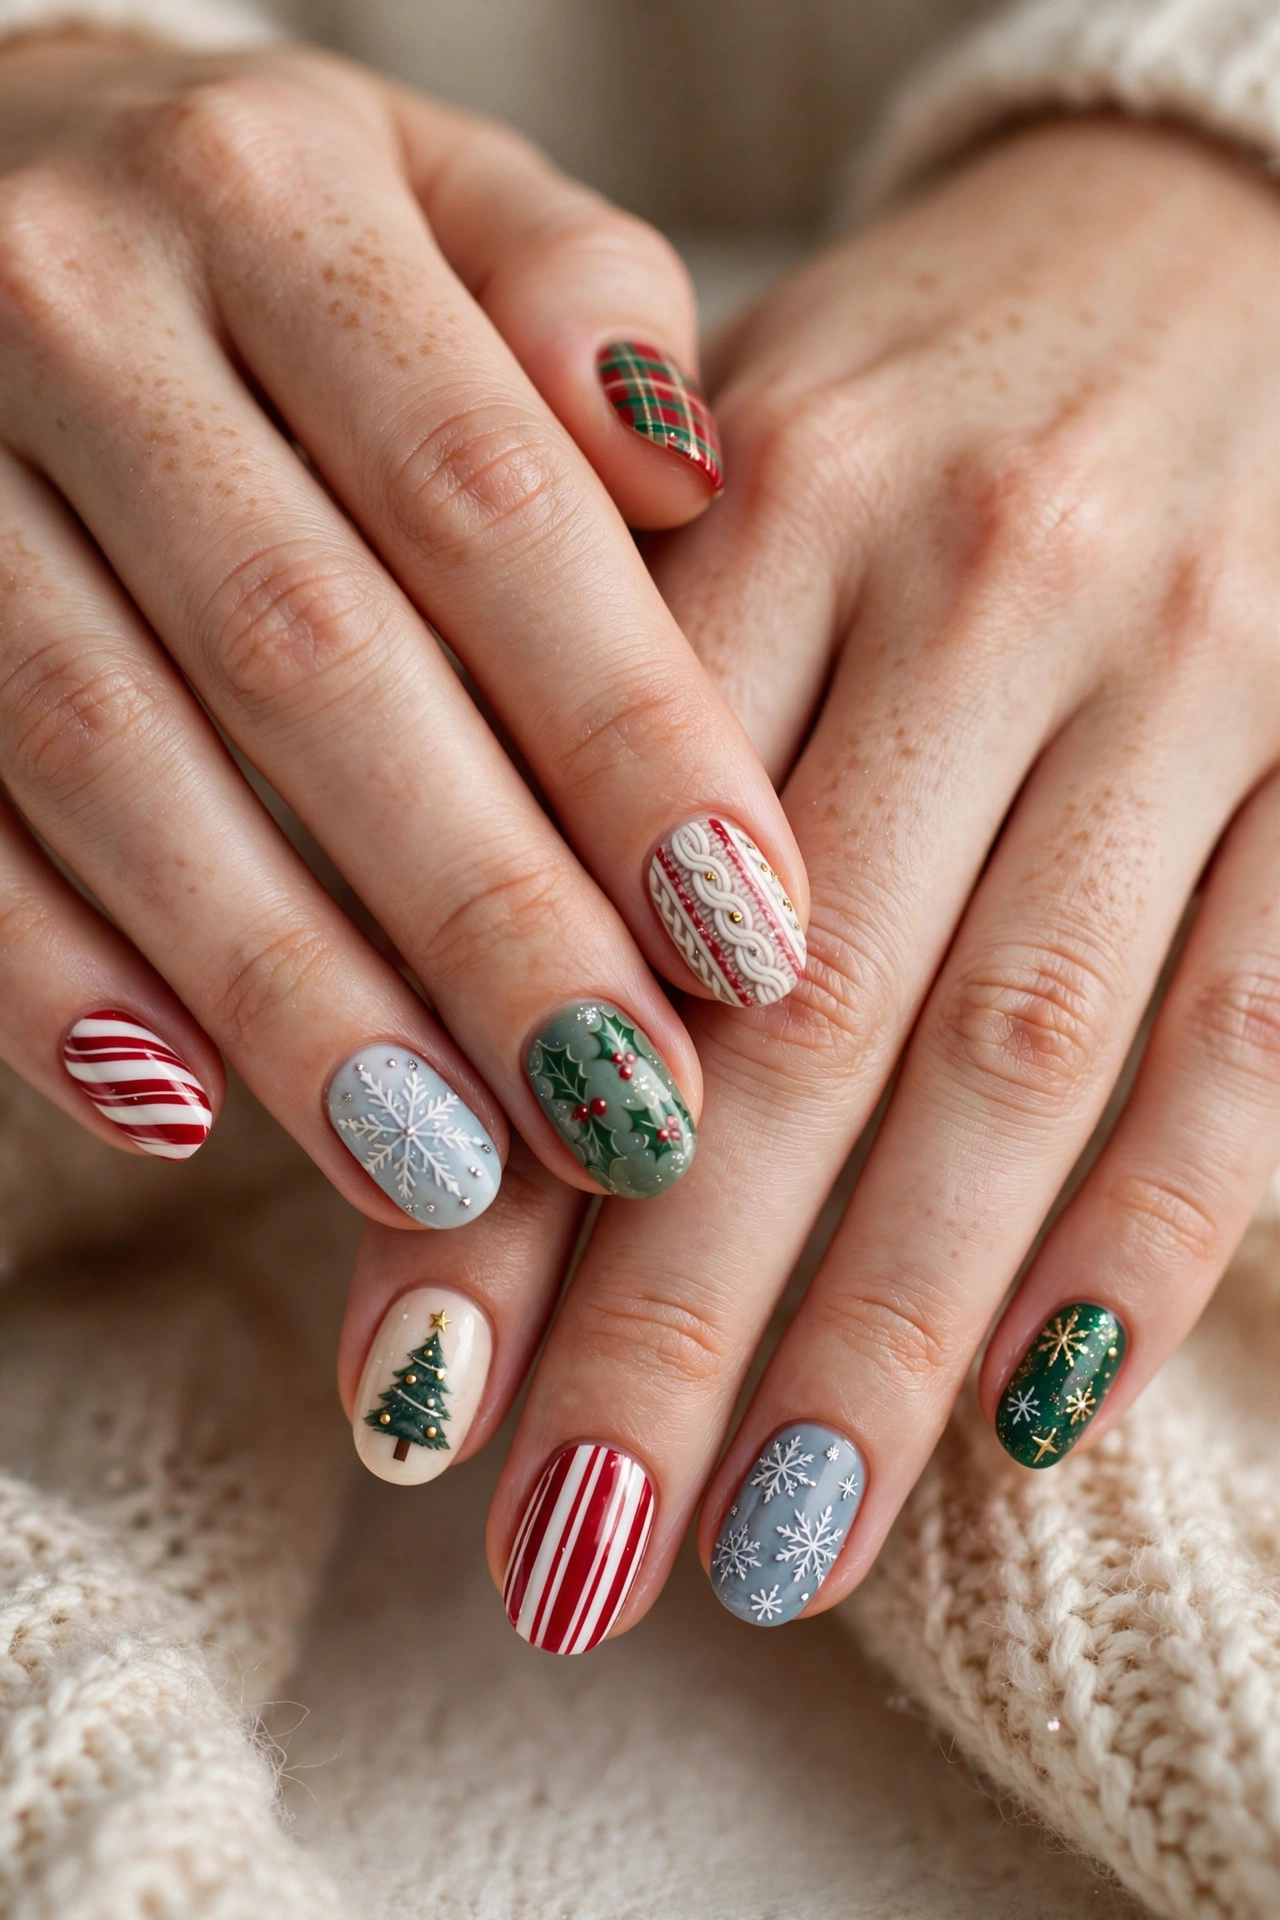
The fastest answer: yes, you can absolutely DIY Christmas nail art at home with regular polish, a base and top coat, and a few household tools like toothpicks, tape, and a makeup sponge. Beginner designs like glitter fades and polka-dot snow take 20 to 30 minutes and need zero special tools, while detailed looks like tartan plaid or sweater-knit texture take 45 to 60 minutes. You do not need a UV lamp, and you do not need professional brushes — a dotting tool costs under $5, but a bobby pin works for dots in a pinch.
What Do You Need to DIY Christmas Nail Art?
Before you start on any of the 25 designs below, gather these basics. Everything on this list is cheap, reusable, and covers nearly every design in this guide.
The polish essentials
- Base coat and glossy top coat: the two products that separate amateur-looking nail art from salon-looking nail art. Apply base to clean nails and top coat over every finished design. A quick-dry top coat cuts your total waiting time nearly in half.
- Core colors: red, dark green, white, gold glitter, silver glitter, and black. Those six cover about 20 of the 25 designs here. If you are buying one thing for this project, make it a good white polish — thin, streaky white ruins more holiday designs than anything else.
- Accent colors: burgundy, navy, nude, and one metallic (gold or silver). Nice to have, not required.
The tools (most of them free)
- Dotting tool (or a bobby pin, toothpick, or the end of a paintbrush handle): makes every dot — snow, berries, lights, baubles — perfectly round.
- Striping tape or thin masking tape: for straight candy cane lines and crisp plaid.
- A makeup sponge: for glitter fades and gradient effects.
- A small detail brush or a nail art liner brush: only needed for the 4 advanced designs. A cheap 5-pack lasts years.
Prep supplies that matter more than you think
- Acetone or polish remover and a small cleanup brush (an old angled eyeliner brush works) dipped in remover for cleaning up edges — this one step makes DIY work look professional.
- Cuticle pusher, nail file, and buffer: if you want a refresher on the basics first, our guide to how to paint nails walks through prep step by step.
How Long Does Christmas Nail Art Take?
Realistic timing by skill level, assuming one full set of ten nails and a quick-dry top coat:
- Beginner designs (designs 1, 5, 12, 15, 18, 20, 25): 20 to 35 minutes total. These use dots, single-color glitter, or simple shapes.
- Intermediate designs (designs 2, 3, 6, 8, 10, 13, 14, 16, 17, 19, 21, 23, 24): 35 to 50 minutes. These need two colors layered, tape, or a sponge.
- Advanced designs (designs 4, 7, 9, 11, 22): 45 to 75 minutes. These need a detail brush and a steady hand — worth it for a party, not for a Tuesday.
Whatever your level, let each layer dry 2 to 3 minutes before adding the next one. Rushing layers is the number one reason DIY nail art smudges, and the extra 15 minutes of patience is cheaper than redoing the whole hand.
25 Christmas Nail Art Designs to DIY
Each design below gives you a skill level, the exact products you need, the real time it takes, and numbered steps. Start at the top for the easiest wins, or jump to whichever design matches your holiday plans.
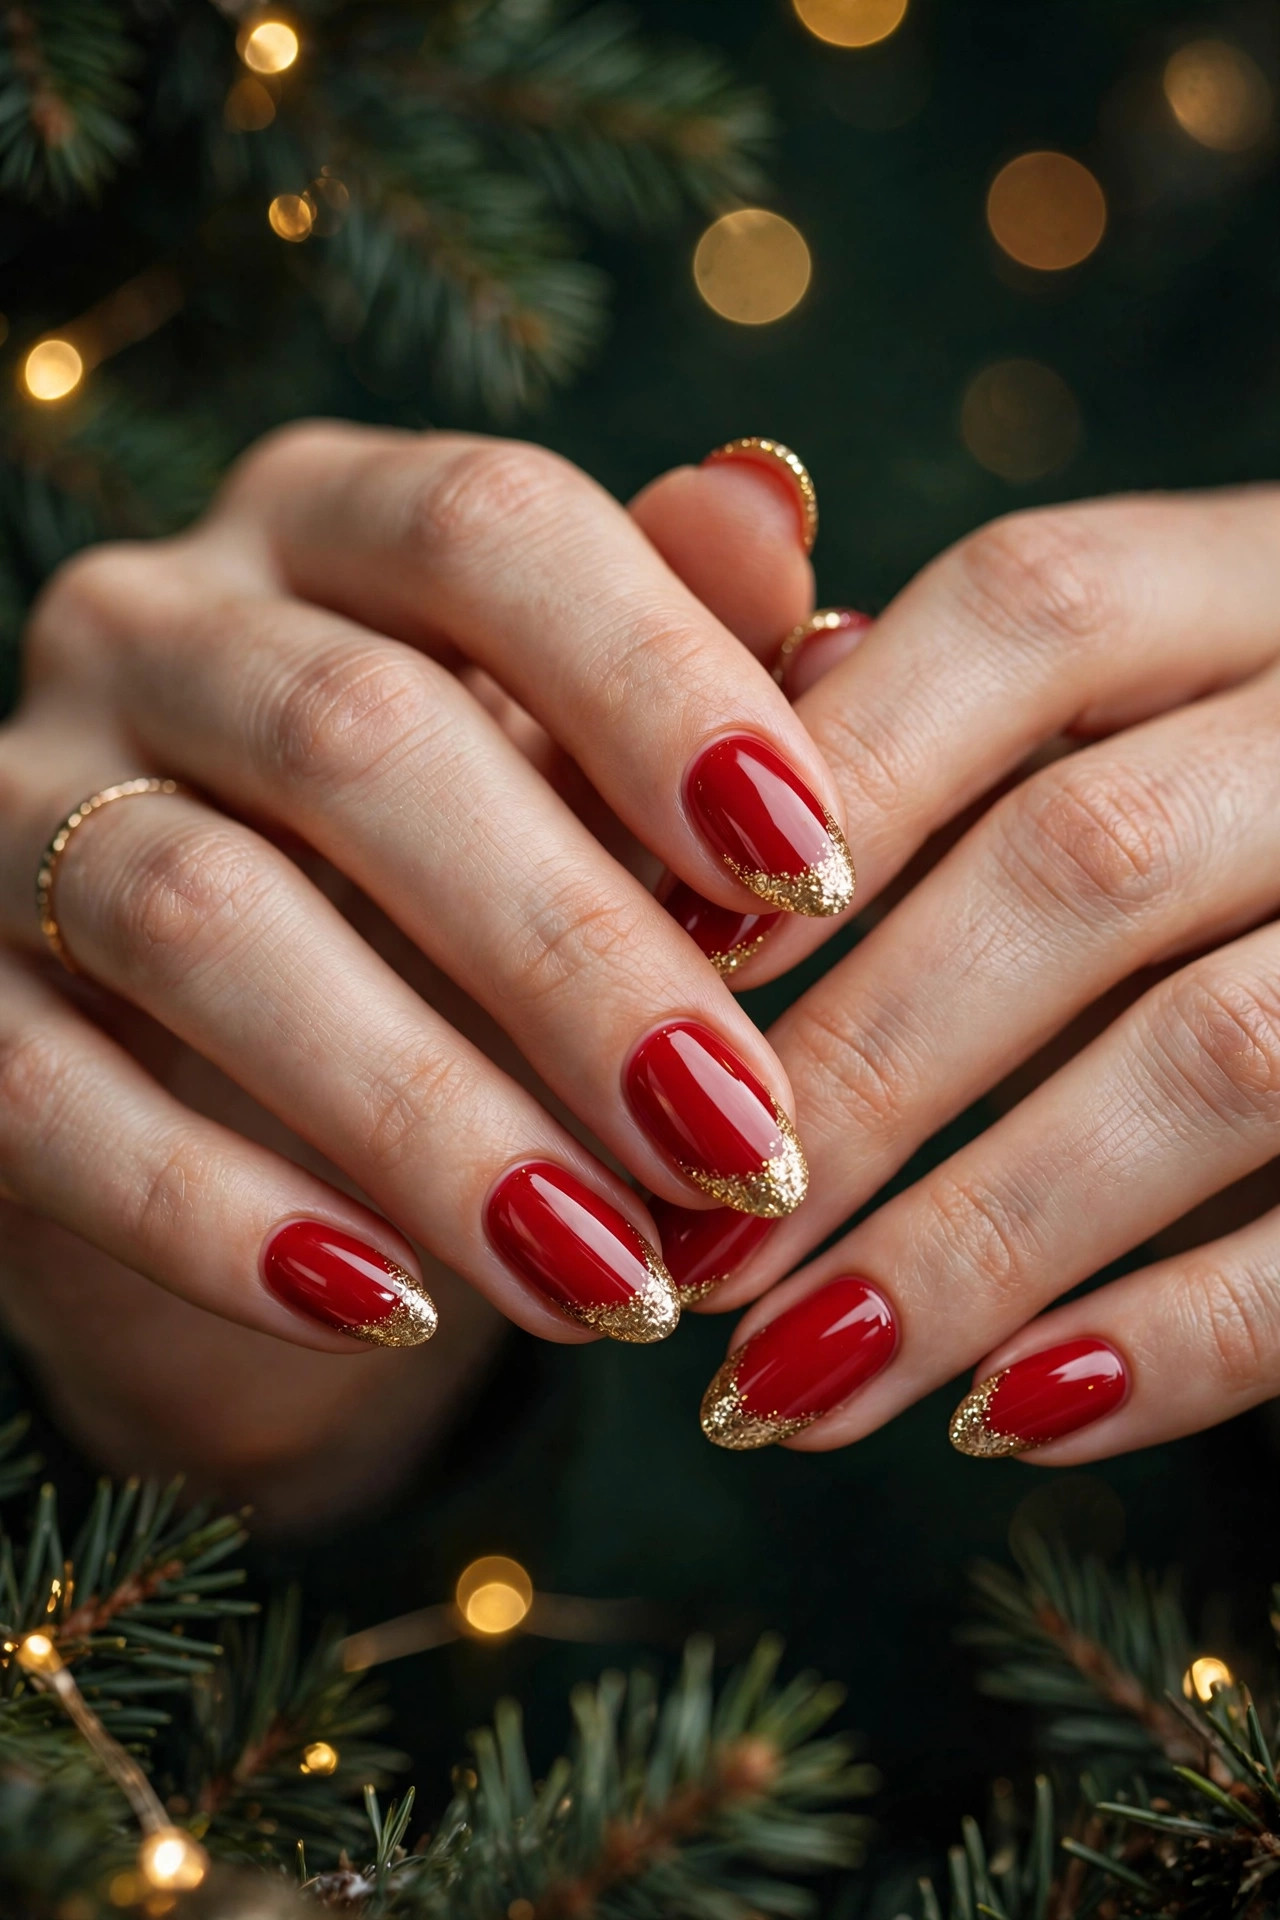
1. Classic Red and Gold Tips
Skill level: Beginner | Time: 25 minutes | Key products: red polish, gold glitter polish, top coat
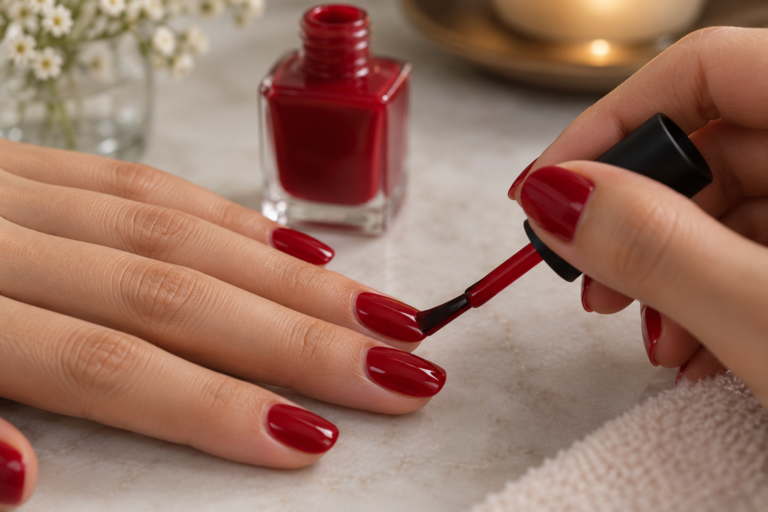
The simplest festive design that exists: a red base with gold tips. Paint two coats of red on all nails and let them dry completely — at least 10 minutes. Then paint gold glitter polish just on the free edge of each nail, following your natural nail line. One generous coat of glitter is enough; two makes it richer. Finish with top coat. Total drying time matters here because gold glitter over tacky red bleeds pink.
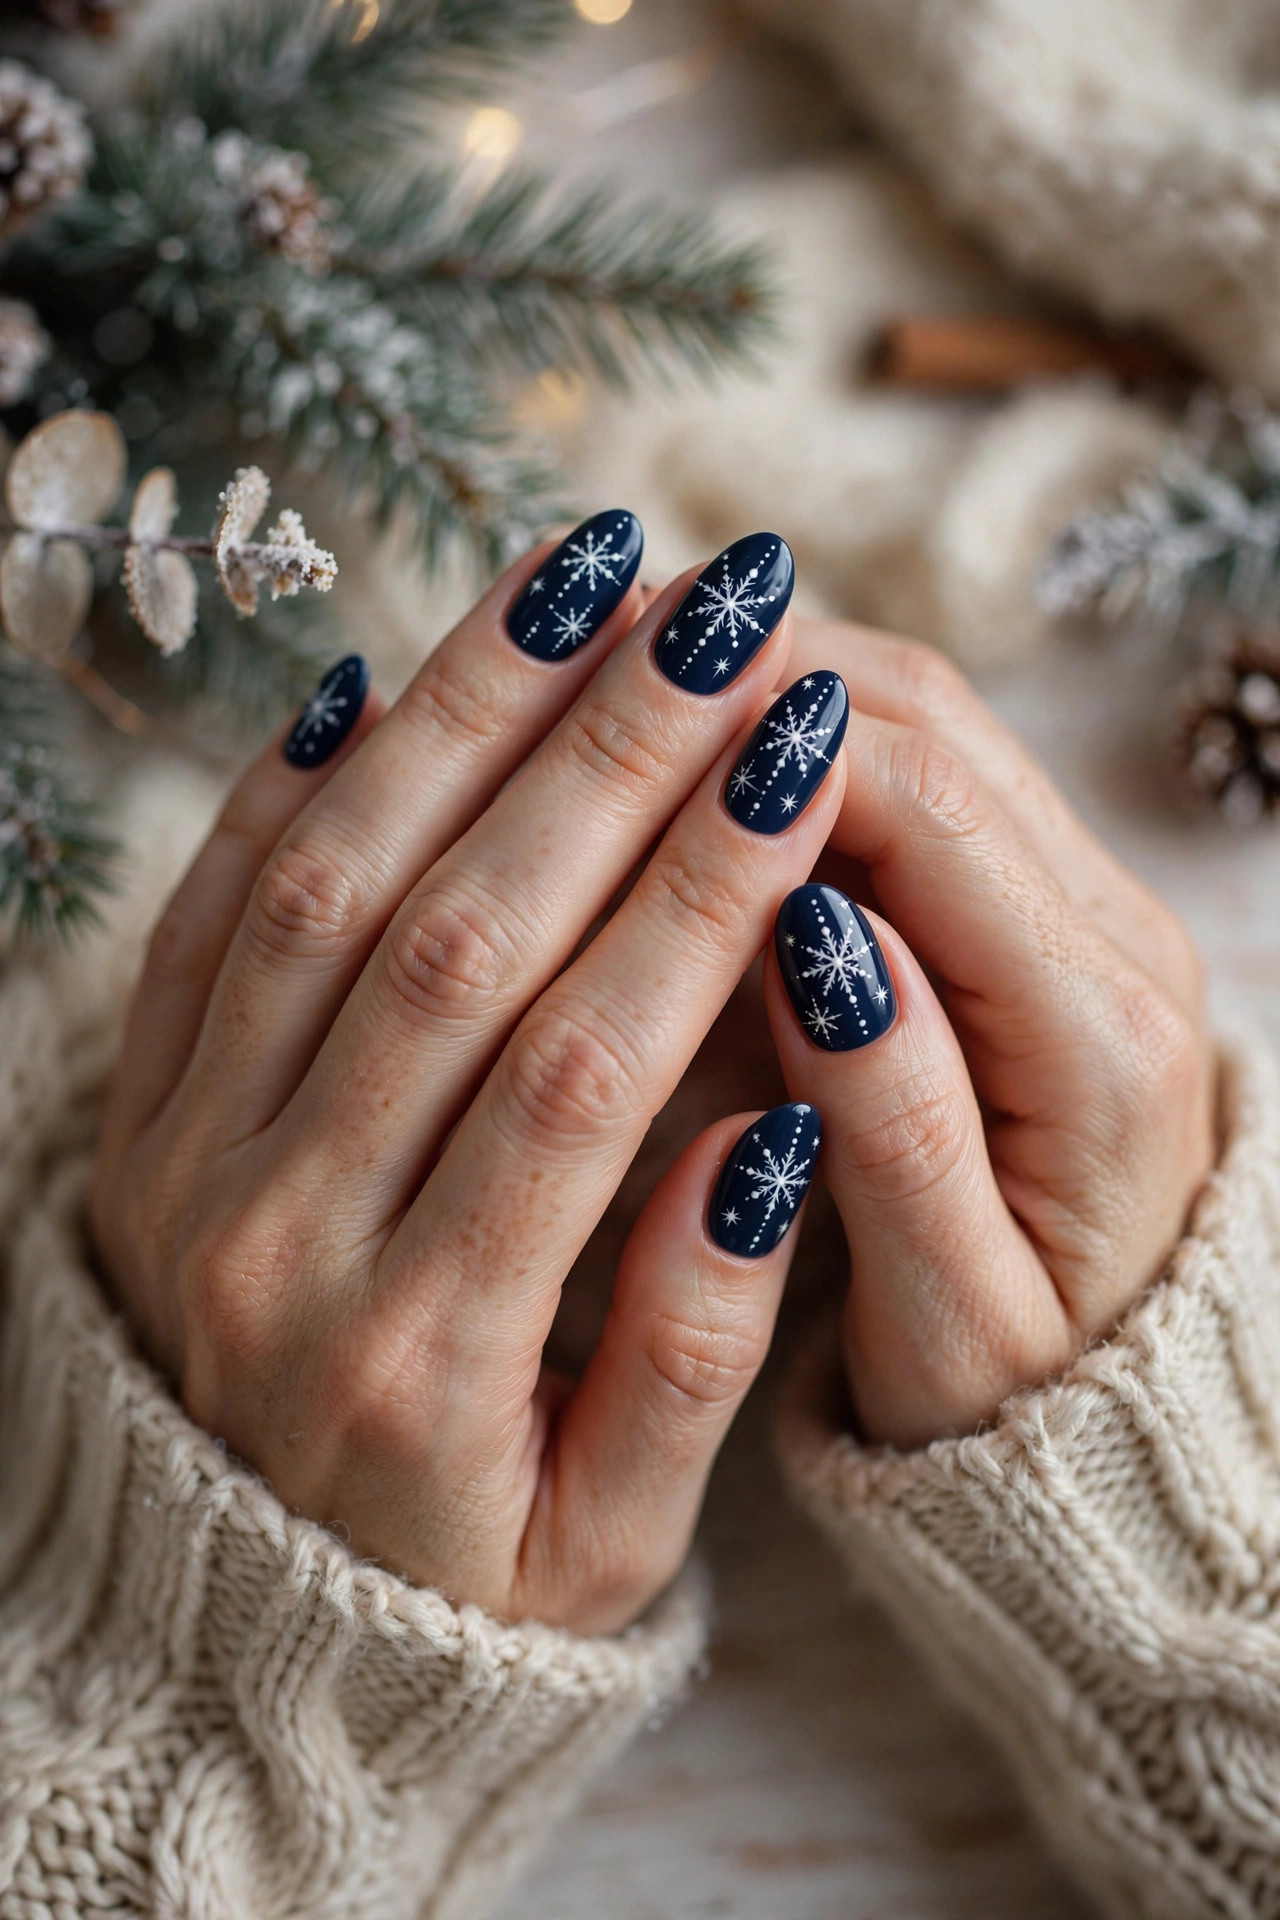
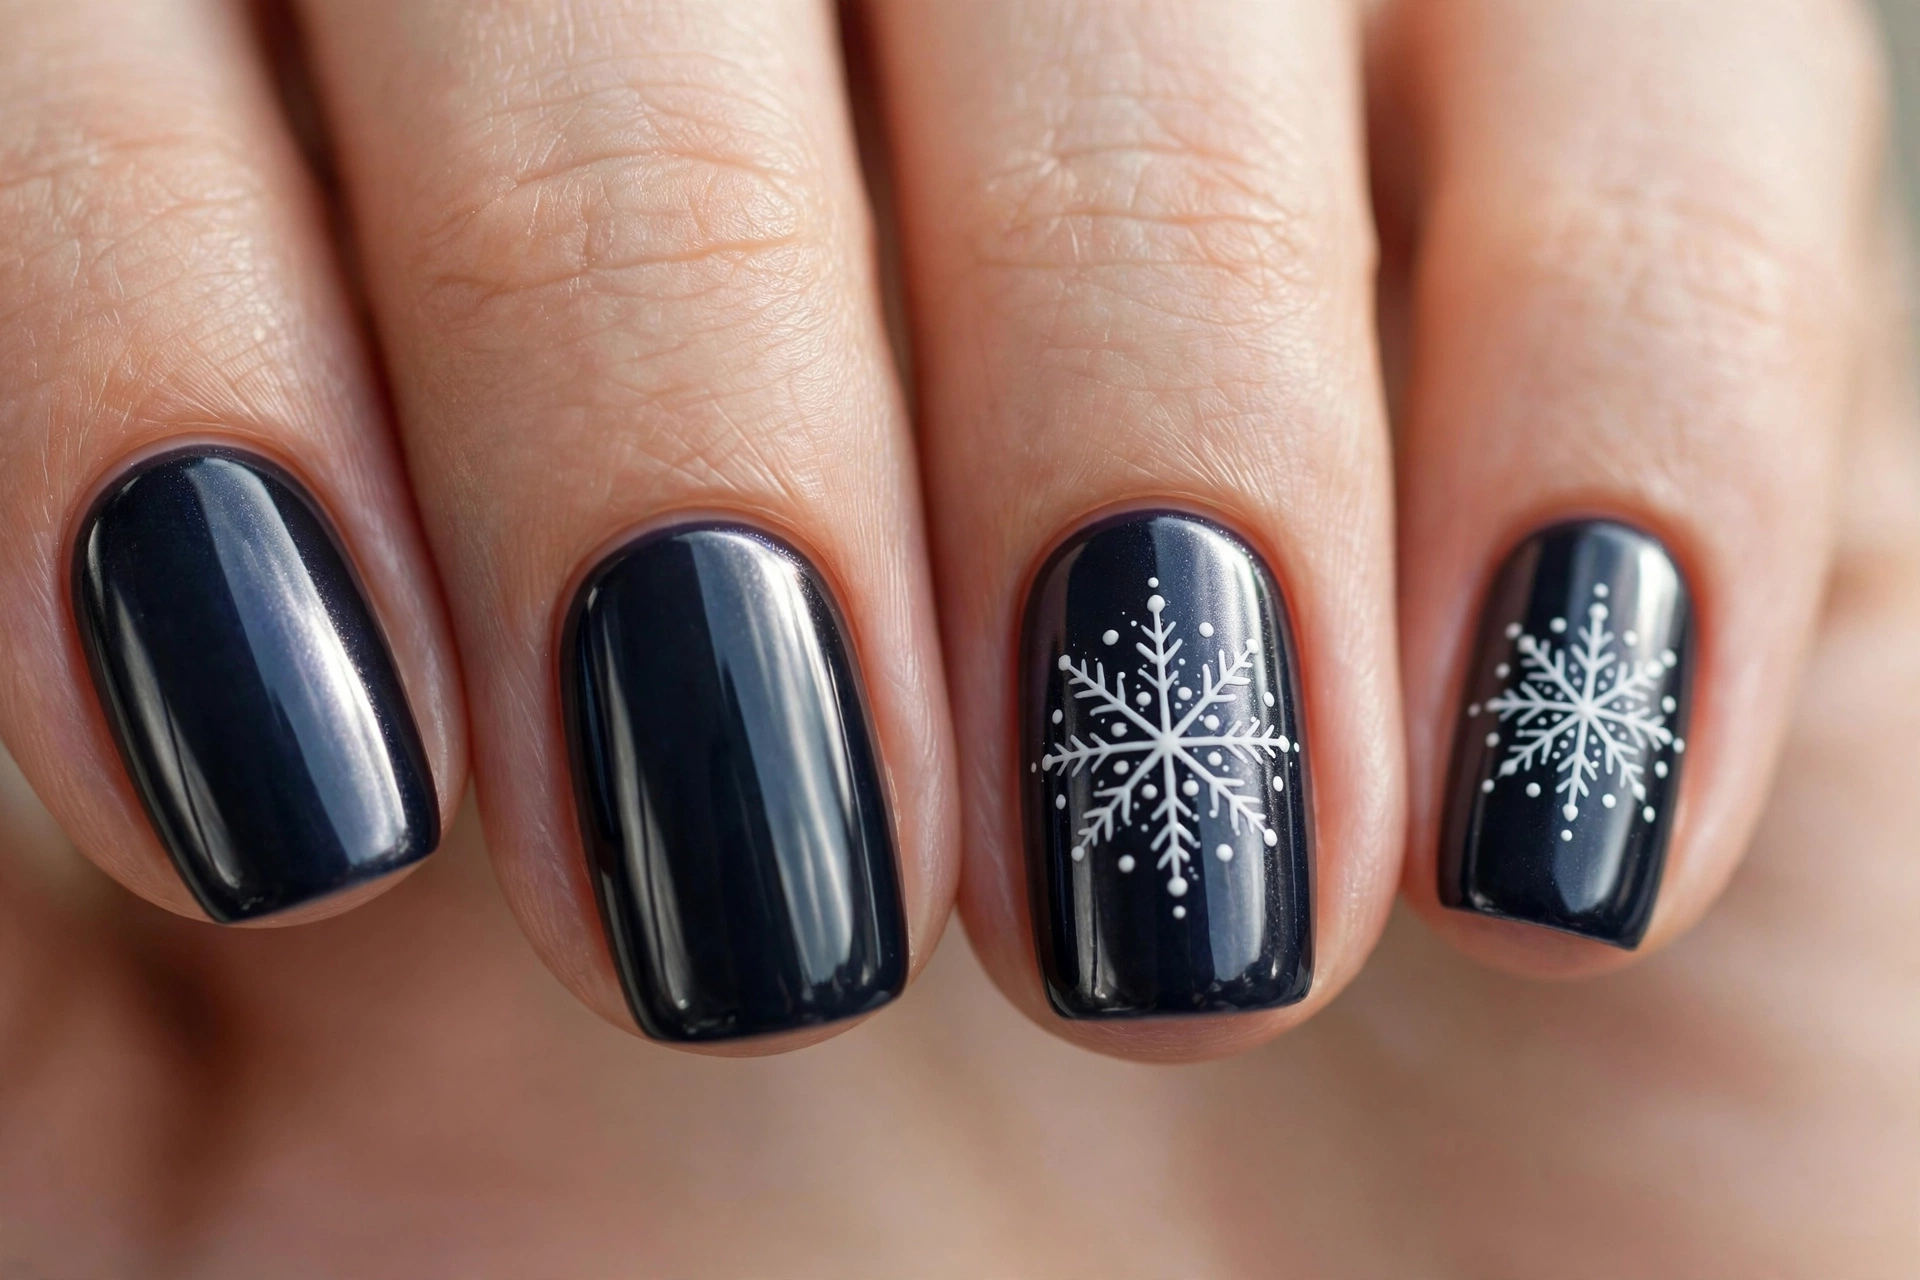
2. Snowflake Dots
Skill level: Intermediate | Time: 40 minutes | Key products: navy or dark blue polish, white polish, dotting tool or bobby pin
Paint two coats of dark navy and let them dry fully. Dip your dotting tool in white polish and place one large dot in the center of the nail. Using a smaller dotter or a toothpick tip, pull short lines outward from the center dot — six lines makes a classic snowflake. Add a tiny dot at the end of each line. The trick: reload white polish every two lines so the lines stay opaque. Seal with top coat. Each snowflake takes about 90 seconds once you get the rhythm.
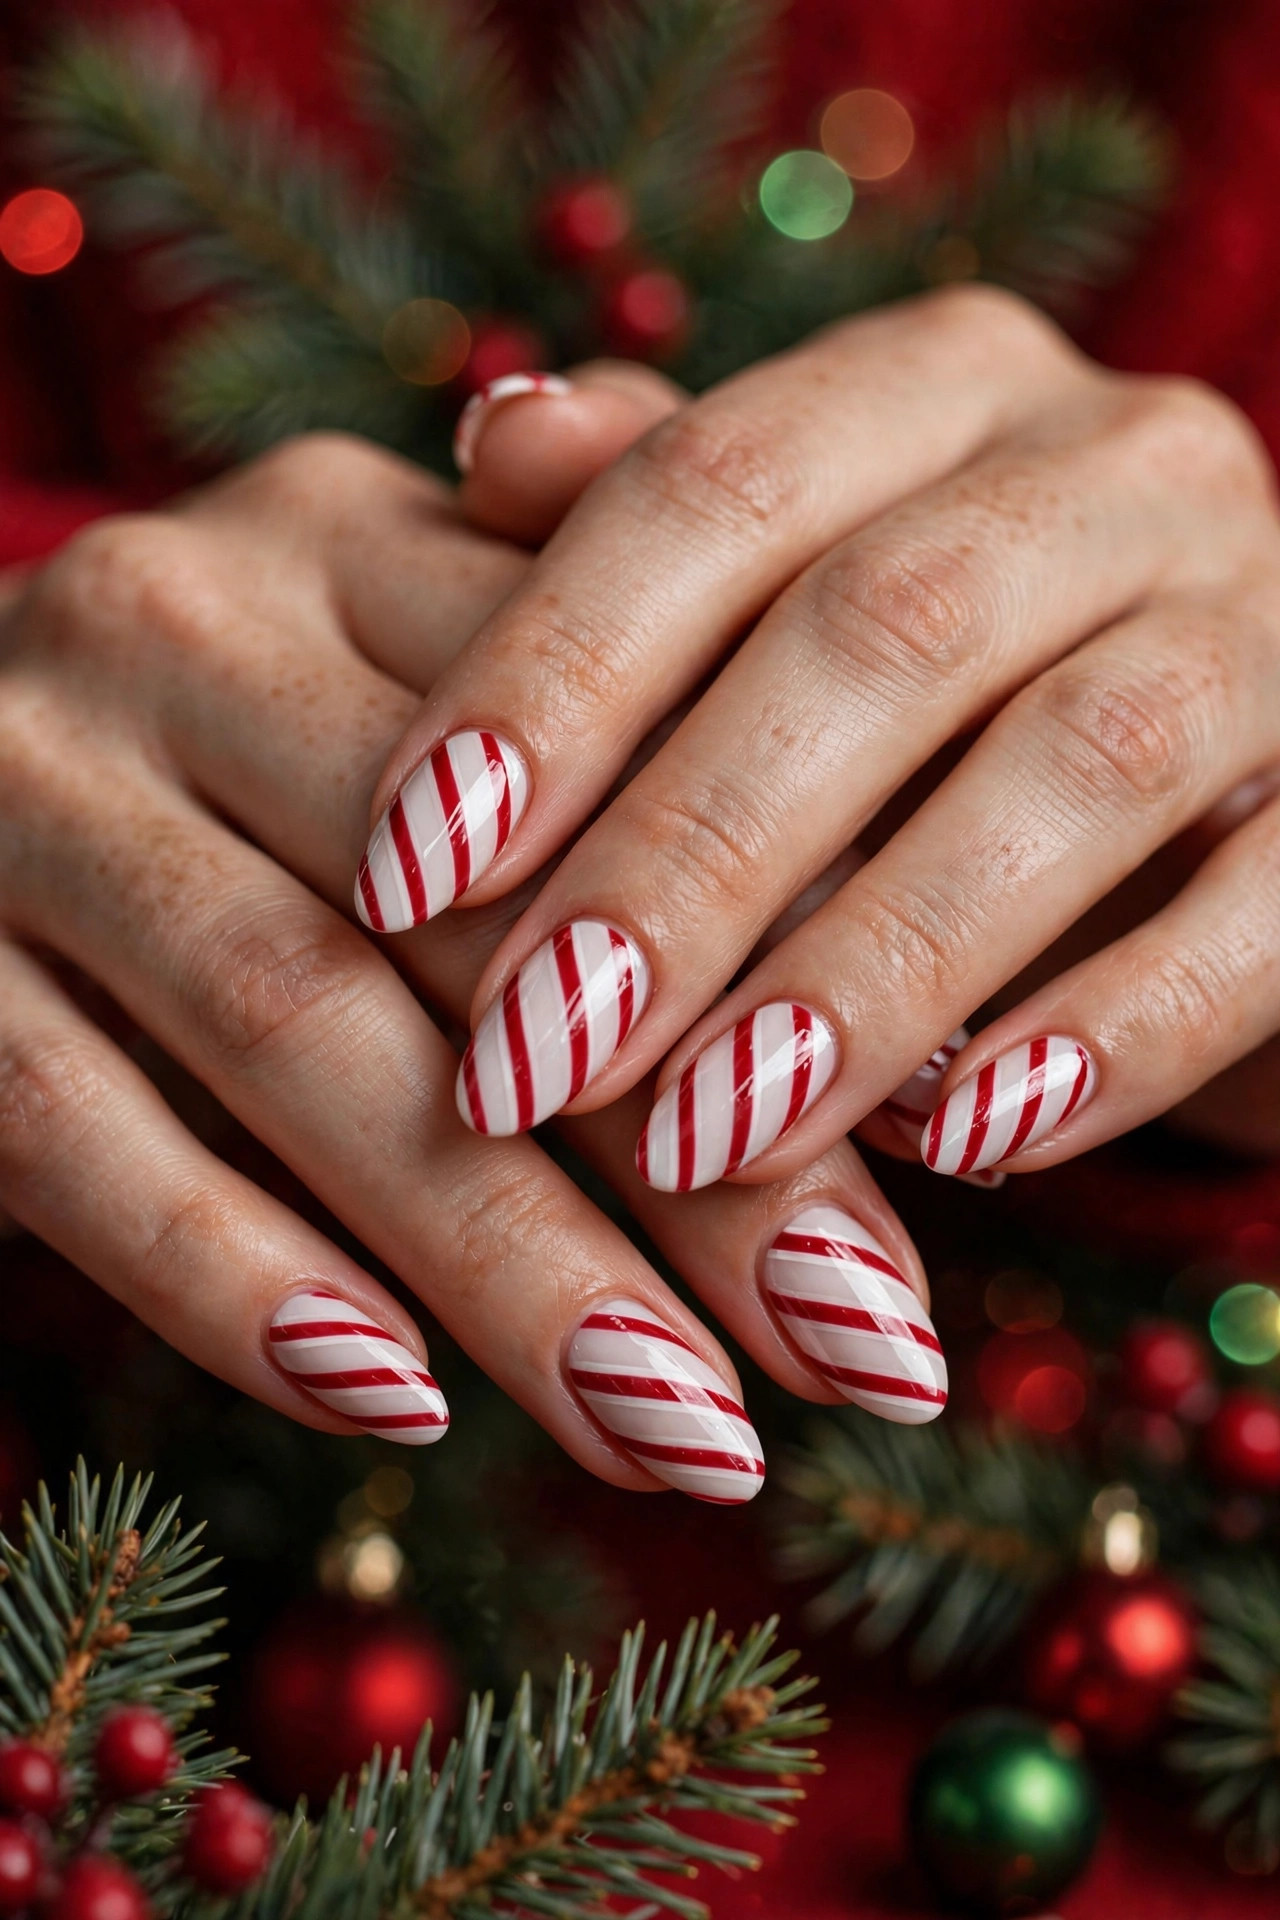
3. Candy Cane Stripes
Skill level: Intermediate | Time: 40 minutes | Key products: white polish, red polish, thin tape or striping brush
Paint two coats of white and dry completely — this step needs a full 15 minutes, because red bleeds into tacky white. Place thin strips of tape diagonally across each nail, leaving even gaps. Paint red in the gaps, then peel the tape off while the red is still slightly wet, pulling at an angle away from the nail. Wait 3 minutes, then top coat. Work one nail at a time for the red step so you can peel the tape before it dries stuck.
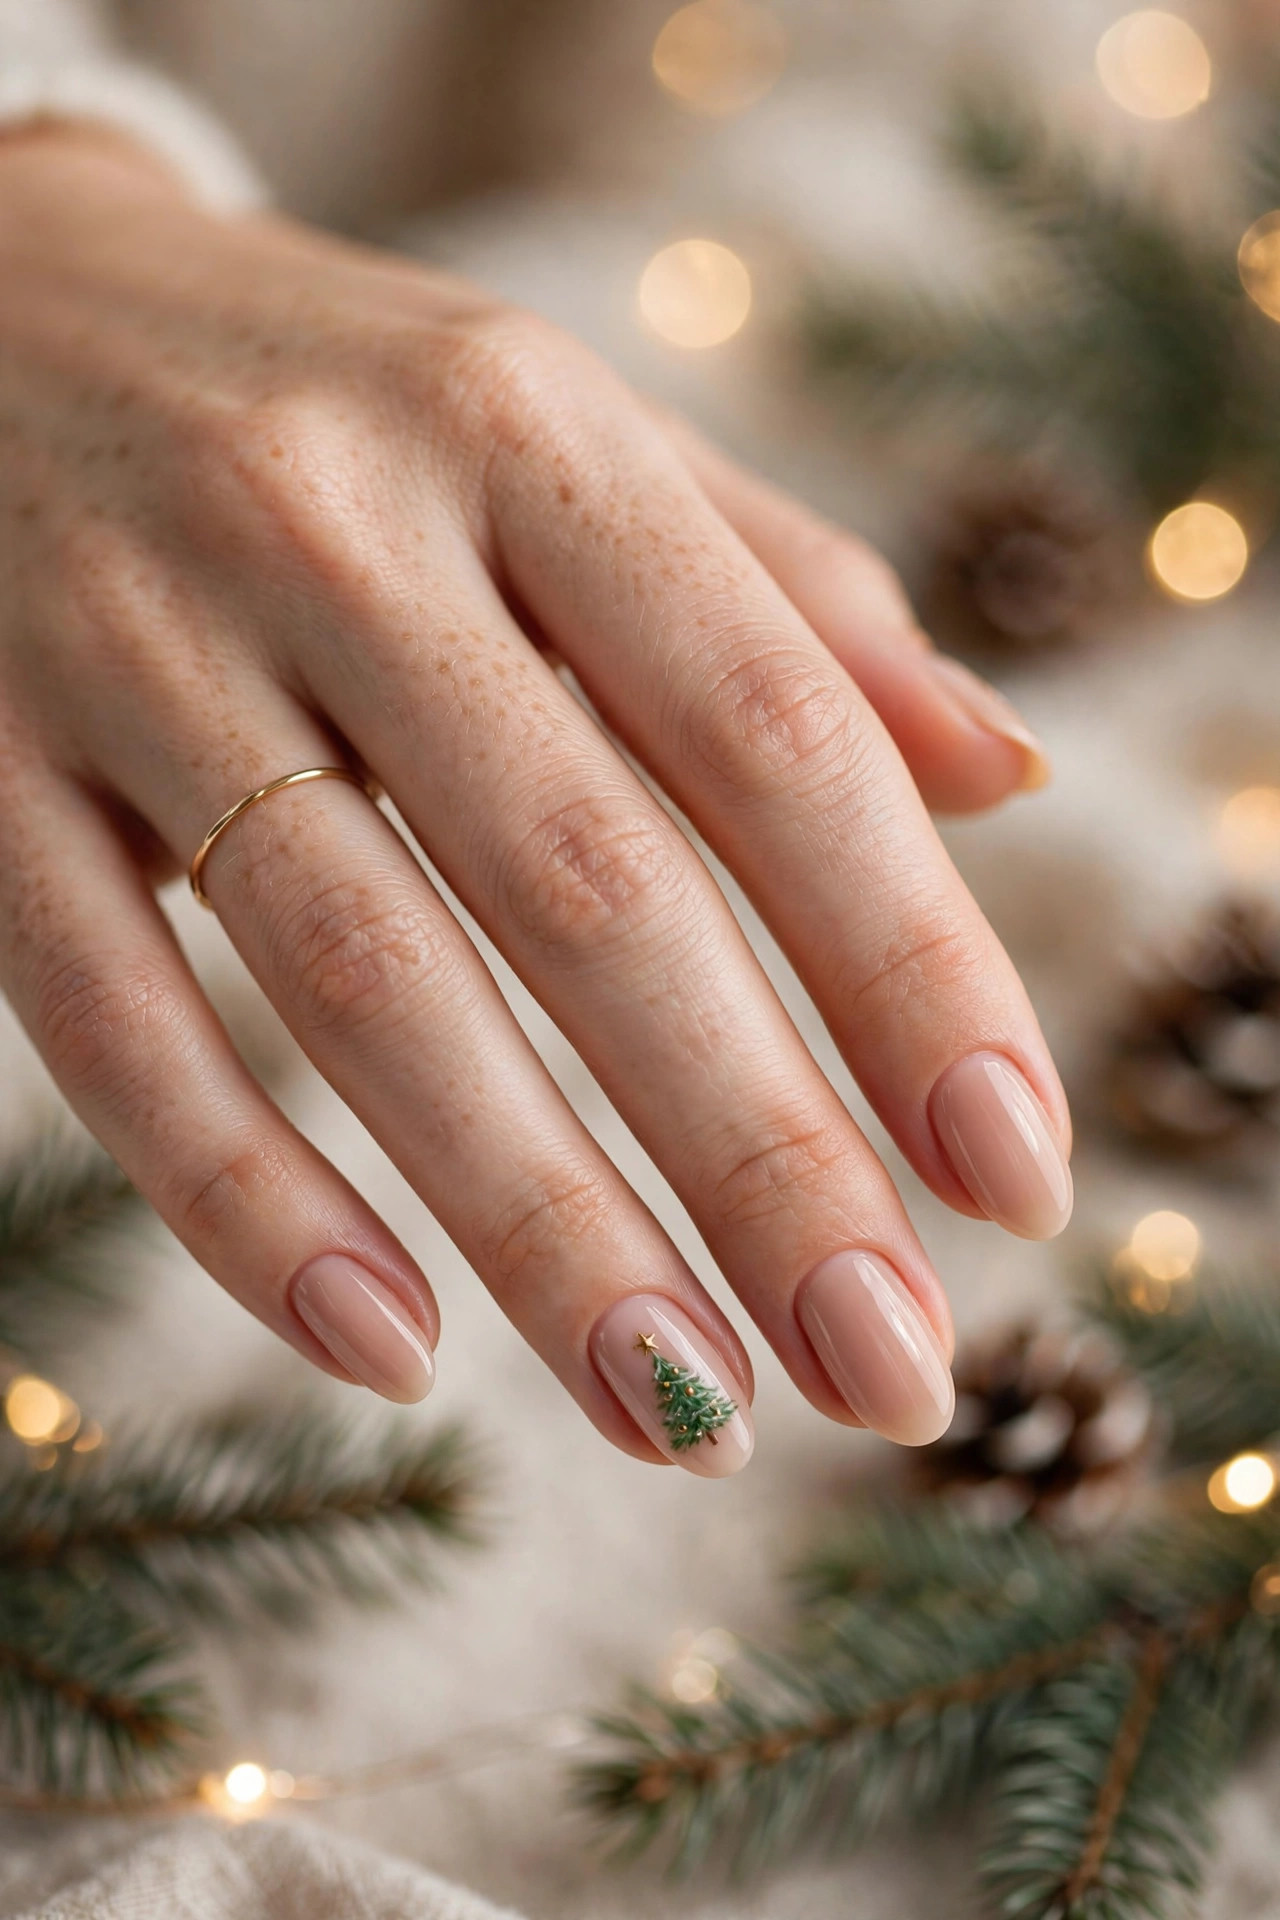
4. Tiny Christmas Tree Accent
Skill level: Advanced | Time: 55 minutes | Key products: green polish, nude or white base polish, gold polish or gold stud, detail brush
Paint all nails nude; do the tree on your ring finger only — one accent nail keeps this elegant instead of busy. With a detail brush and green polish, paint a small triangle in the center of the accent nail, then two smaller overlapping triangles below it to form a tiered tree. Let it dry 5 minutes. Add a gold dot as the star and 3 tiny white dots as ornaments. Trees look best small — about one-third of the nail height. Top coat everything.
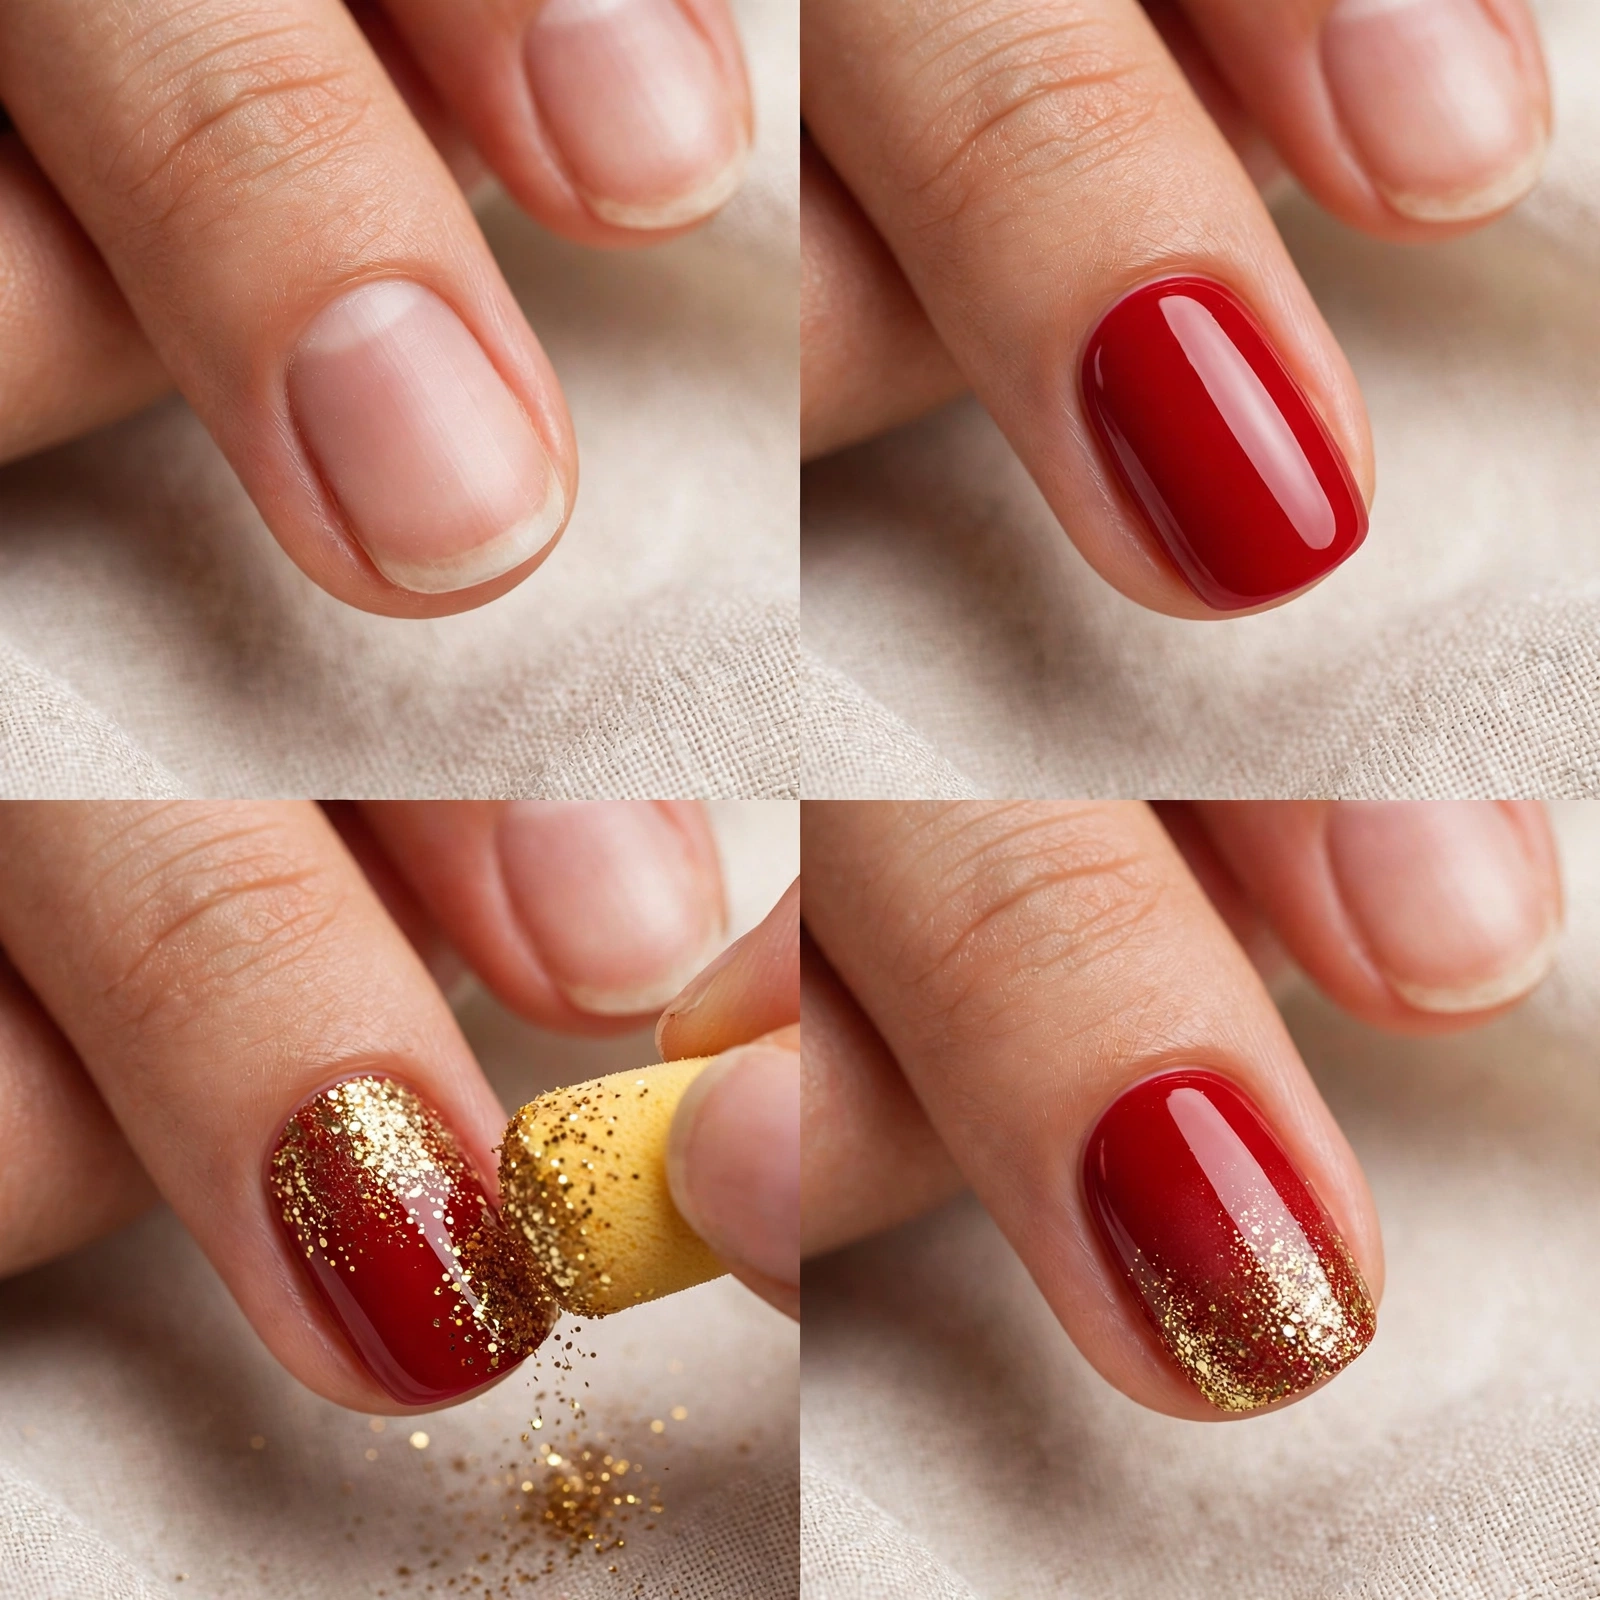
5. Holiday Glitter Fade
Skill level: Beginner | Time: 20 minutes | Key products: deep red or burgundy polish, gold glitter polish, makeup sponge, top coat
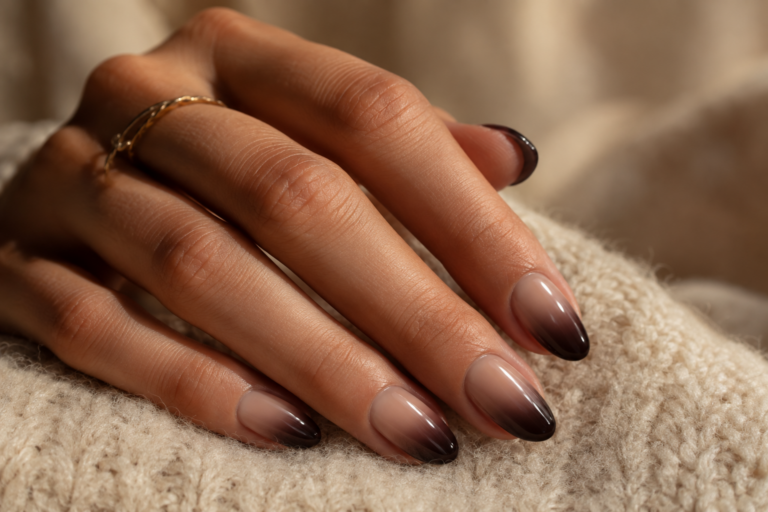
Paint two coats of your base color and let it dry fully. Dab gold glitter polish onto the corner of a makeup sponge — not the brush — and sponge it onto the tips of each nail, fading toward the middle. Two sponge applications builds a natural gradient. The sponge gives you the fade the brush cannot. Top coat twice: glitter is textured and needs two layers to go smooth. This is the fastest design in this list and one of the most complimented.
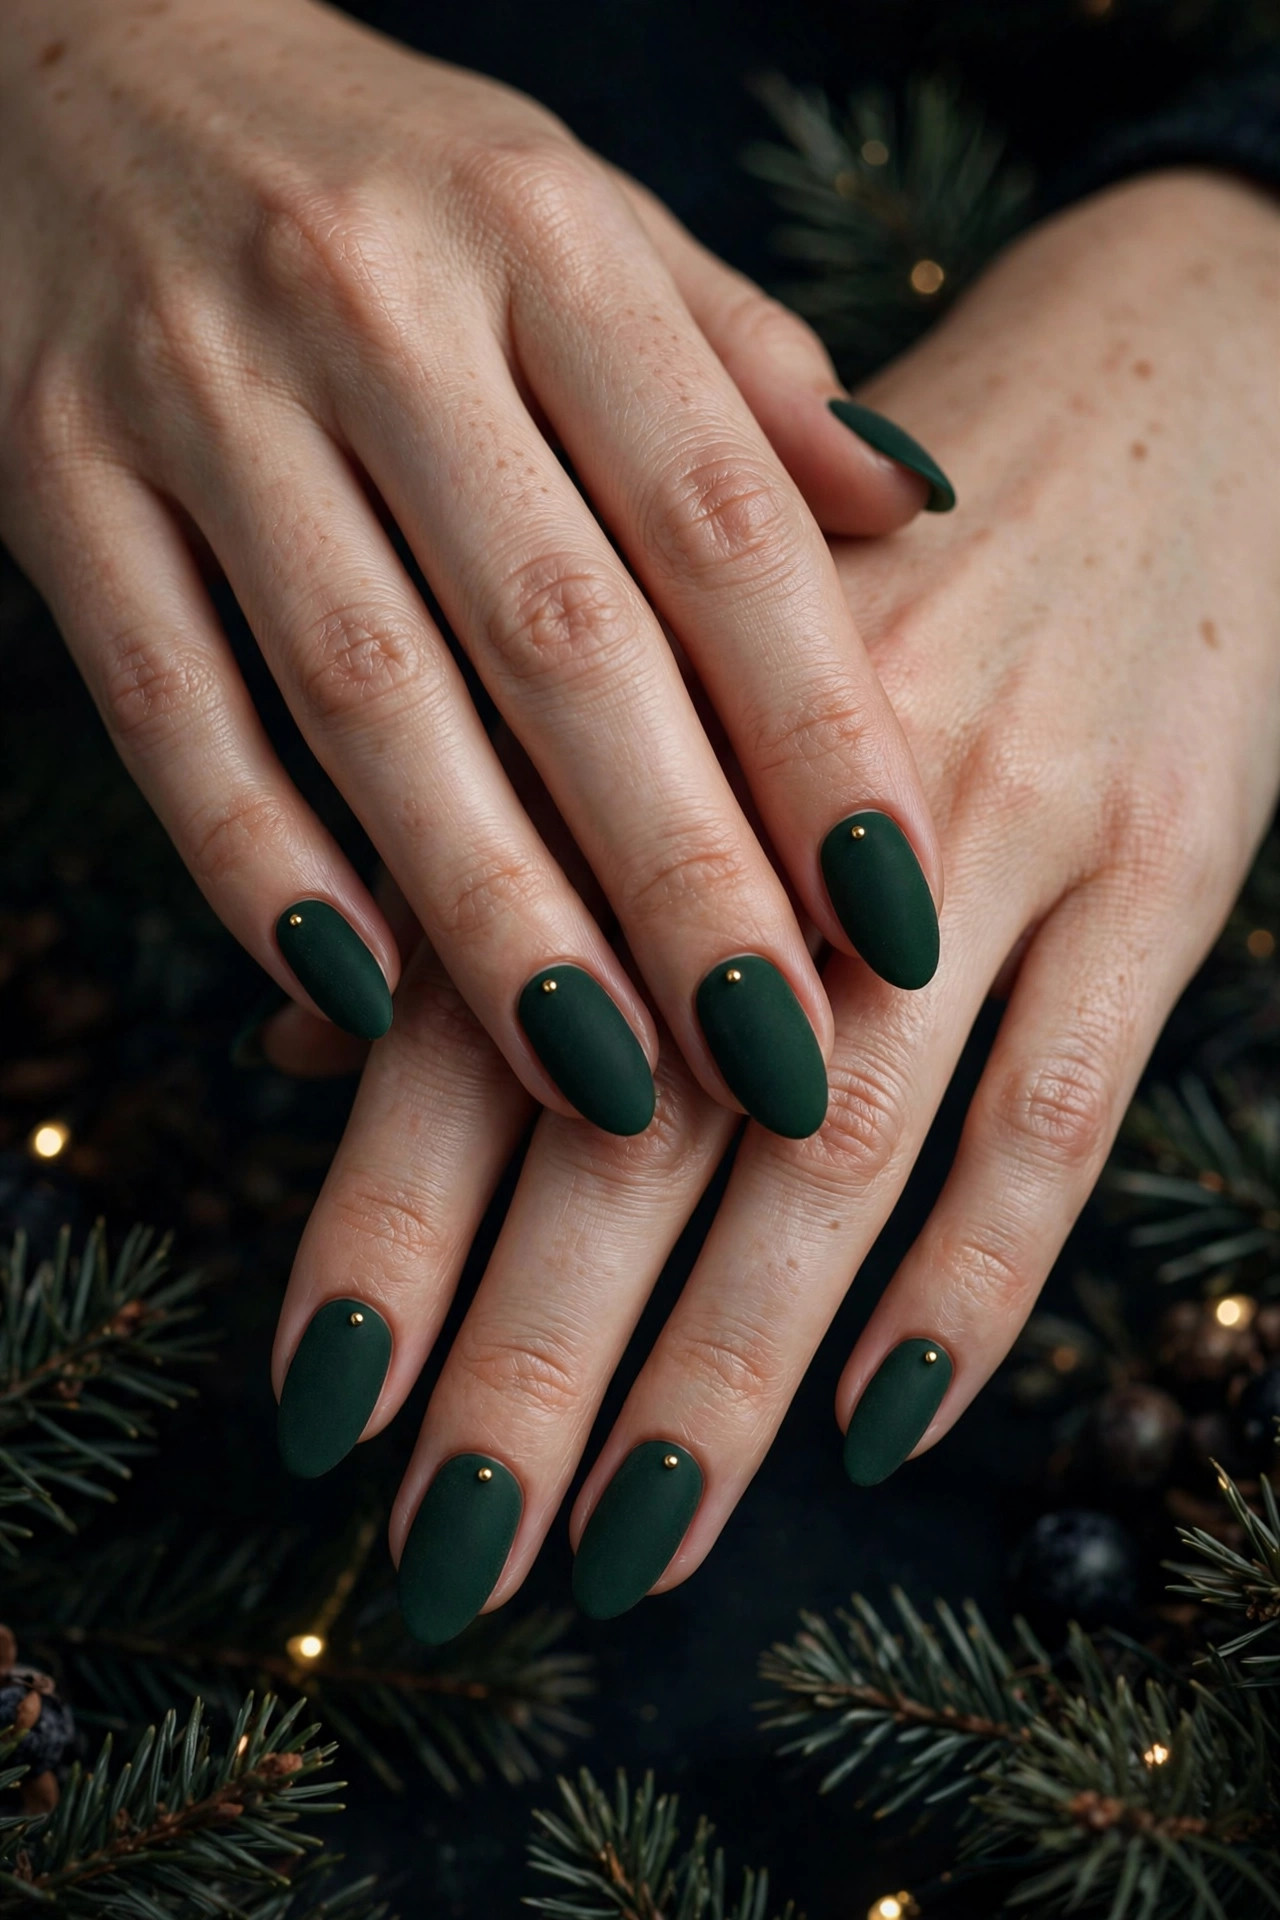
6. Evergreen Matte
Skill level: Intermediate | Time: 30 minutes | Key products: dark green polish, matte top coat, optional gold studs
Paint two coats of a deep forest green. Once dry, apply a matte top coat over every nail — matte transforms ordinary green into a velvety, expensive-looking finish. If you want one accent, add a single gold stud or dot at the base of the ring finger nail while the matte coat is tacky. Matte top coat shows every imperfection, so take your time on the green layers. This design reads as holiday without a single literal Christmas symbol, which makes it office-friendly.
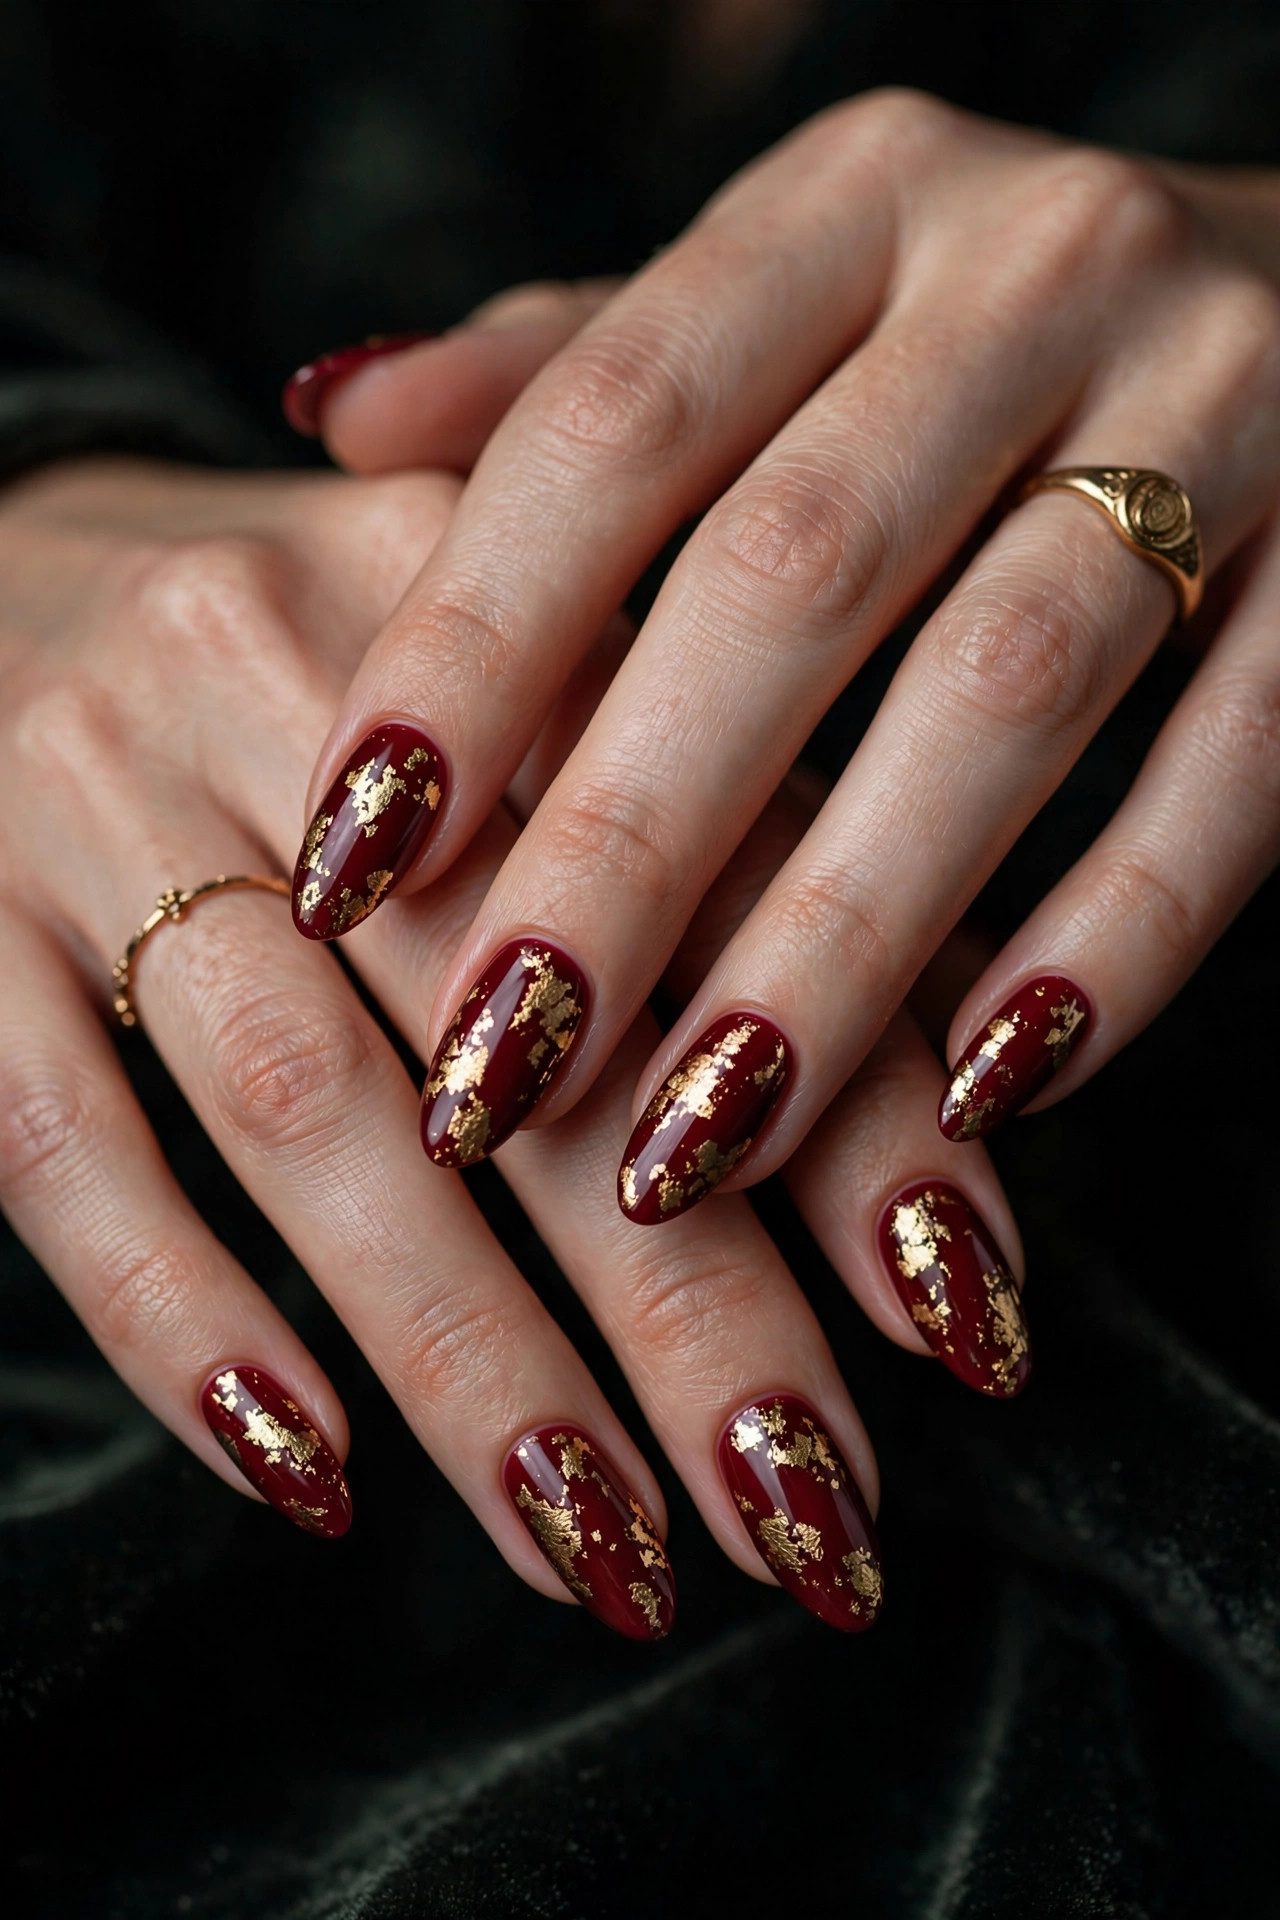
7. Gold Foil on Burgundy
Skill level: Advanced | Time: 50 minutes | Key products: burgundy polish, gold foil flakes, tweezers, top coat
Paint two coats of burgundy and let them dry until just tacky to the touch — about 5 minutes after the second coat. Using tweezers, press small torn pieces of gold foil onto the tacky surface. Irregular, asymmetric placement looks expensive; symmetry looks crafty. Press each piece down gently, then seal with two coats of regular (not matte) top coat, letting the first dry 5 minutes. The top coat layers melt the foil edges flat so nothing catches or peels.
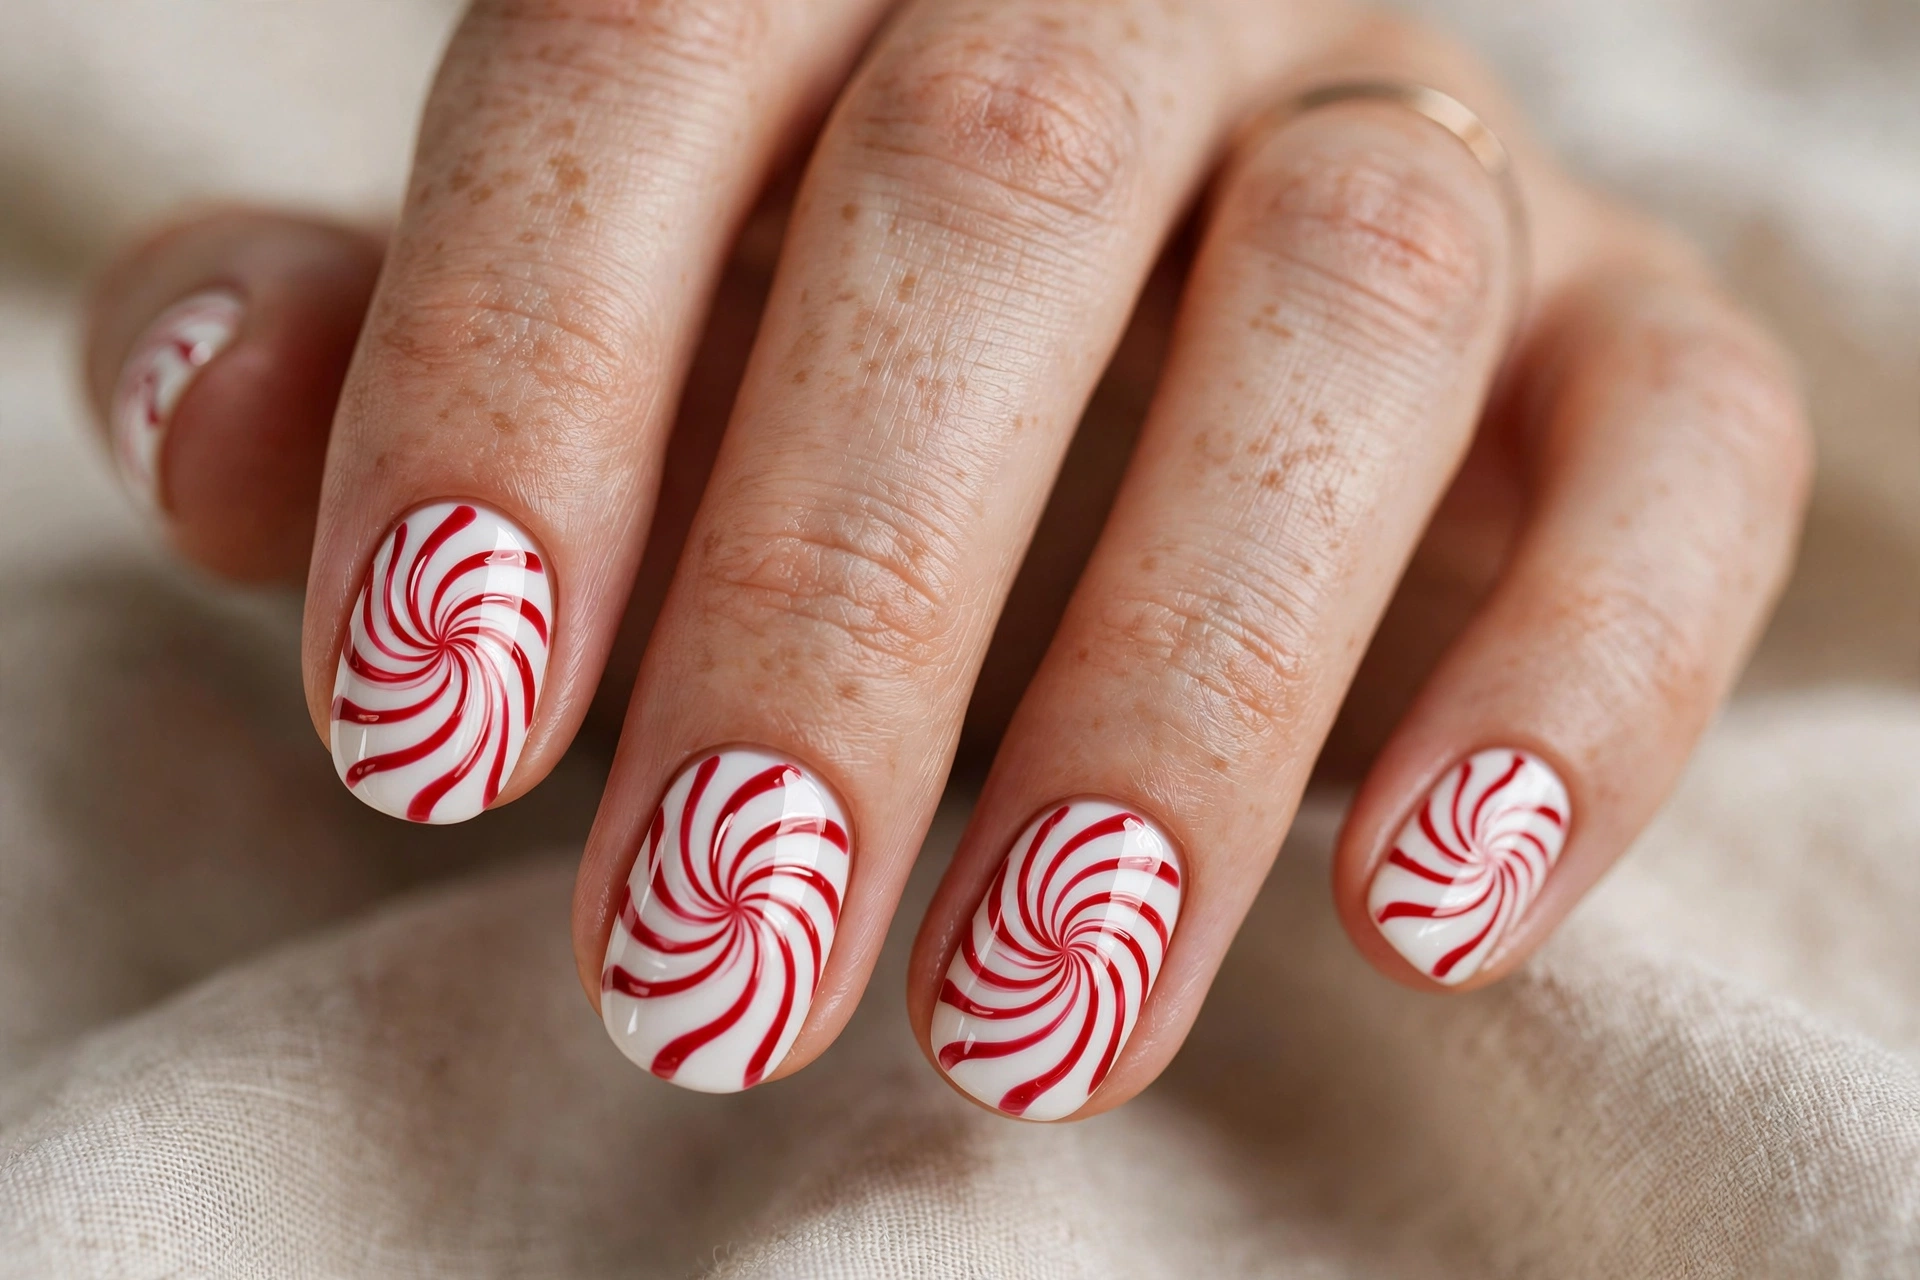
8. Peppermint Swirl
Skill level: Intermediate | Time: 45 minutes | Key products: white polish, red polish, detail brush or toothpick
Paint two coats of white and dry fully. With a detail brush, paint a red spiral starting from the center of the nail and curving outward, like a peppermint candy. Alternatively, paint 3 red curved stripes from one corner. The toothpick method: place a red dot in the center, then drag the toothpick through it in a spiral motion. Spirals do not need to be perfect — peppermint candy swirls are organic. Top coat after 5 minutes of drying.
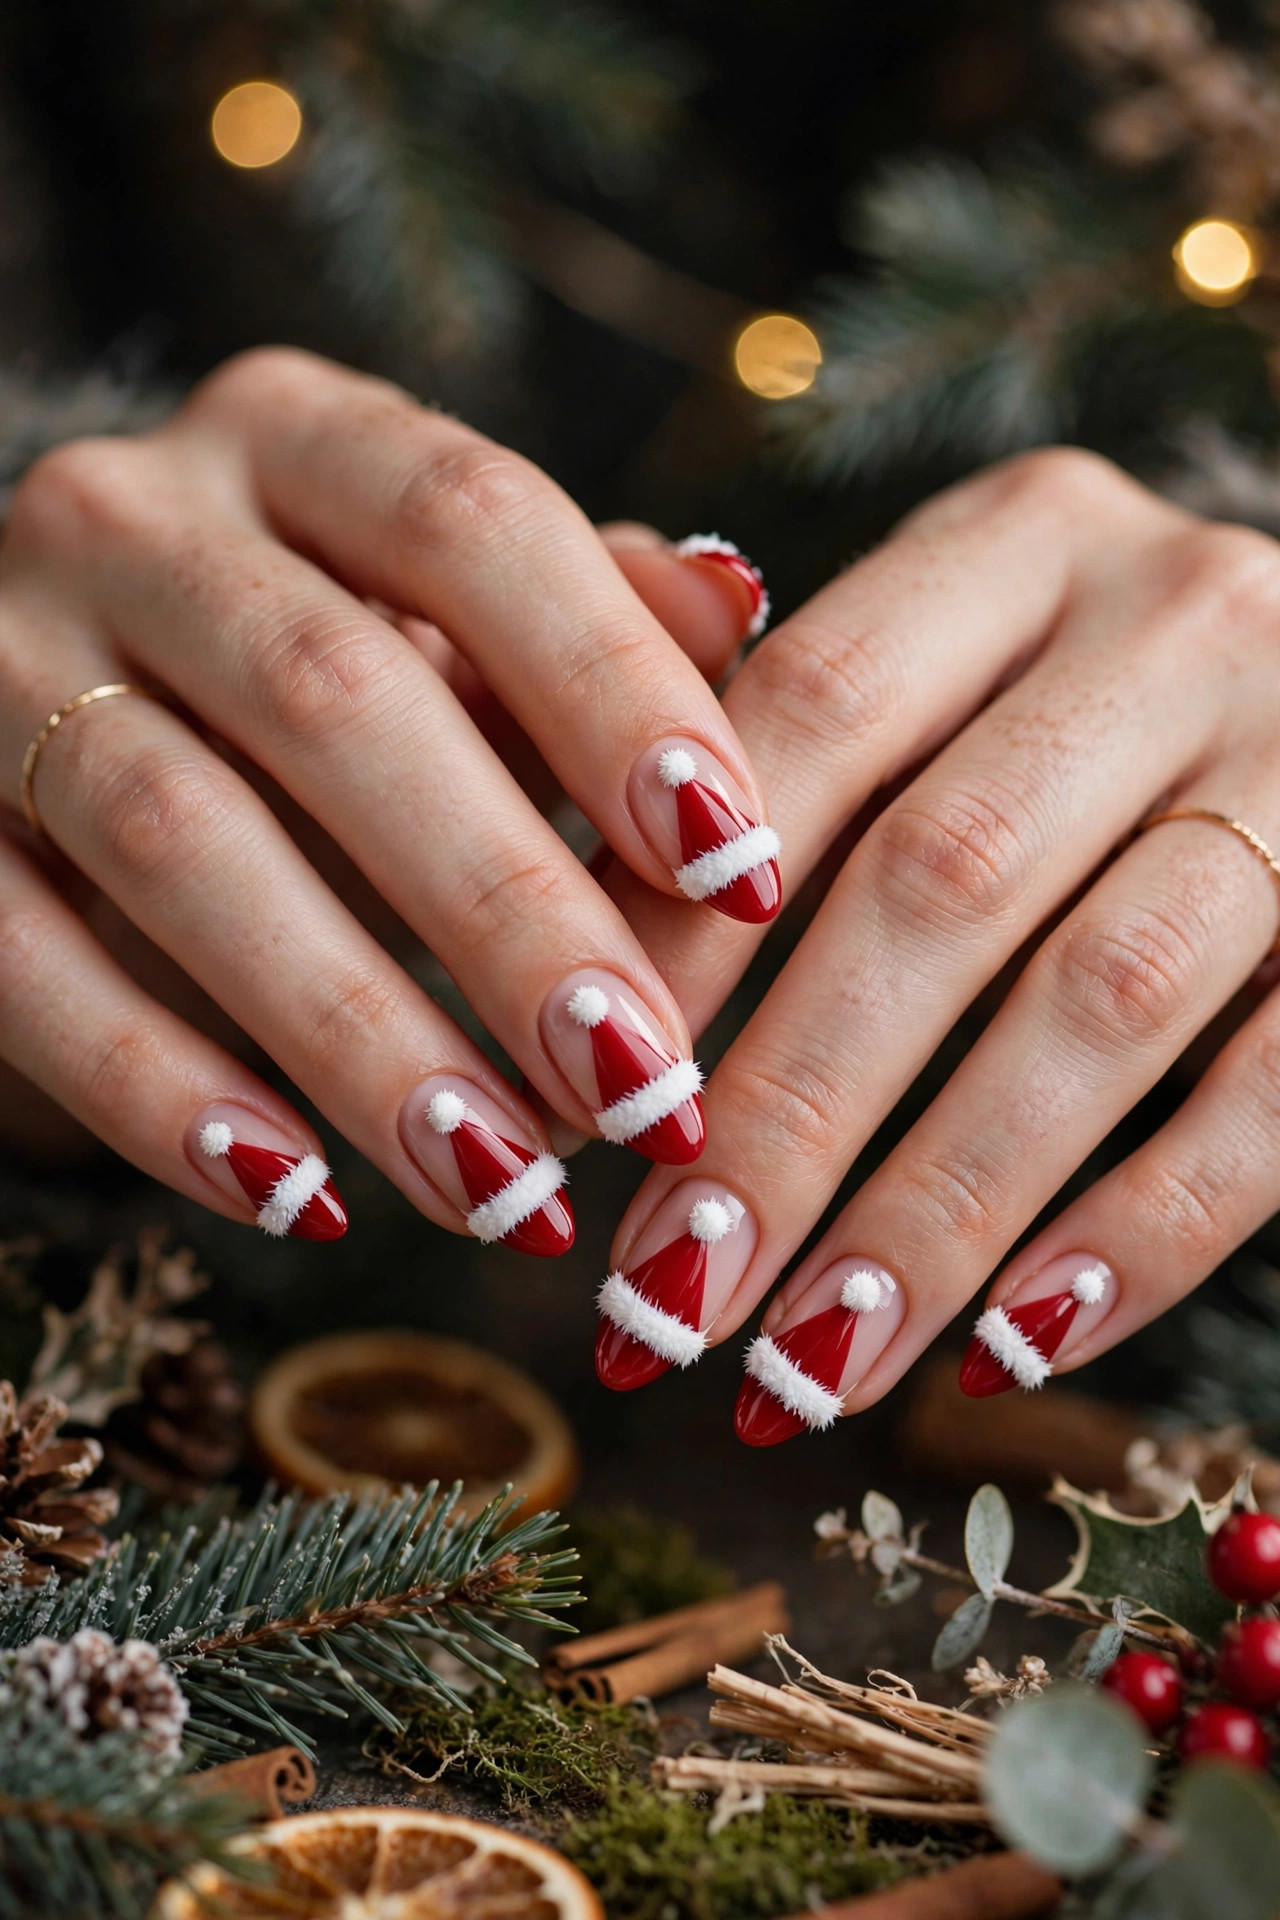
9. Santa Hat French Tips
Skill level: Advanced | Time: 60 minutes | Key products: nude polish, red polish, white polish, detail brush, dotting tool
Paint all nails nude. With a detail brush, paint a red triangle on each tip — wider at the free edge, pointed toward the cuticle, like a Santa hat shape. Let dry 5 minutes. Paint a white band along the bottom edge of the red triangle (the hat brim) and add a white dot at the tip (the pom-pom). Ten hats at 60 minutes is realistic; this is a party-night design, not a weeknight one. Precision matters, so work under good light and brace your painting hand on the table.
10. Icy Silver Chrome Snow
Skill level: Intermediate | Time: 40 minutes | Key products: chrome powder or metallic silver polish, black or navy base, sponge applicator, top coat
Paint two coats of black or dark navy. While a layer of regular (not quick-dry) top coat is still tacky, buff silver chrome powder onto each nail with a sponge applicator — or simply paint two coats of metallic silver polish for a no-powder version. The dark base underneath gives chrome its icy depth. For the full chrome-powder method and lamp-free options, our chrome nails tutorial walks through every technique. Add white snowflake dots (design 2) on 2 accent nails. Seal with top coat.
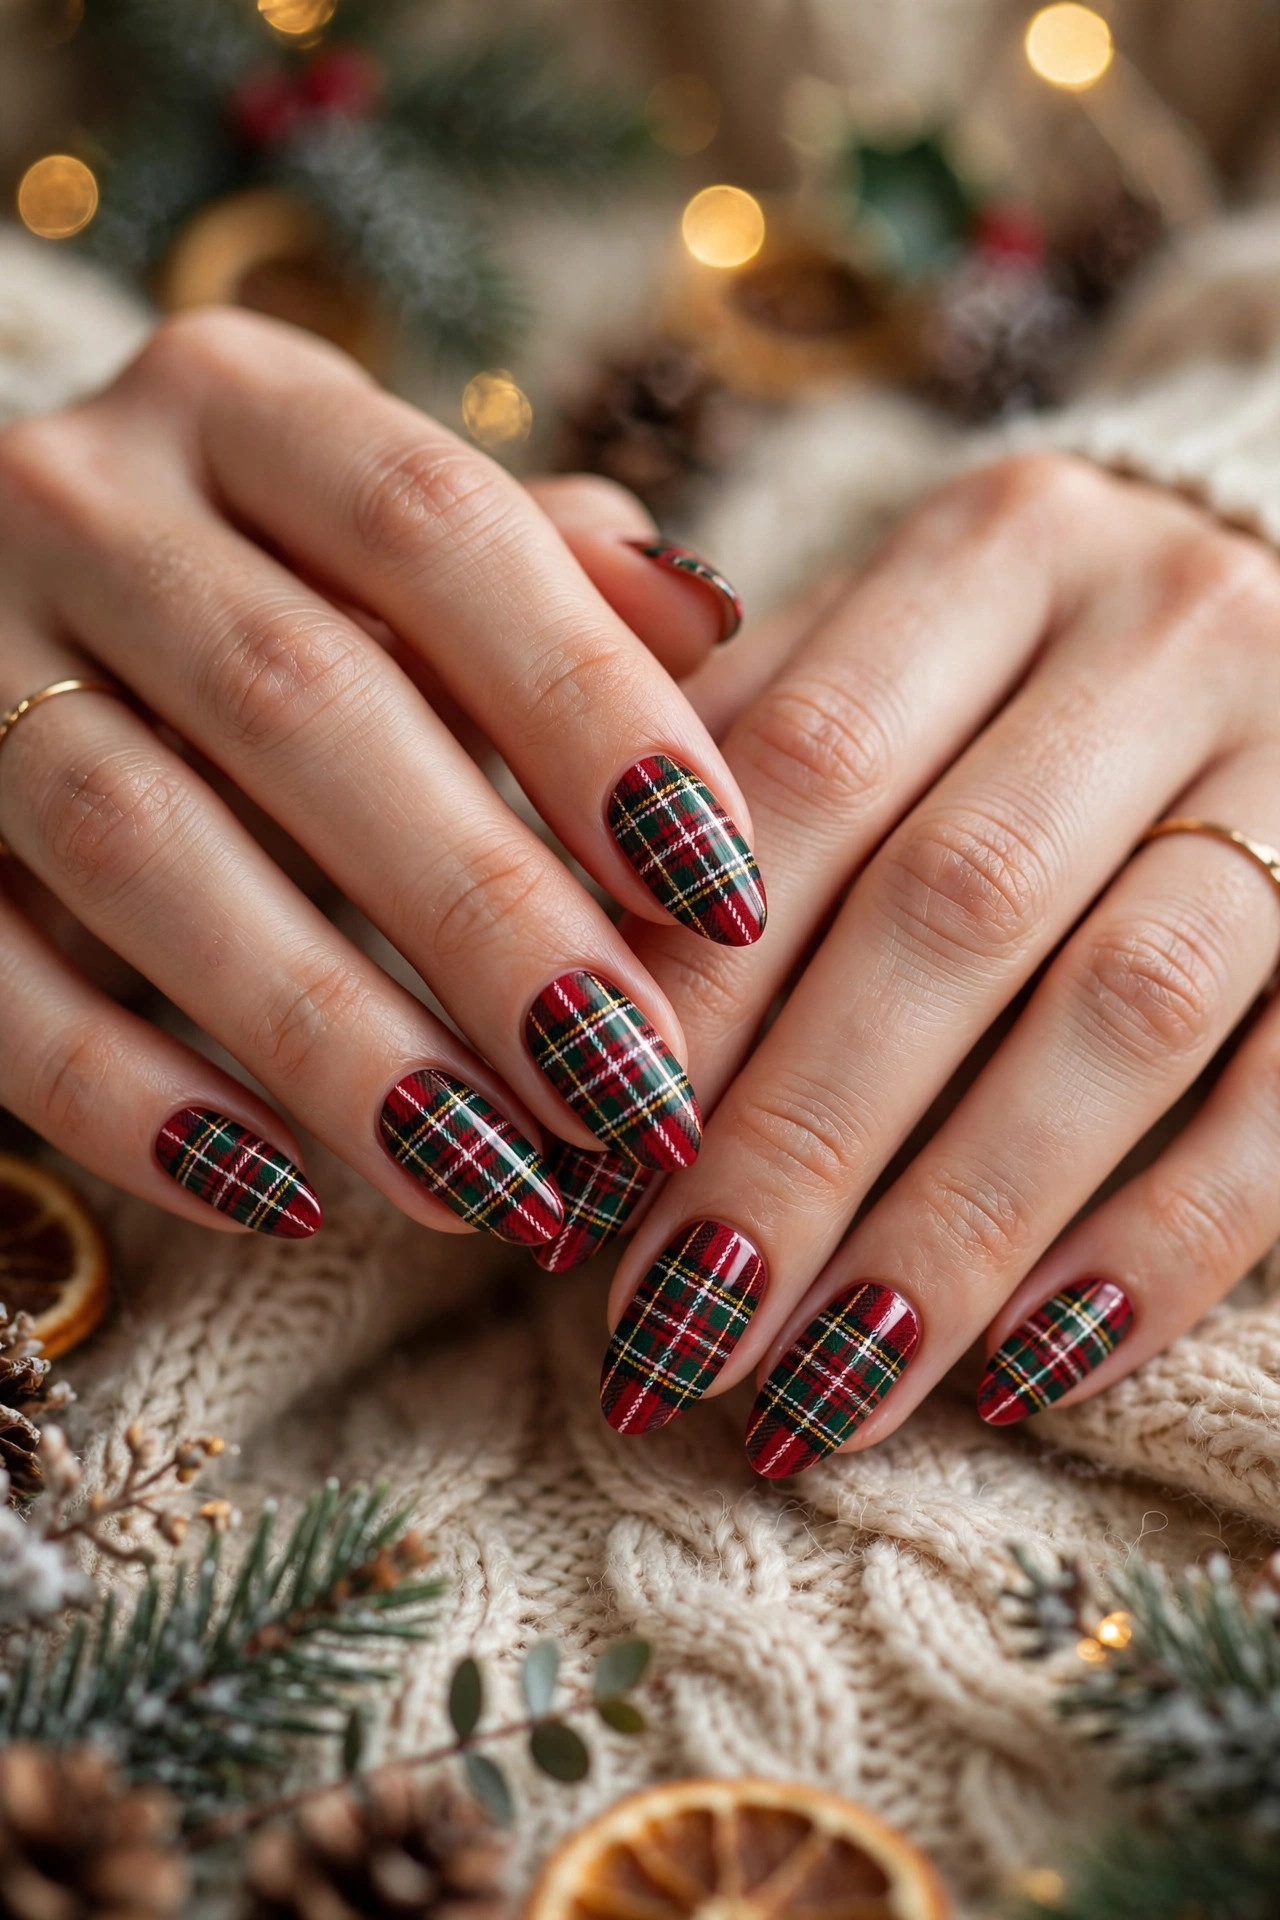
11. Tartan Plaid
Skill level: Advanced | Time: 65 minutes | Key products: red polish, green polish, white polish, thin striping brush or tape
Paint two coats of red and dry completely. With a thin striping brush, paint 2 vertical and 2 horizontal green stripes per nail to form a grid. Let dry 3 minutes. Paint 1 thin white stripe crossing through the green stripes, vertically and horizontally — the white-over-green intersection is what reads as tartan. Finish with thin black lines beside the white stripes if you want authentic plaid depth. This takes practice; do your dominant hand first while you are fresh, or do plaid on 2 accent nails and solid red on the rest.
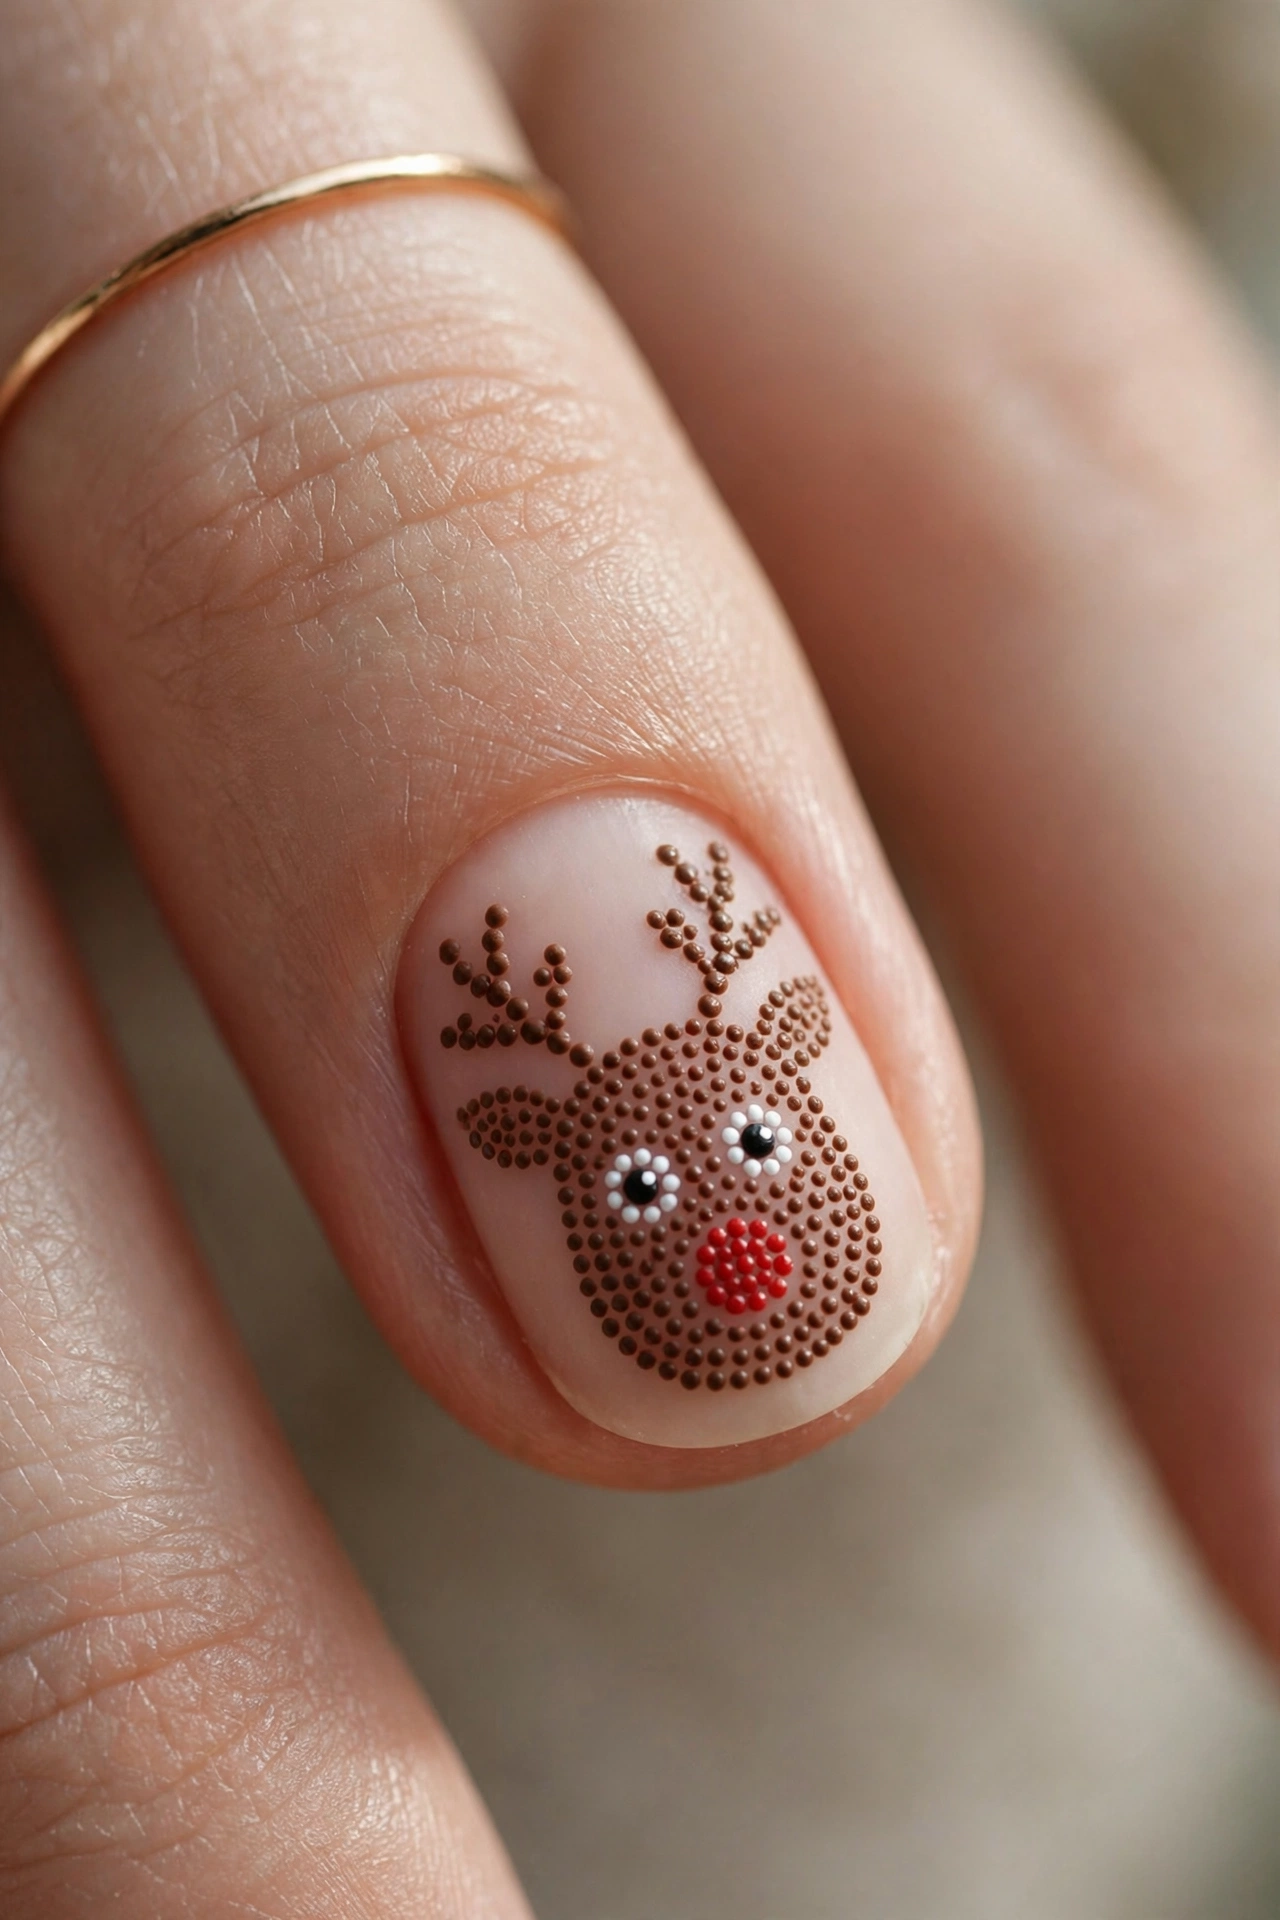
12. Reindeer Face Accent
Skill level: Beginner | Time: 30 minutes | Key products: brown polish, red polish, white polish, black polish, dotting tool
Paint all nails a neutral nude or soft brown. On the ring finger, paint a brown oval for the reindeer face. Add two small brown dots at the top as ears. Place two white dots with smaller black dots inside as eyes. Finish with one red dot in the center-bottom as the nose — Rudolph, obviously. The face takes up the whole nail, which is why this works even with shaky hands: everything is just dots. Top coat once dry.
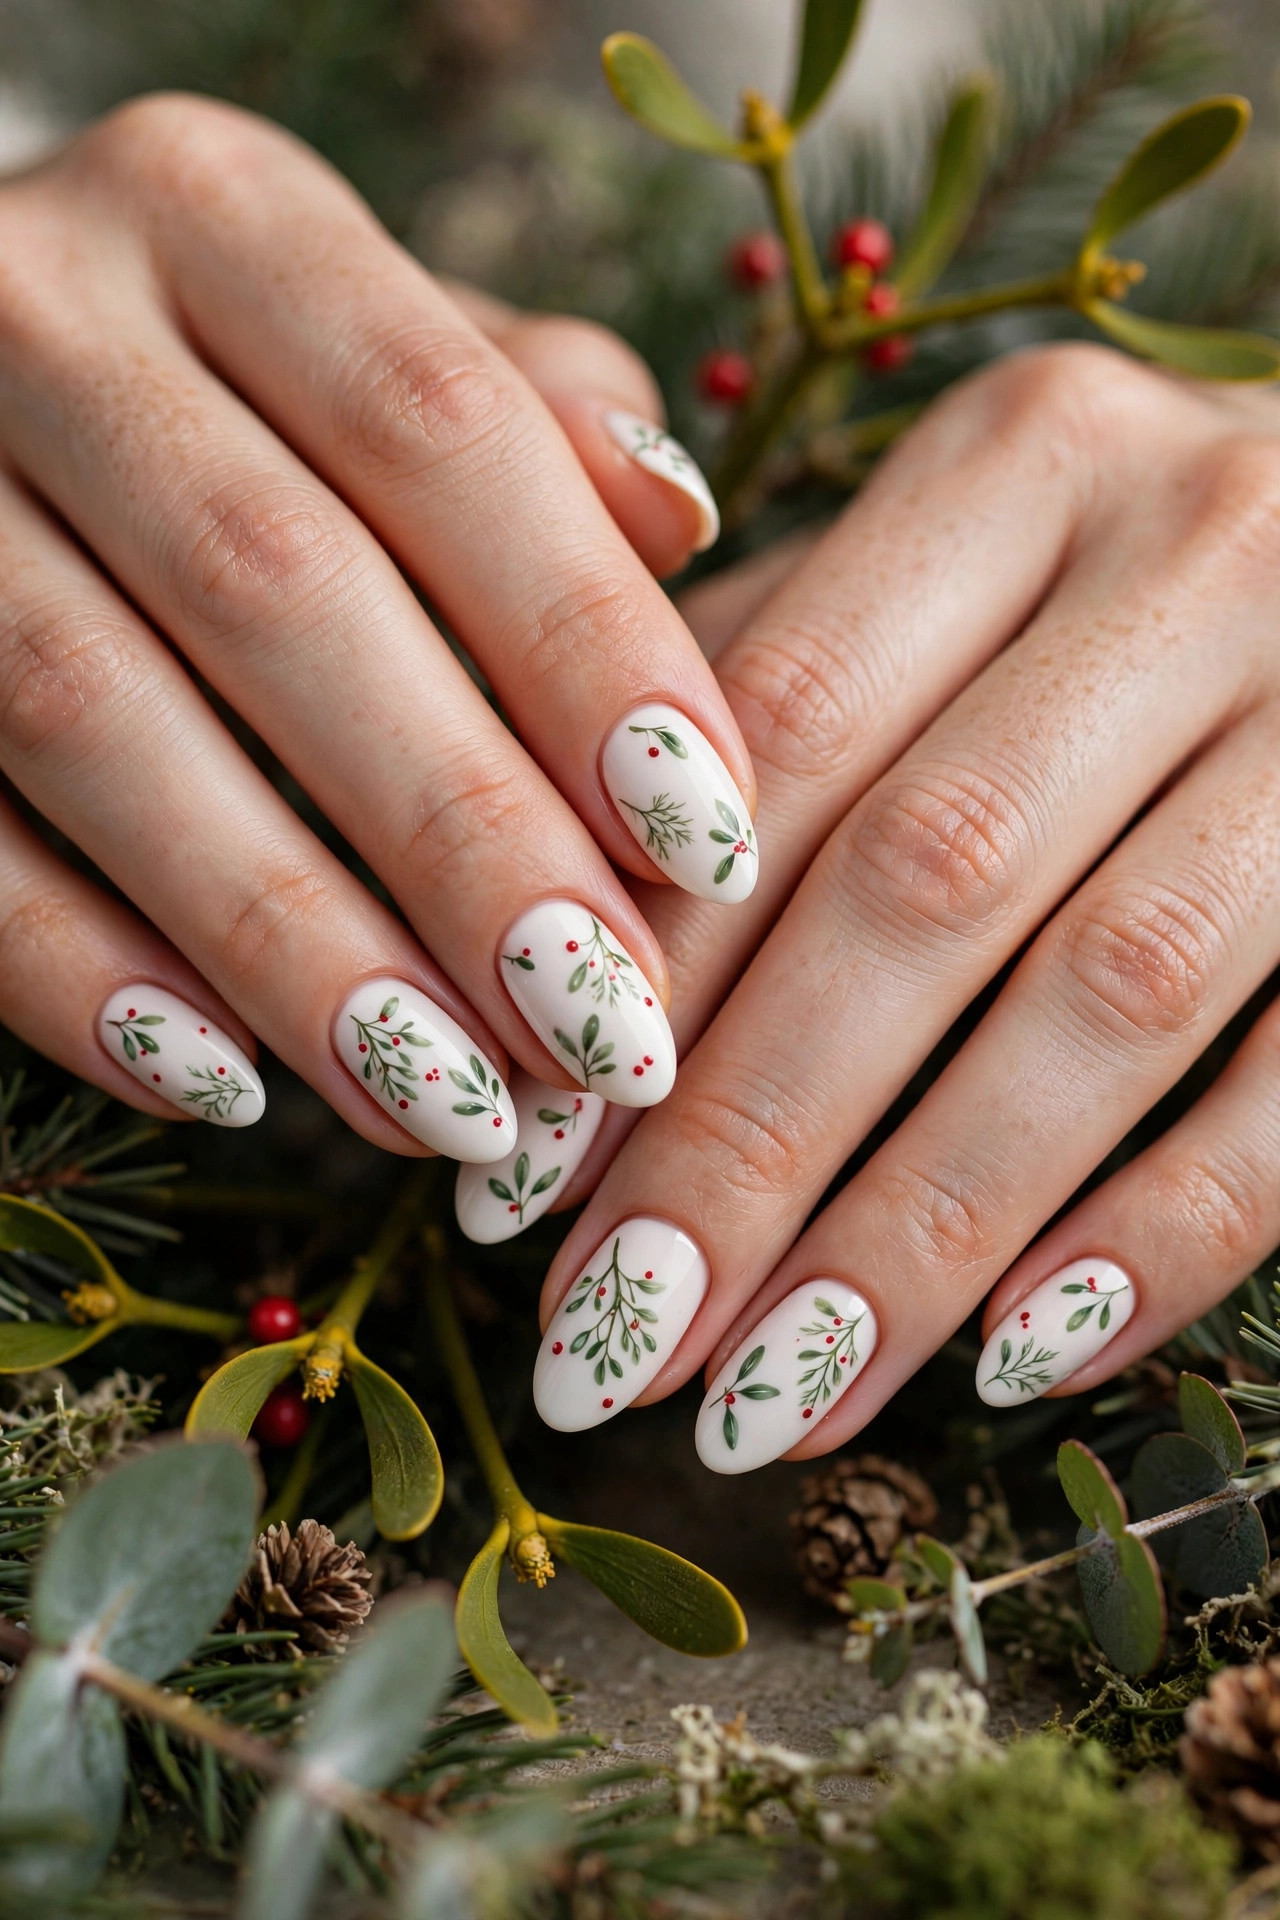
13. Mistletoe Berries
Skill level: Intermediate | Time: 35 minutes | Key products: white or pale pink polish, green polish, red polish, dotting tool
Paint two coats of white or pale pink and dry. With green polish and a dotting tool, place two small green leaf shapes (just elongated dots) near the cuticle. Add 3 red dots clustered beside the leaves as berries. Pull a thin green stem line connecting them with a toothpick. One mistletoe sprig per nail is plenty — this design is about negative space. Repeat on all ten or do it on 4 accent nails over plain white. Top coat.
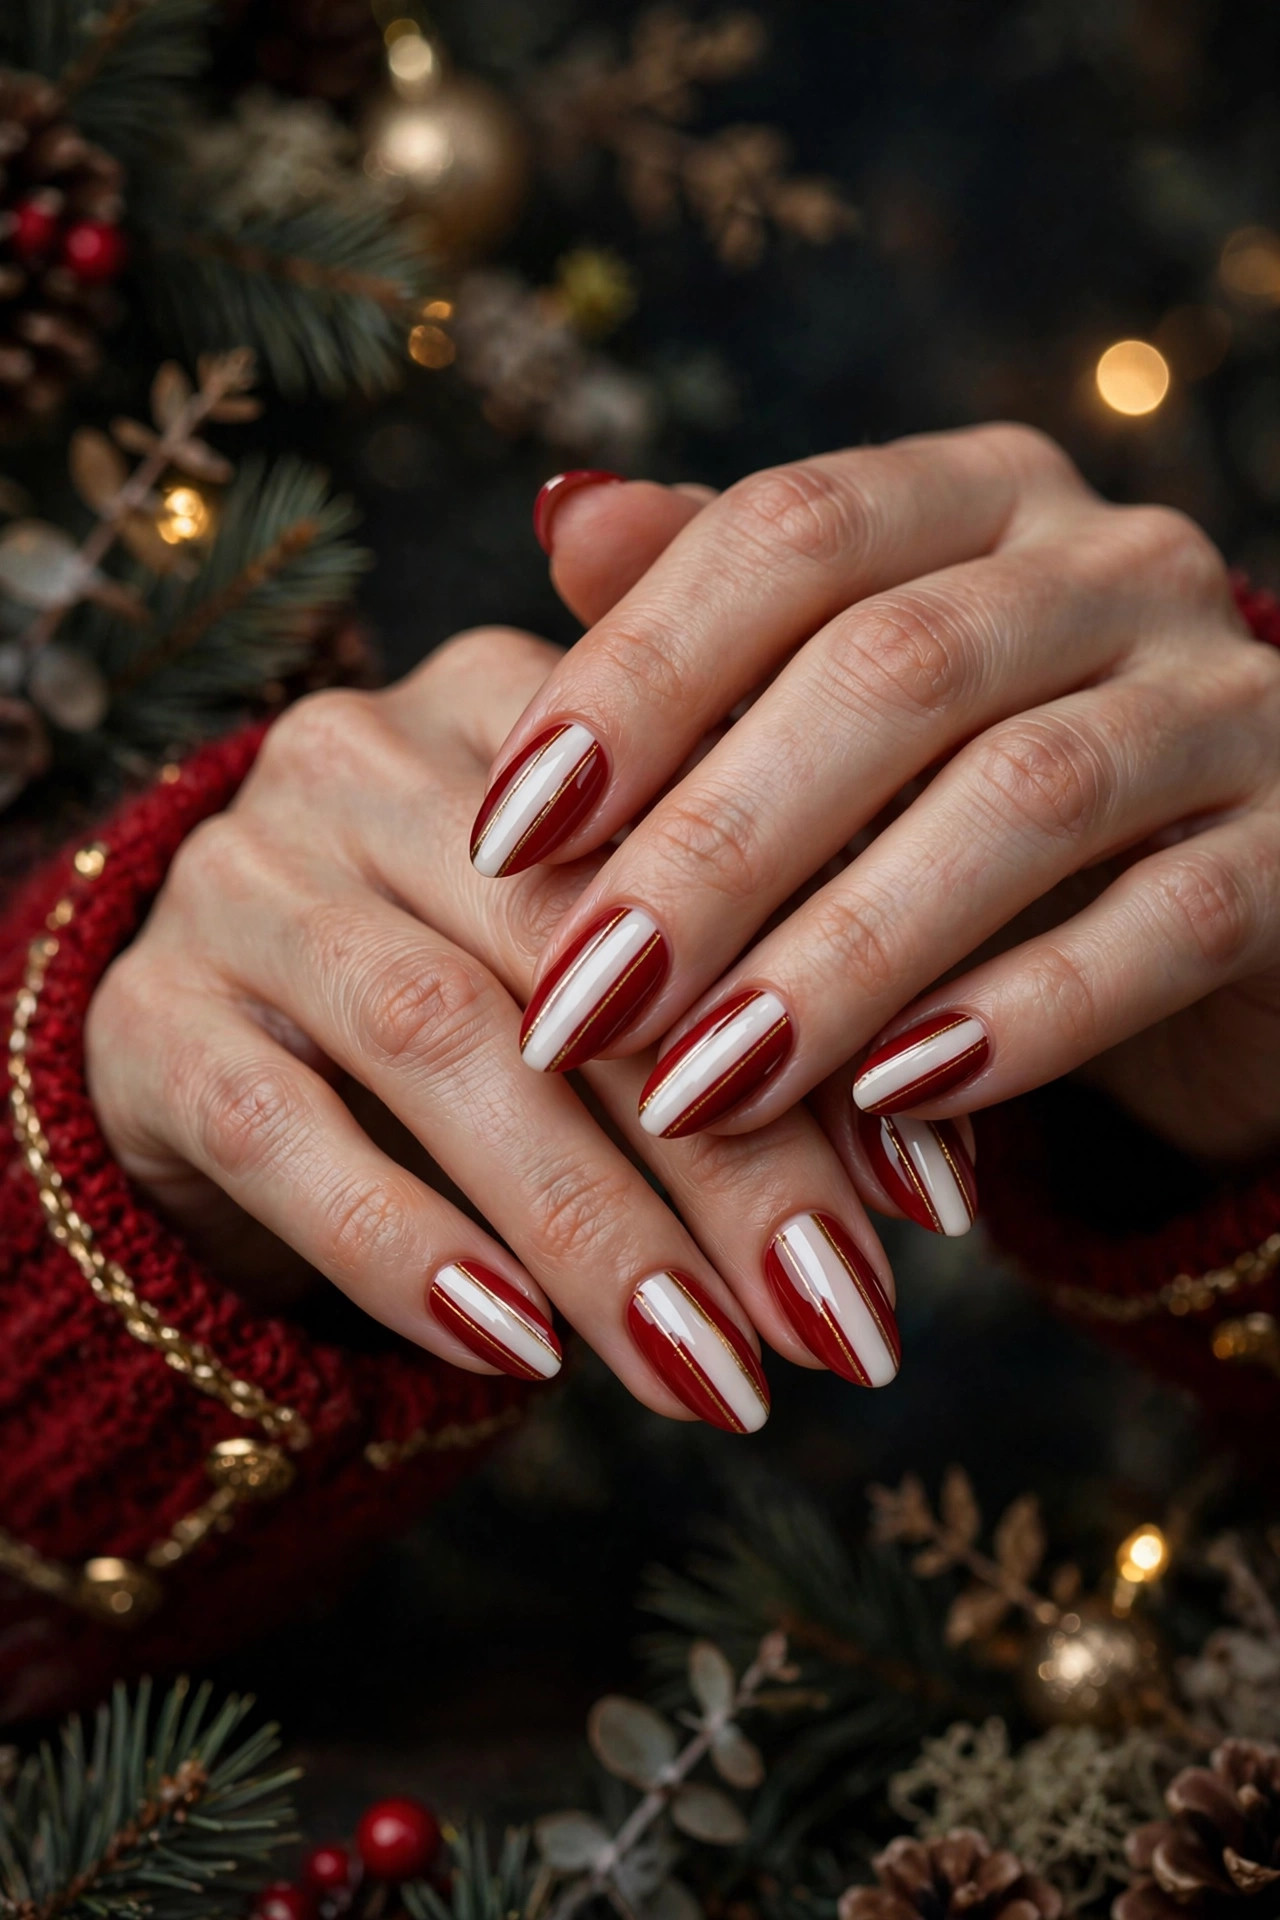
14. Nutcracker Stripes
Skill level: Intermediate | Time: 45 minutes | Key products: red, white, black, and gold polishes, detail brush
Paint two coats of red and dry. Paint a white vertical stripe down the center of each nail, then two thin gold stripes flanking it — this mimics a nutcracker uniform jacket. Add a small black dot row (3 dots) down the white stripe as buttons. On the ring finger, add a tiny gold crown shape (a zigzag line) near the cuticle. The uniform motif reads instantly as nutcracker without any literal face painting. Let each stripe layer dry 3 minutes before the next.
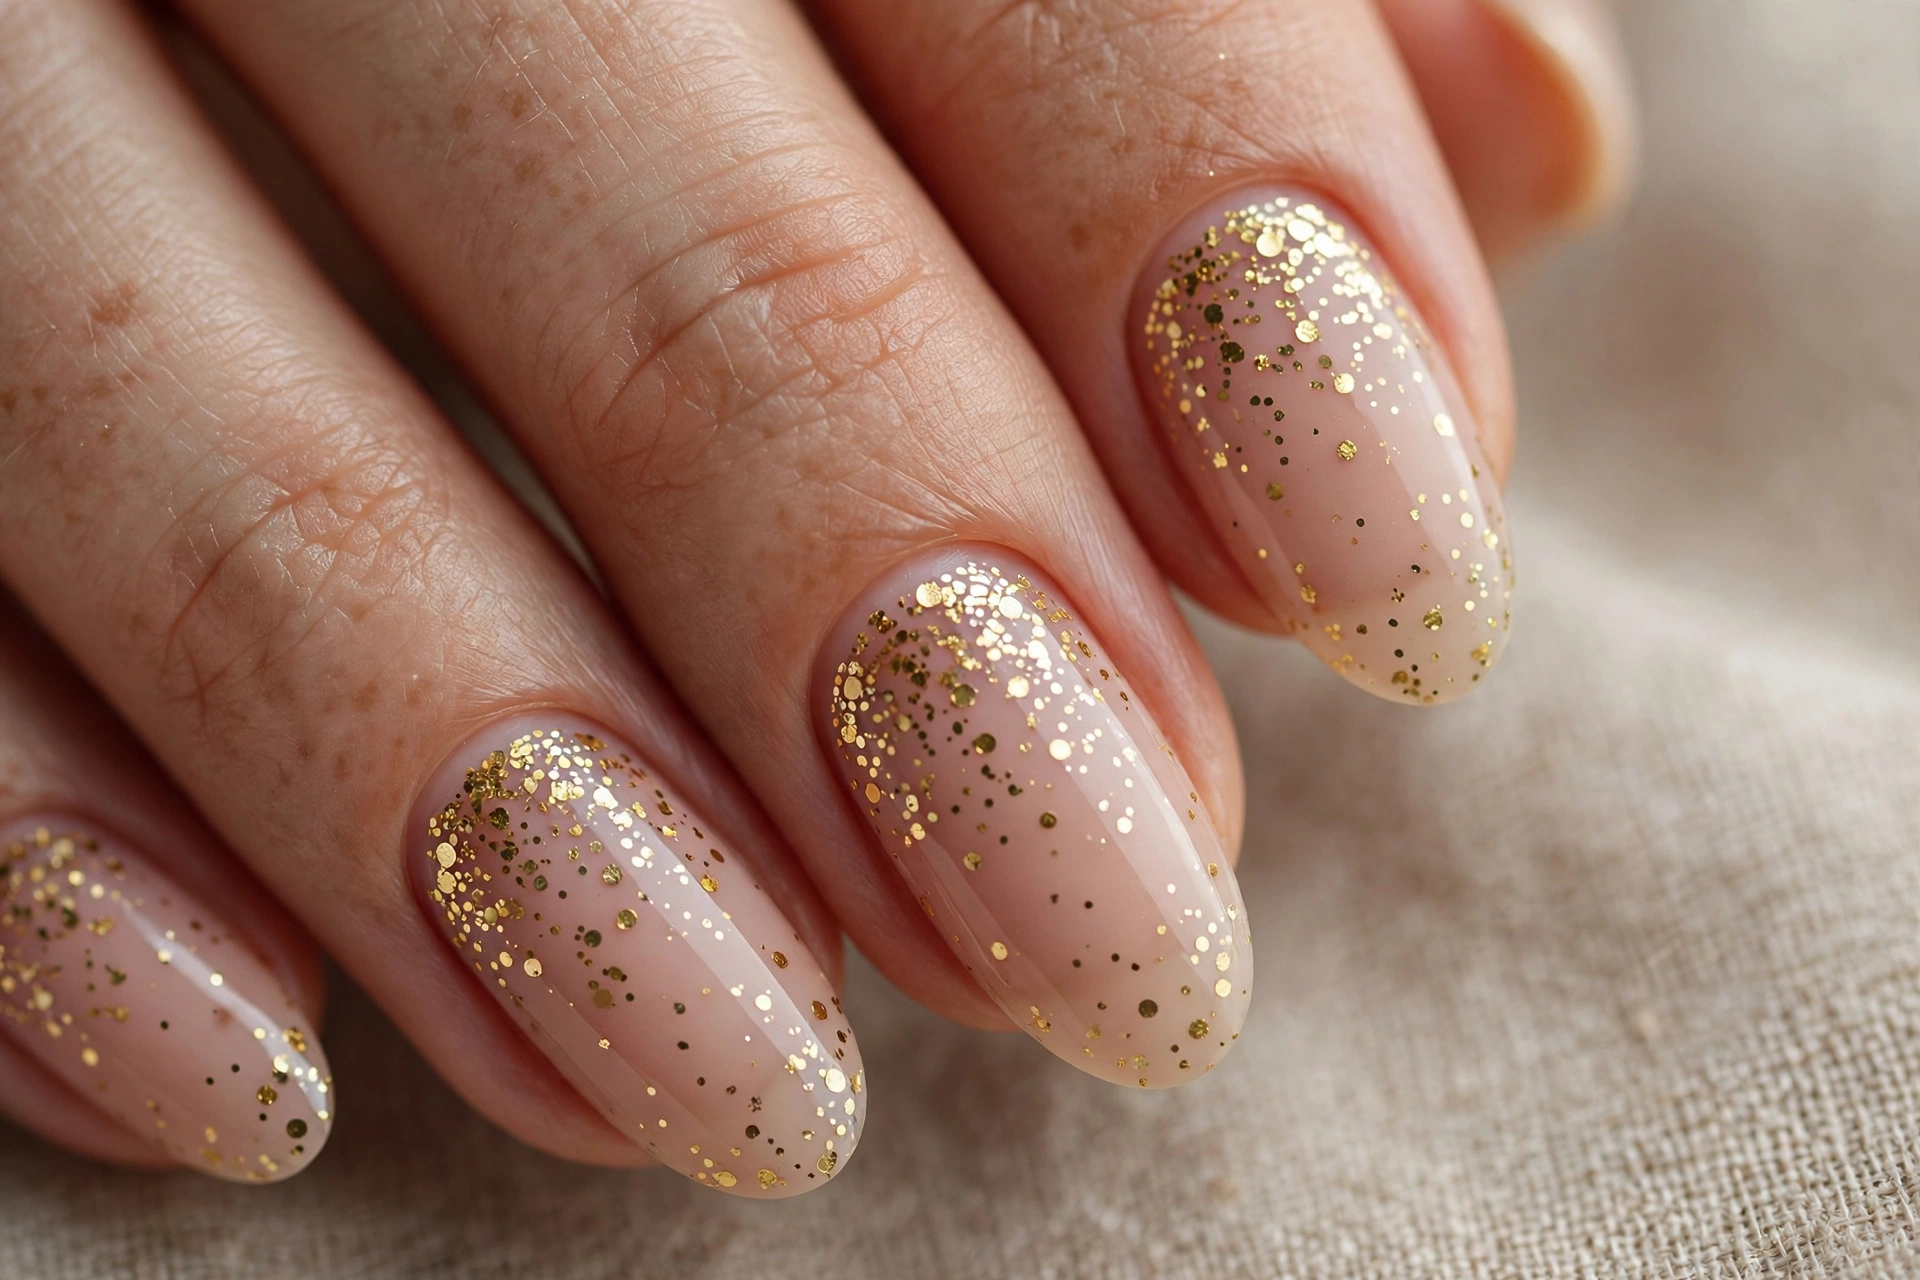
15. Champagne Sparkle Dots
Skill level: Beginner | Time: 20 minutes | Key products: nude polish, gold glitter polish, dotting tool
Paint two coats of nude and dry. Dip a dotting tool in gold glitter polish and place dots in a loose scattered pattern — denser near the cuticle, sparser toward the tip, like champagne bubbles. Vary the dot sizes using both ends of the dotting tool. This works for Christmas, New Year’s Eve, and any winter party, which makes it the most versatile design in this guide. Two coats of top coat smooth the glitter texture.
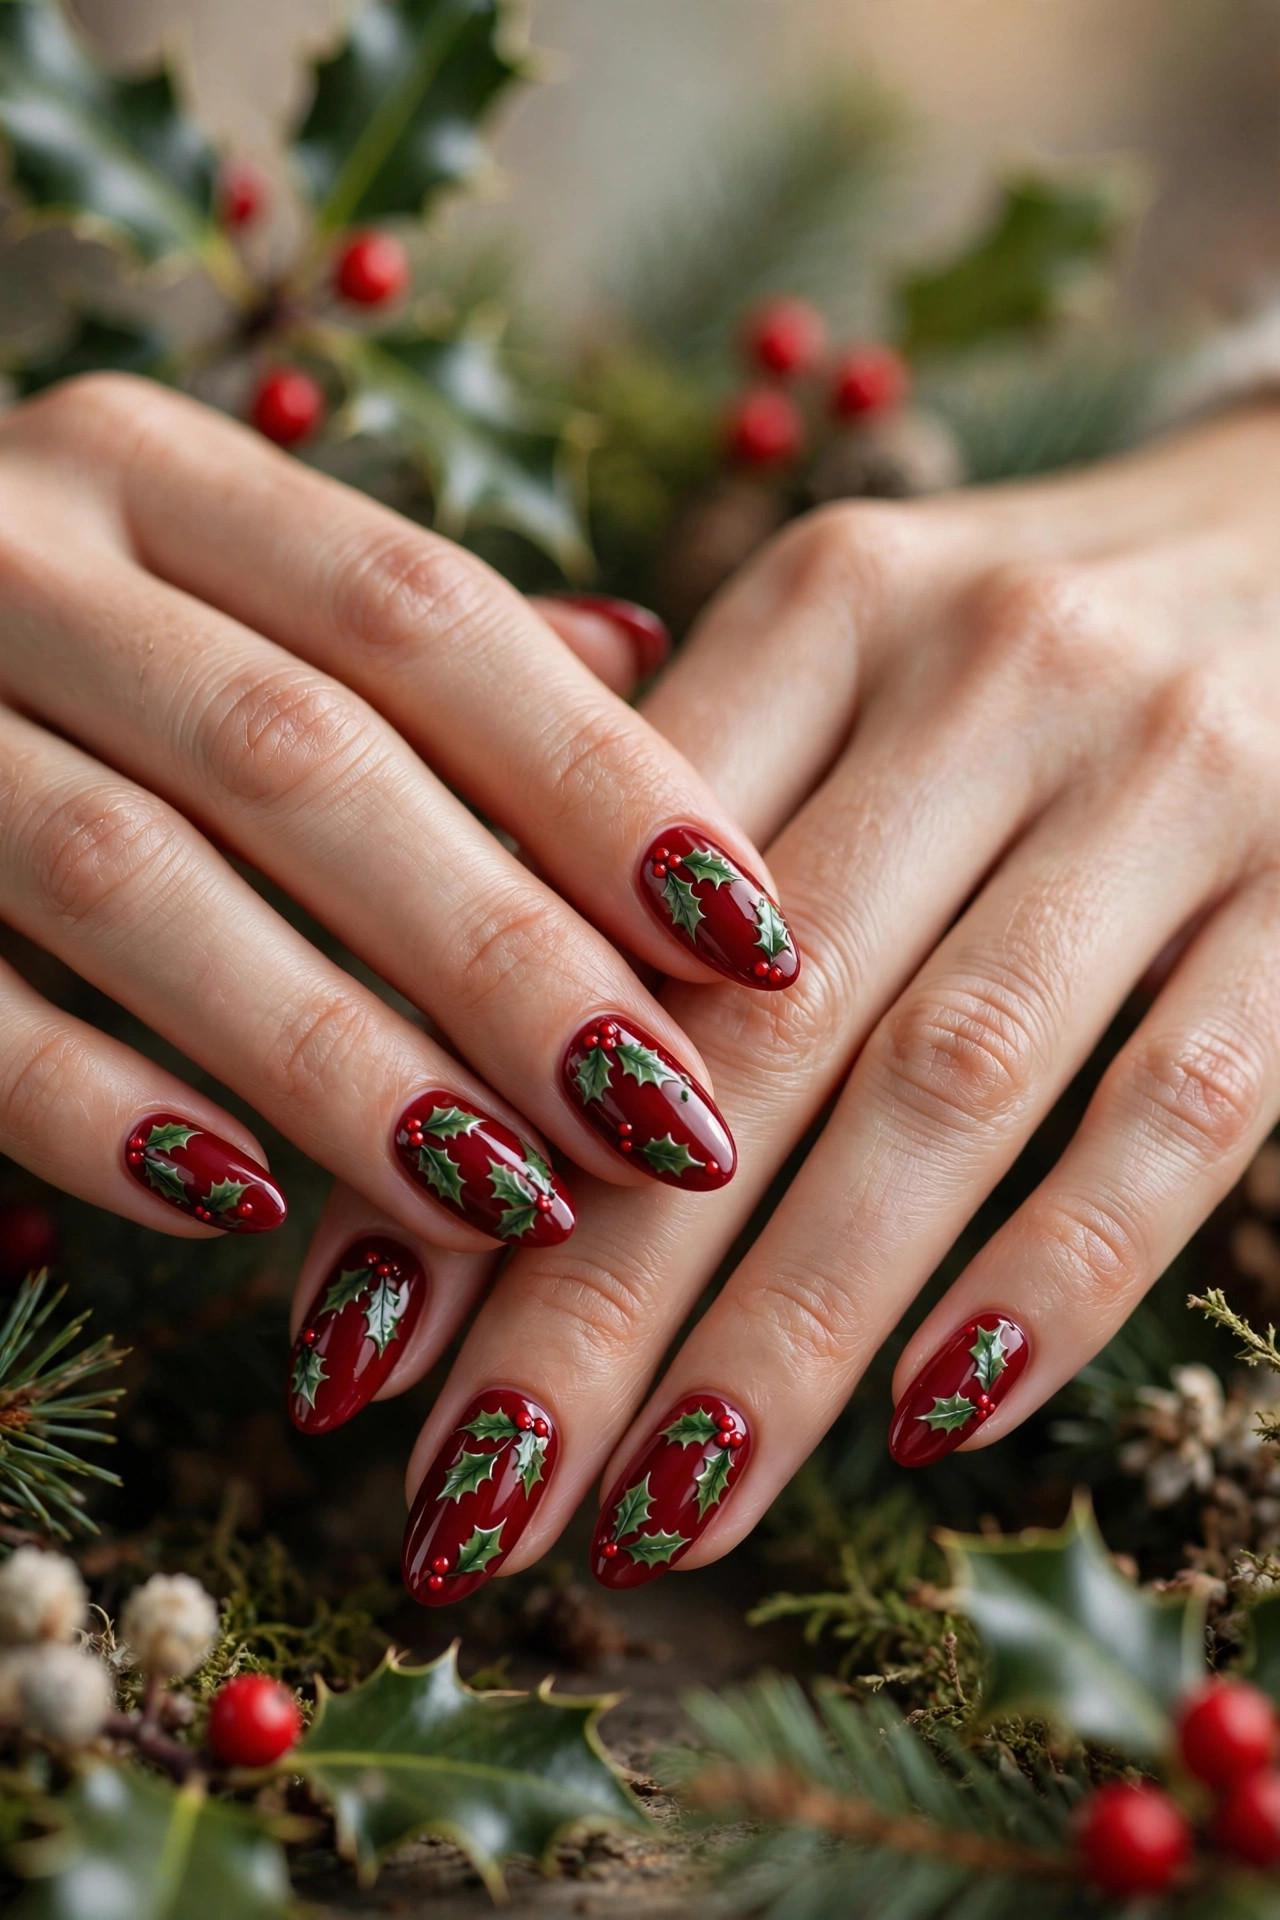
16. Holly Leaves
Skill level: Intermediate | Time: 40 minutes | Key products: deep red polish, green polish, detail brush, dotting tool
Paint two coats of deep red and dry fully. With a detail brush and green polish, paint 3 small pointed leaves near the base of each nail — press the brush down and flick upward to form the leaf point. Add 3 red dots (use a darker red than the base or add black to your red for contrast) as berries in the center of the leaves. Holly leaves look best slightly oversized; tiny ones get lost on the red background. Top coat after 5 minutes.
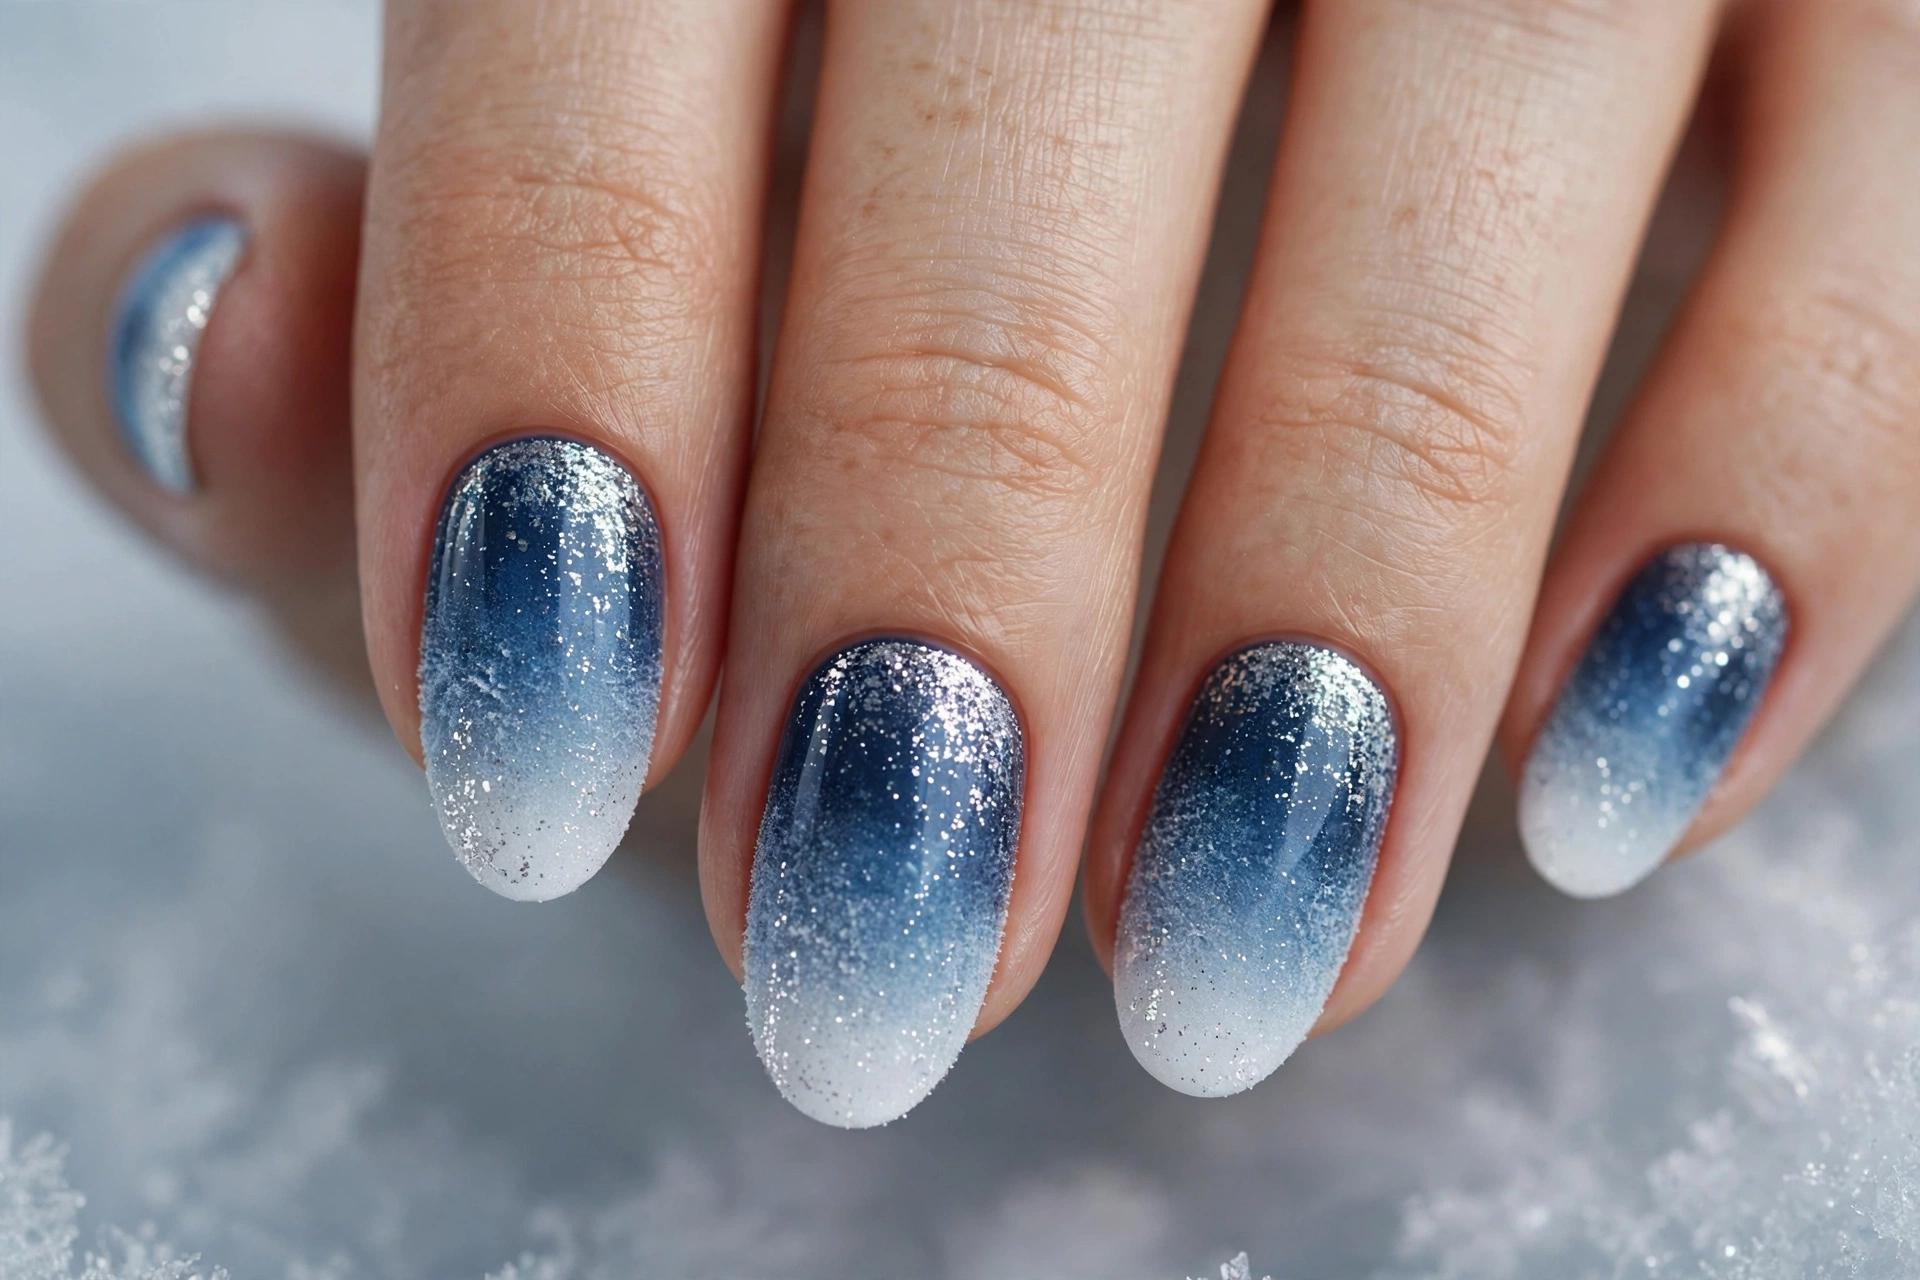
17. Blue Frost Gradient
Skill level: Intermediate | Time: 40 minutes | Key products: light blue polish, white polish, dark blue polish, makeup sponge
Paint two coats of white as the base and dry. On a makeup sponge, paint three horizontal stripes: dark blue, light blue, white. Sponge straight down onto each nail, reapplying polish to the sponge every 2 nails. The gradient should run dark at the cuticle to white at the tip, like frost forming. Clean up the skin around nails with remover on a brush immediately after, before it dries. Two top coats smooth the sponged texture. Add silver glitter on tips for extra frost.
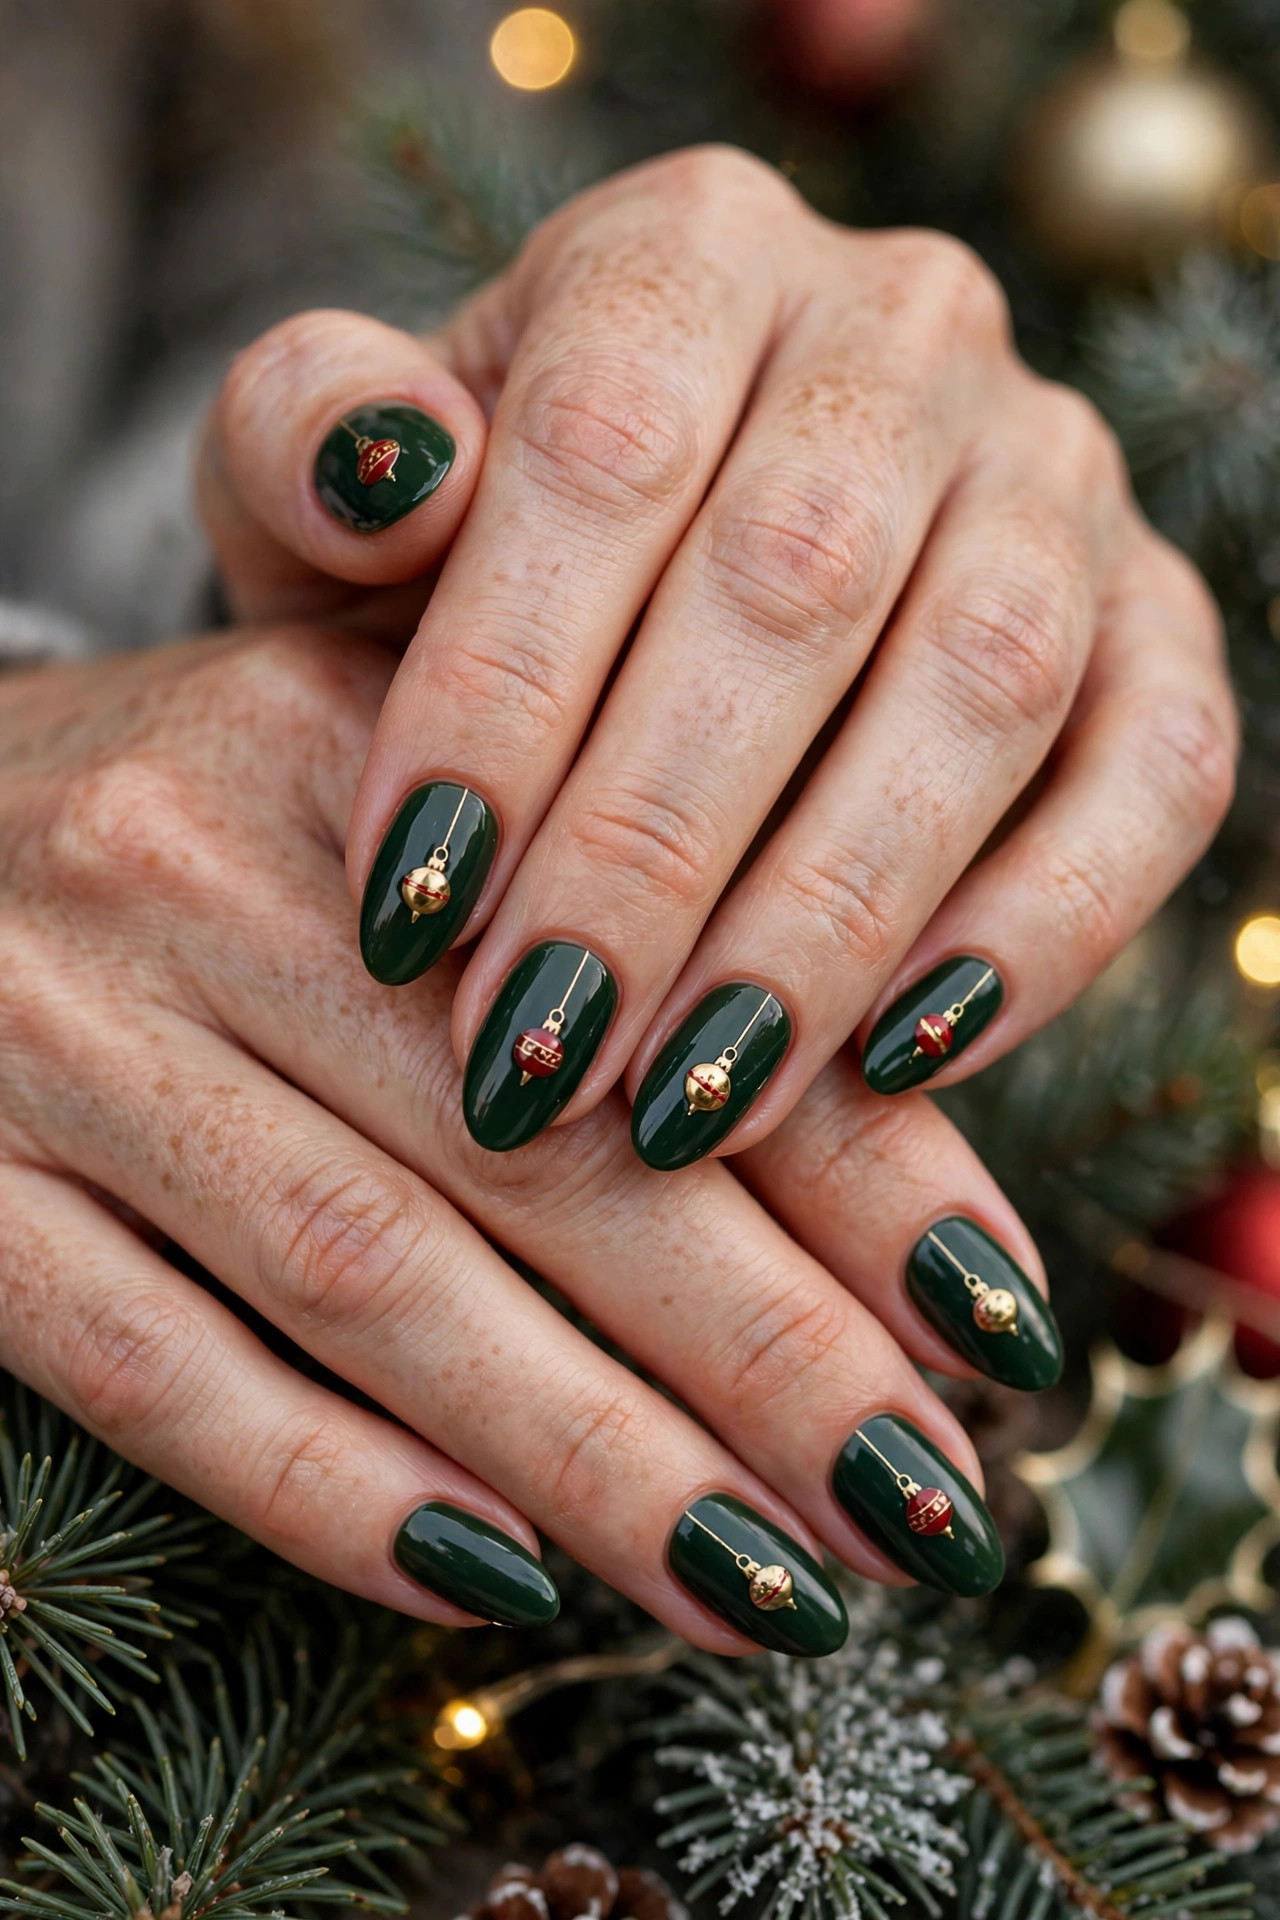
18. Ornament Baubles
Skill level: Beginner | Time: 30 minutes | Key products: dark green or burgundy polish, gold polish, dotting tool, detail brush
Paint two coats of dark green or burgundy and dry. With a detail brush, paint a thin gold line from the cuticle downward about one-third of the nail — the ornament string. With the large end of a dotting tool dipped in gold, place one big circle at the end of the string. Add a small white dot on the gold circle as the highlight reflection. One bauble per nail, centered, looks like a row of hanging ornaments. This is genuinely one of the easiest designs here and photographs beautifully.
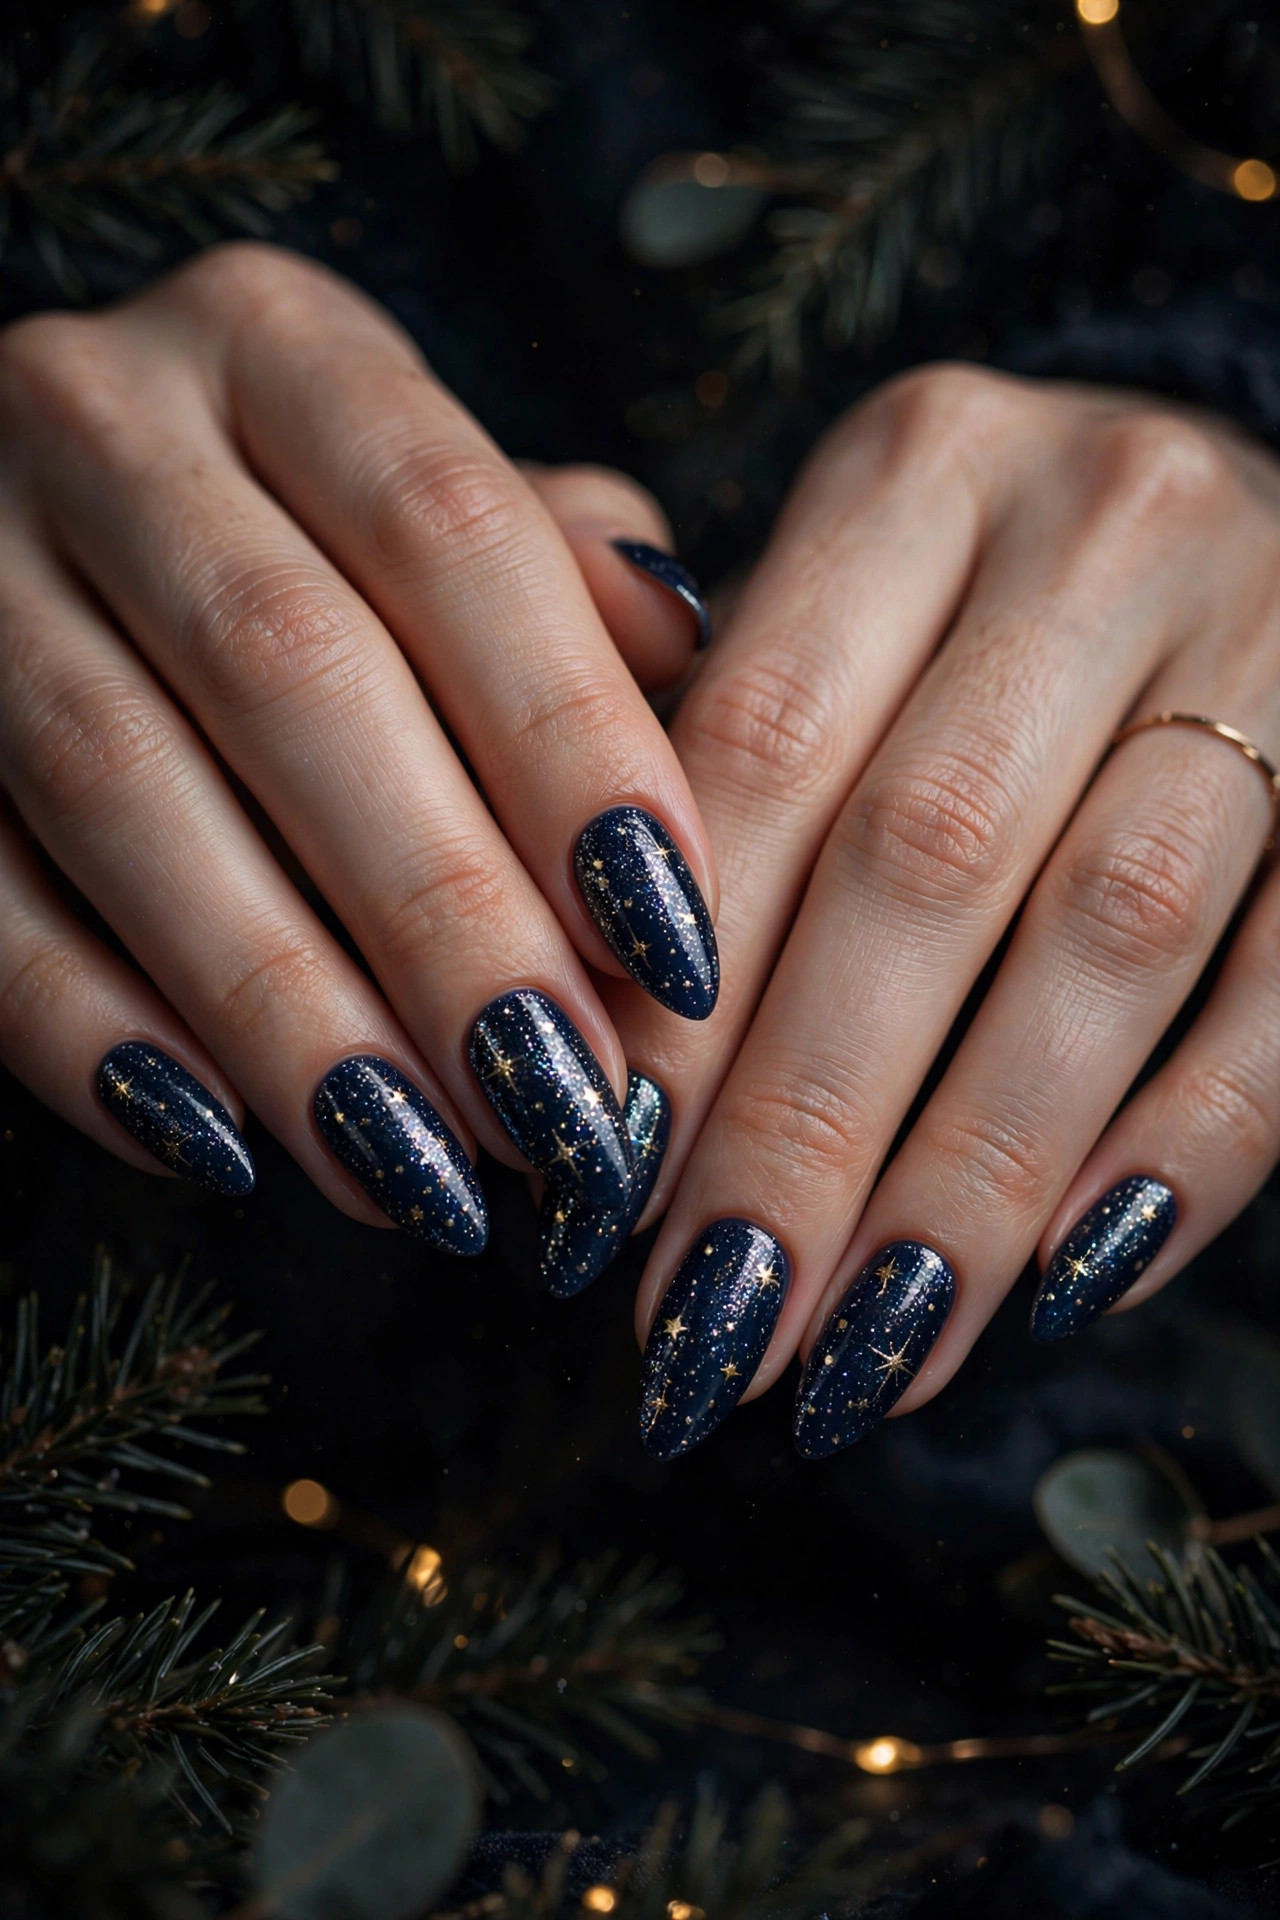
19. Starry Night Sky
Skill level: Intermediate | Time: 40 minutes | Key products: navy polish, gold polish, silver glitter polish, toothpick
Paint two coats of navy and dry. With a toothpick dipped in gold polish, paint small 4-point stars: one vertical line crossed by one horizontal line, then tiny diagonal flicks. Scatter 3 to 5 stars per nail at random positions. Add a few single silver glitter dots as distant stars. Stars read better sparse than crowded — leave plenty of navy negative space. This doubles as a New Year’s Eve design, so you get two holidays from one manicure. Top coat.
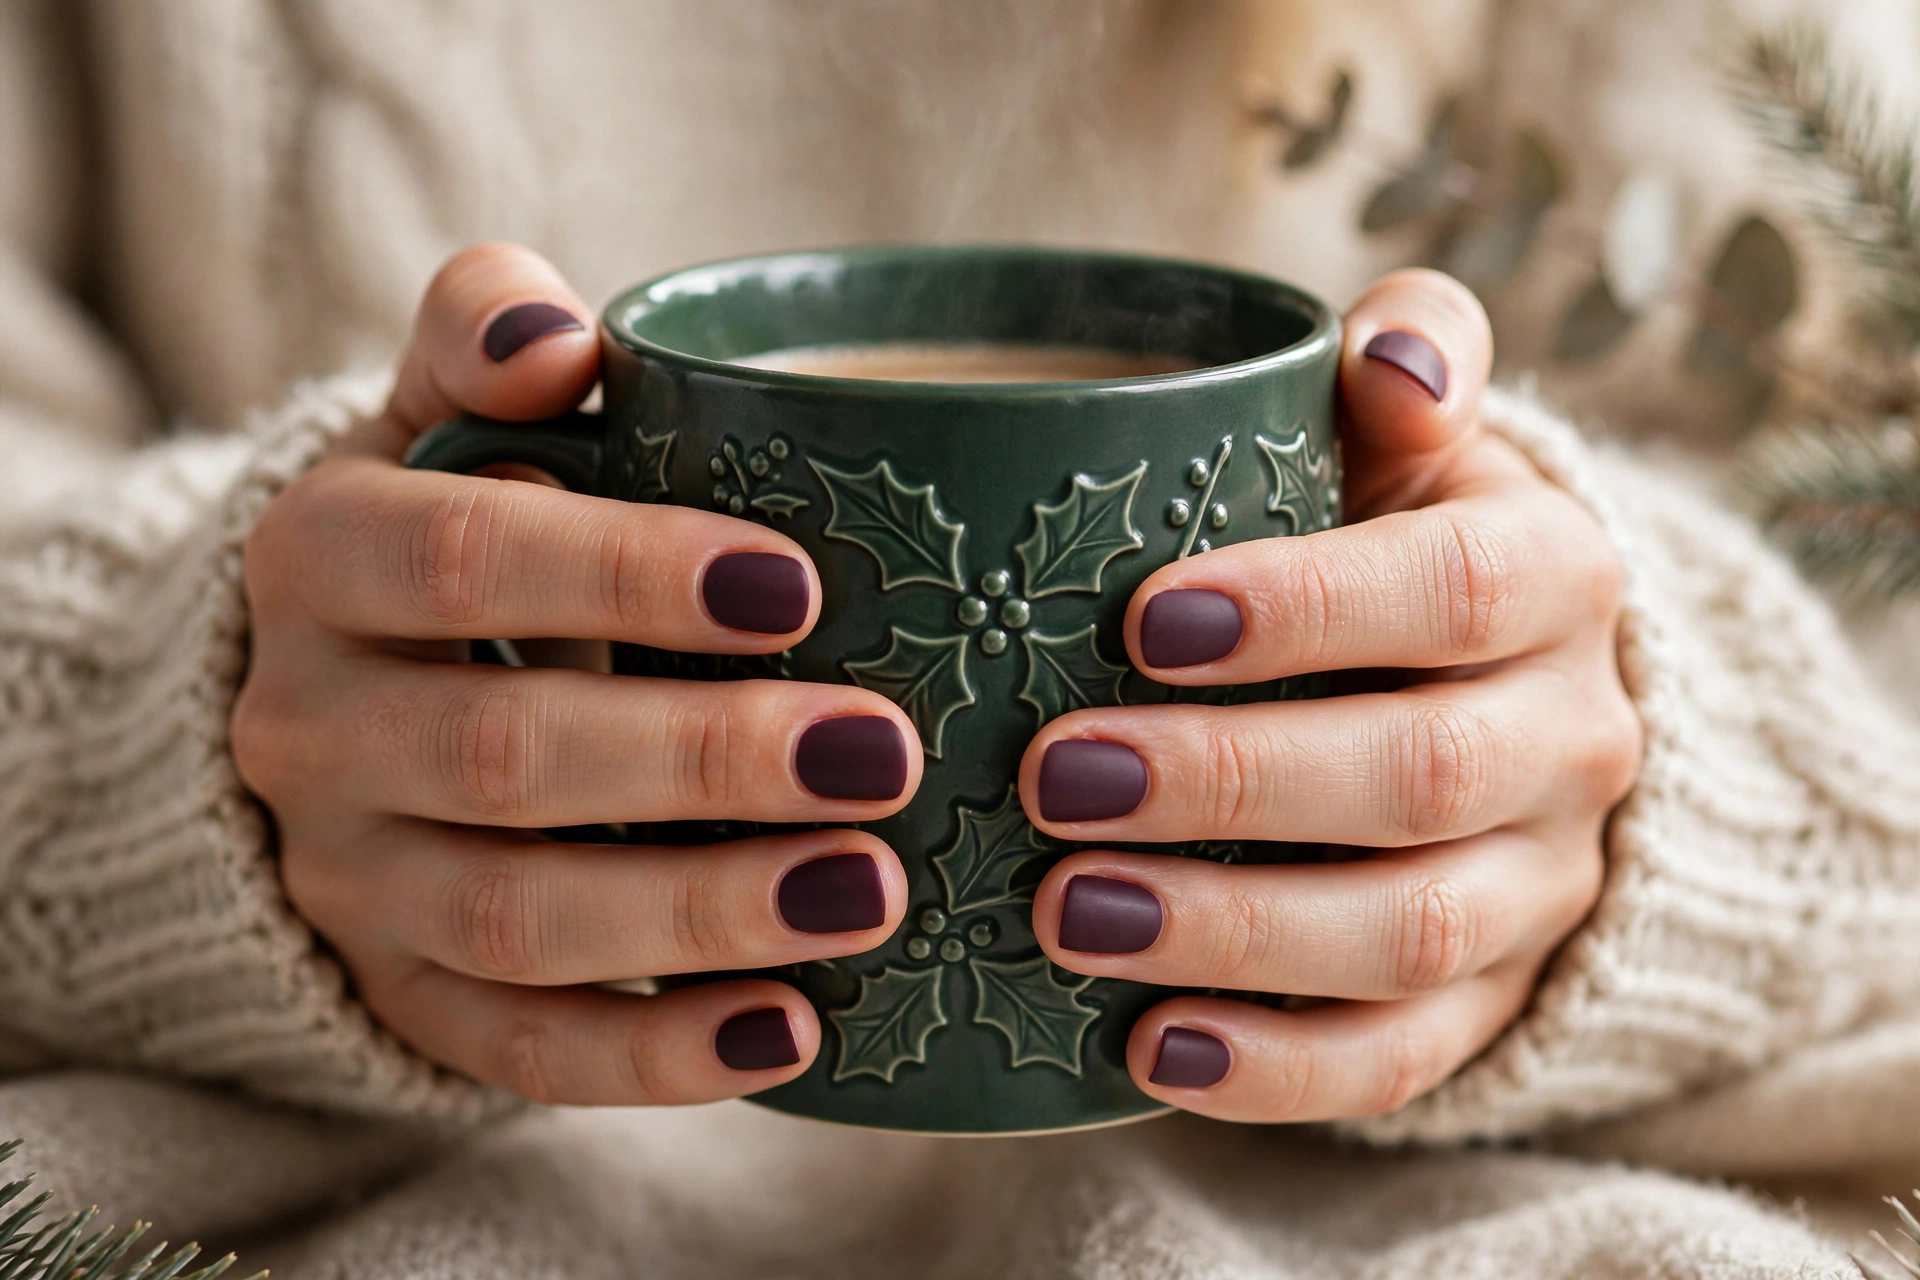
20. Velvet Deep Plum
Skill level: Beginner | Time: 25 minutes | Key products: deep plum or oxblood polish, matte top coat
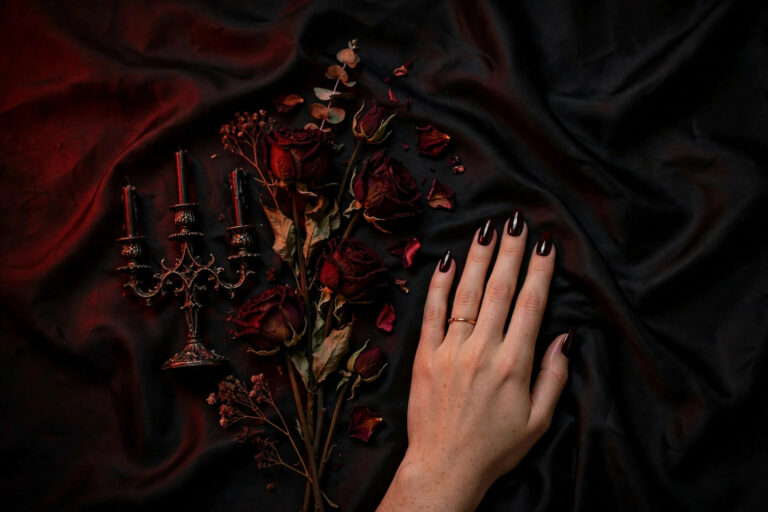
Sometimes the best Christmas nail art is no art at all. Two coats of deep plum or oxblood, sealed with a matte top coat, gives you a velvety, candlelit-dinner finish that works from the office party to Christmas morning. Matte dark shades show brush strokes, so use thin coats and let the first coat dry 5 full minutes before the second. No design, no tools, no stress — and it matches everything.
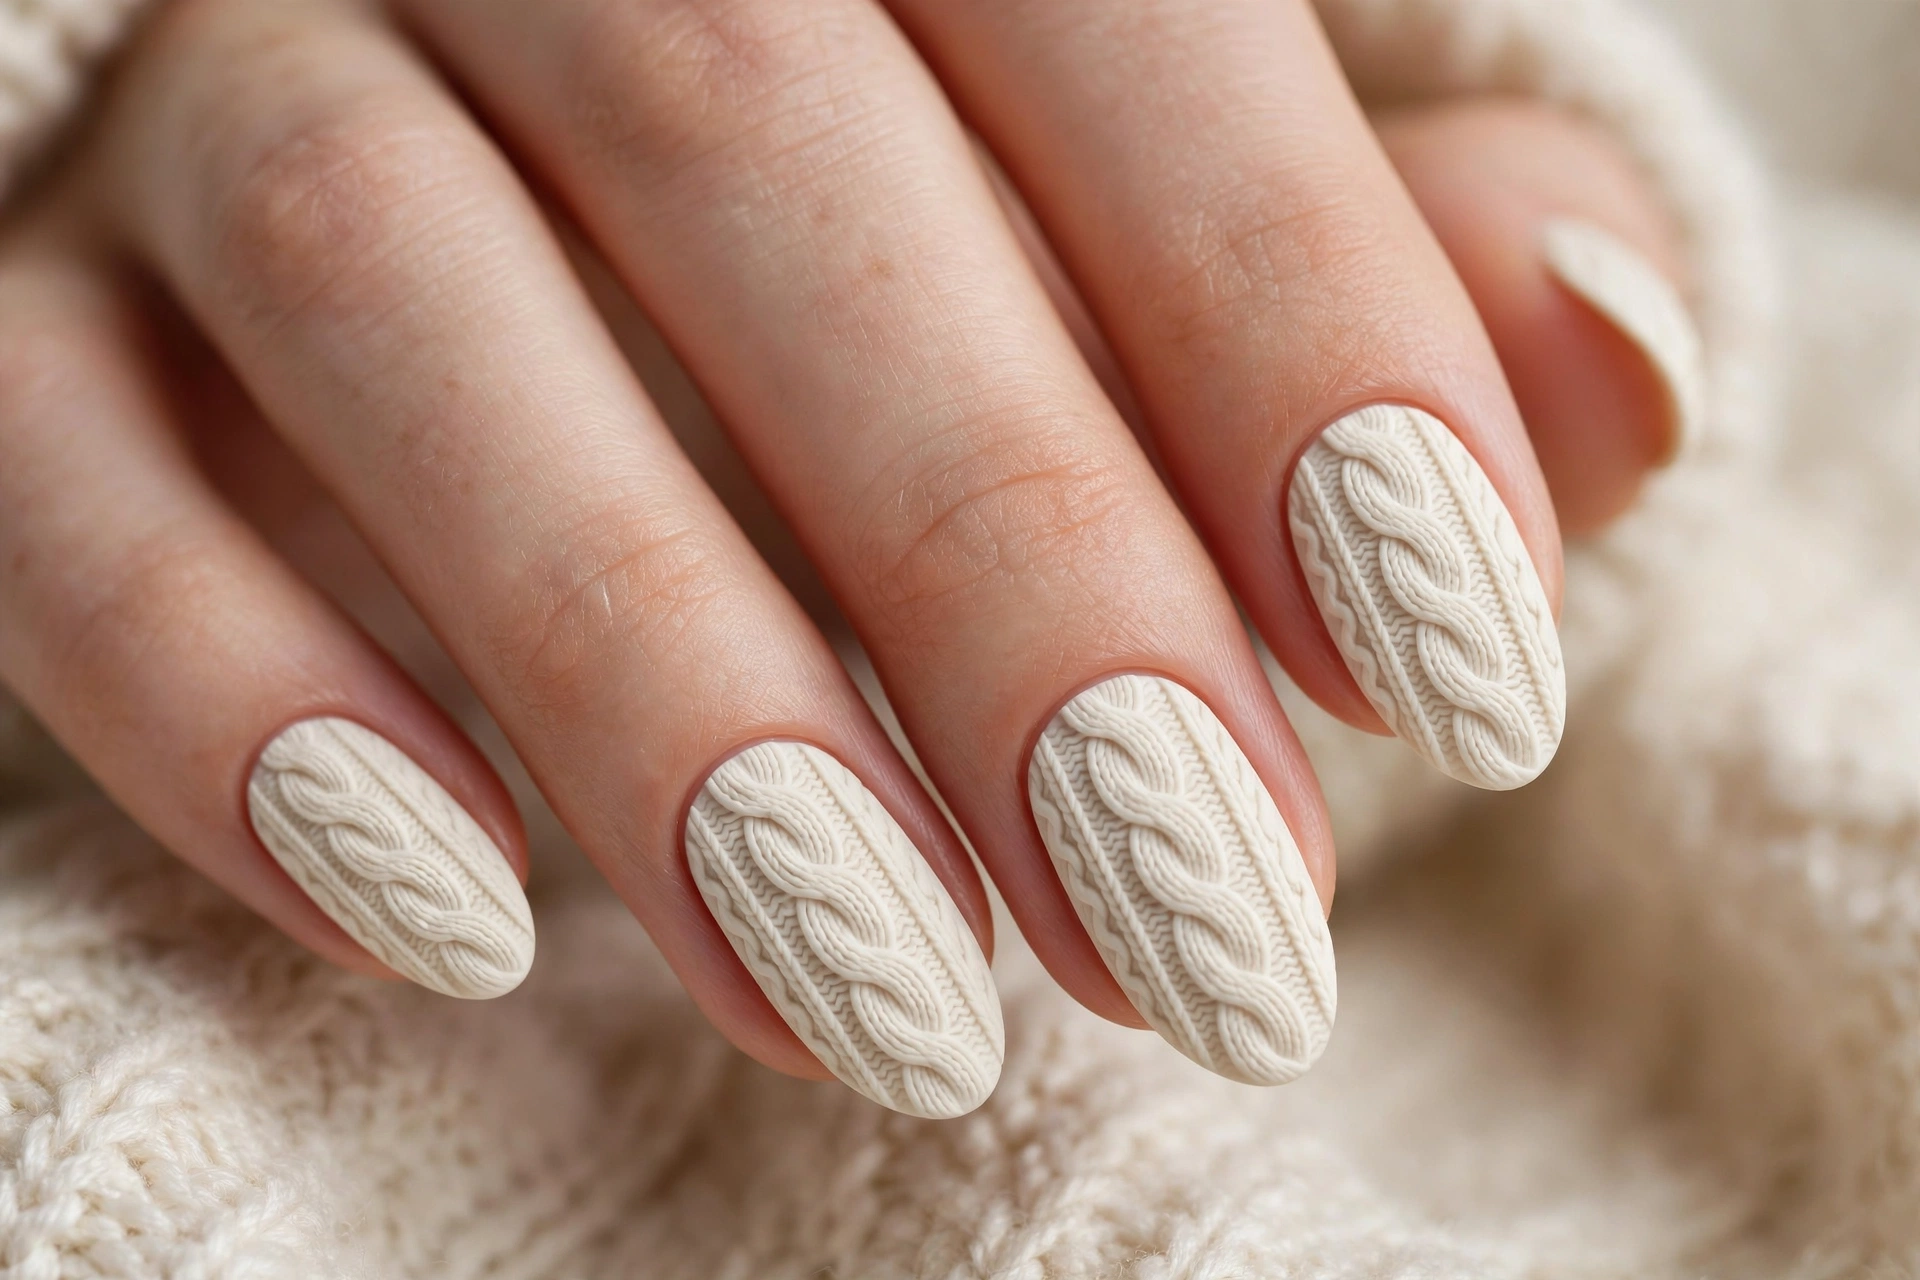
21. Sweater Knit Texture
Skill level: Intermediate | Time: 45 minutes | Key products: cream or dusty pink polish, detail brush or 3D gel, matte top coat
Paint two coats of cream or dusty pink and dry fully. With a detail brush and the same polish, paint a cable-knit pattern: one vertical line down the center with small diagonal lines branching off it, like a herringbone. Repeat with a second line beside it. The trick is building the pattern slightly thick — two passes over the same lines — so it has real texture. Seal with a matte top coat, which makes the raised pattern look like actual knit fabric. This cozy design pairs perfectly with the season’s chunky sweaters.
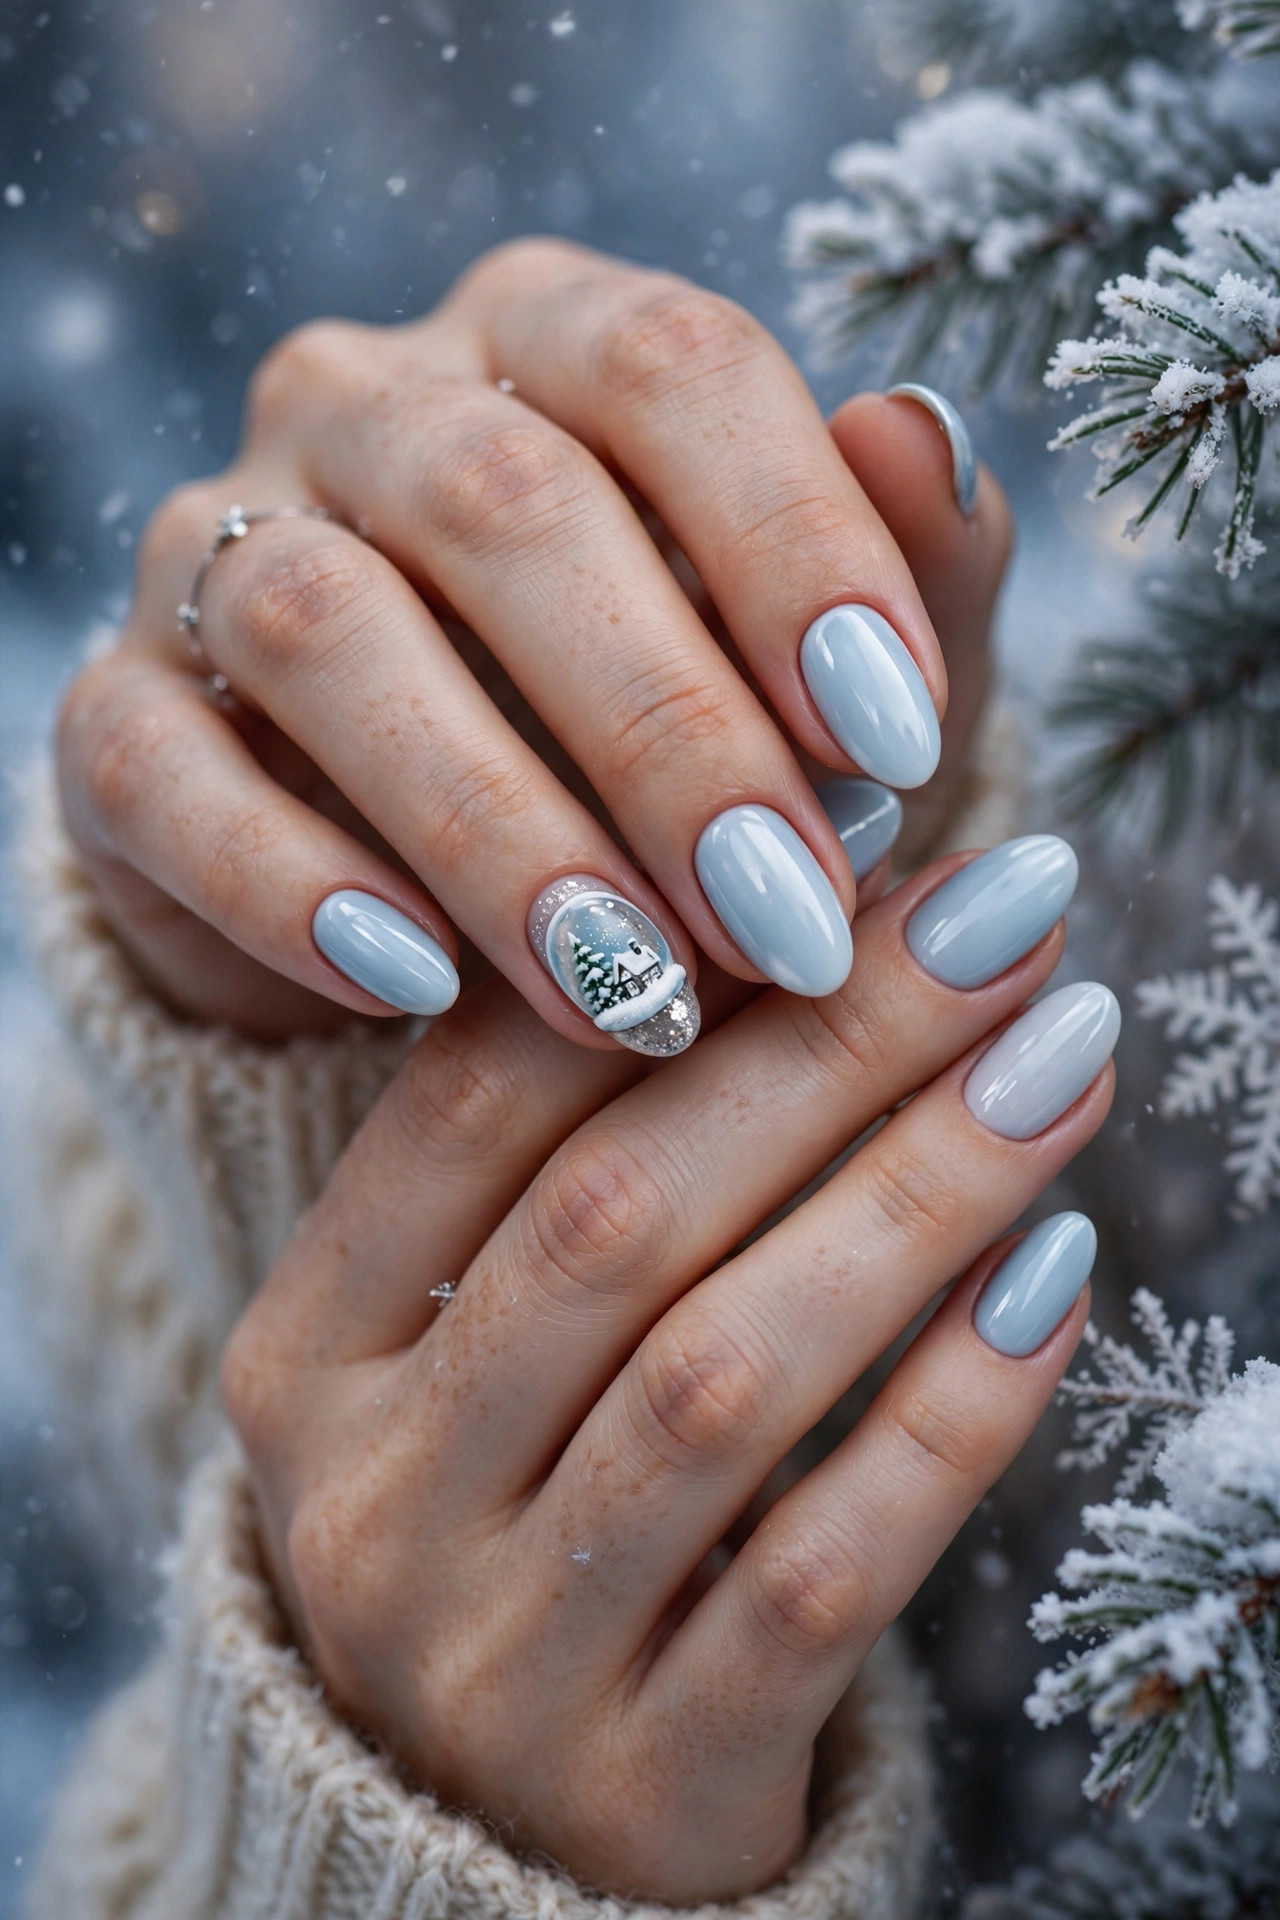
22. Snow Globe Accent
Skill level: Advanced | Time: 60 minutes | Key products: light blue polish, white polish, silver glitter, detail brush, dotting tool
Paint all nails light blue; do the snow globe on the ring finger. With a detail brush, paint a white circle outline in the center of the accent nail. Inside the circle, paint a tiny white triangle tree and 5 to 7 white dots as falling snow. Paint a small white trapezoid at the bottom of the circle as the globe base. Dab silver glitter dots inside for sparkle. Keep every element small — the globe should occupy about half the nail. This is the most detailed design in the guide; save it for when you have a full hour and good lighting.
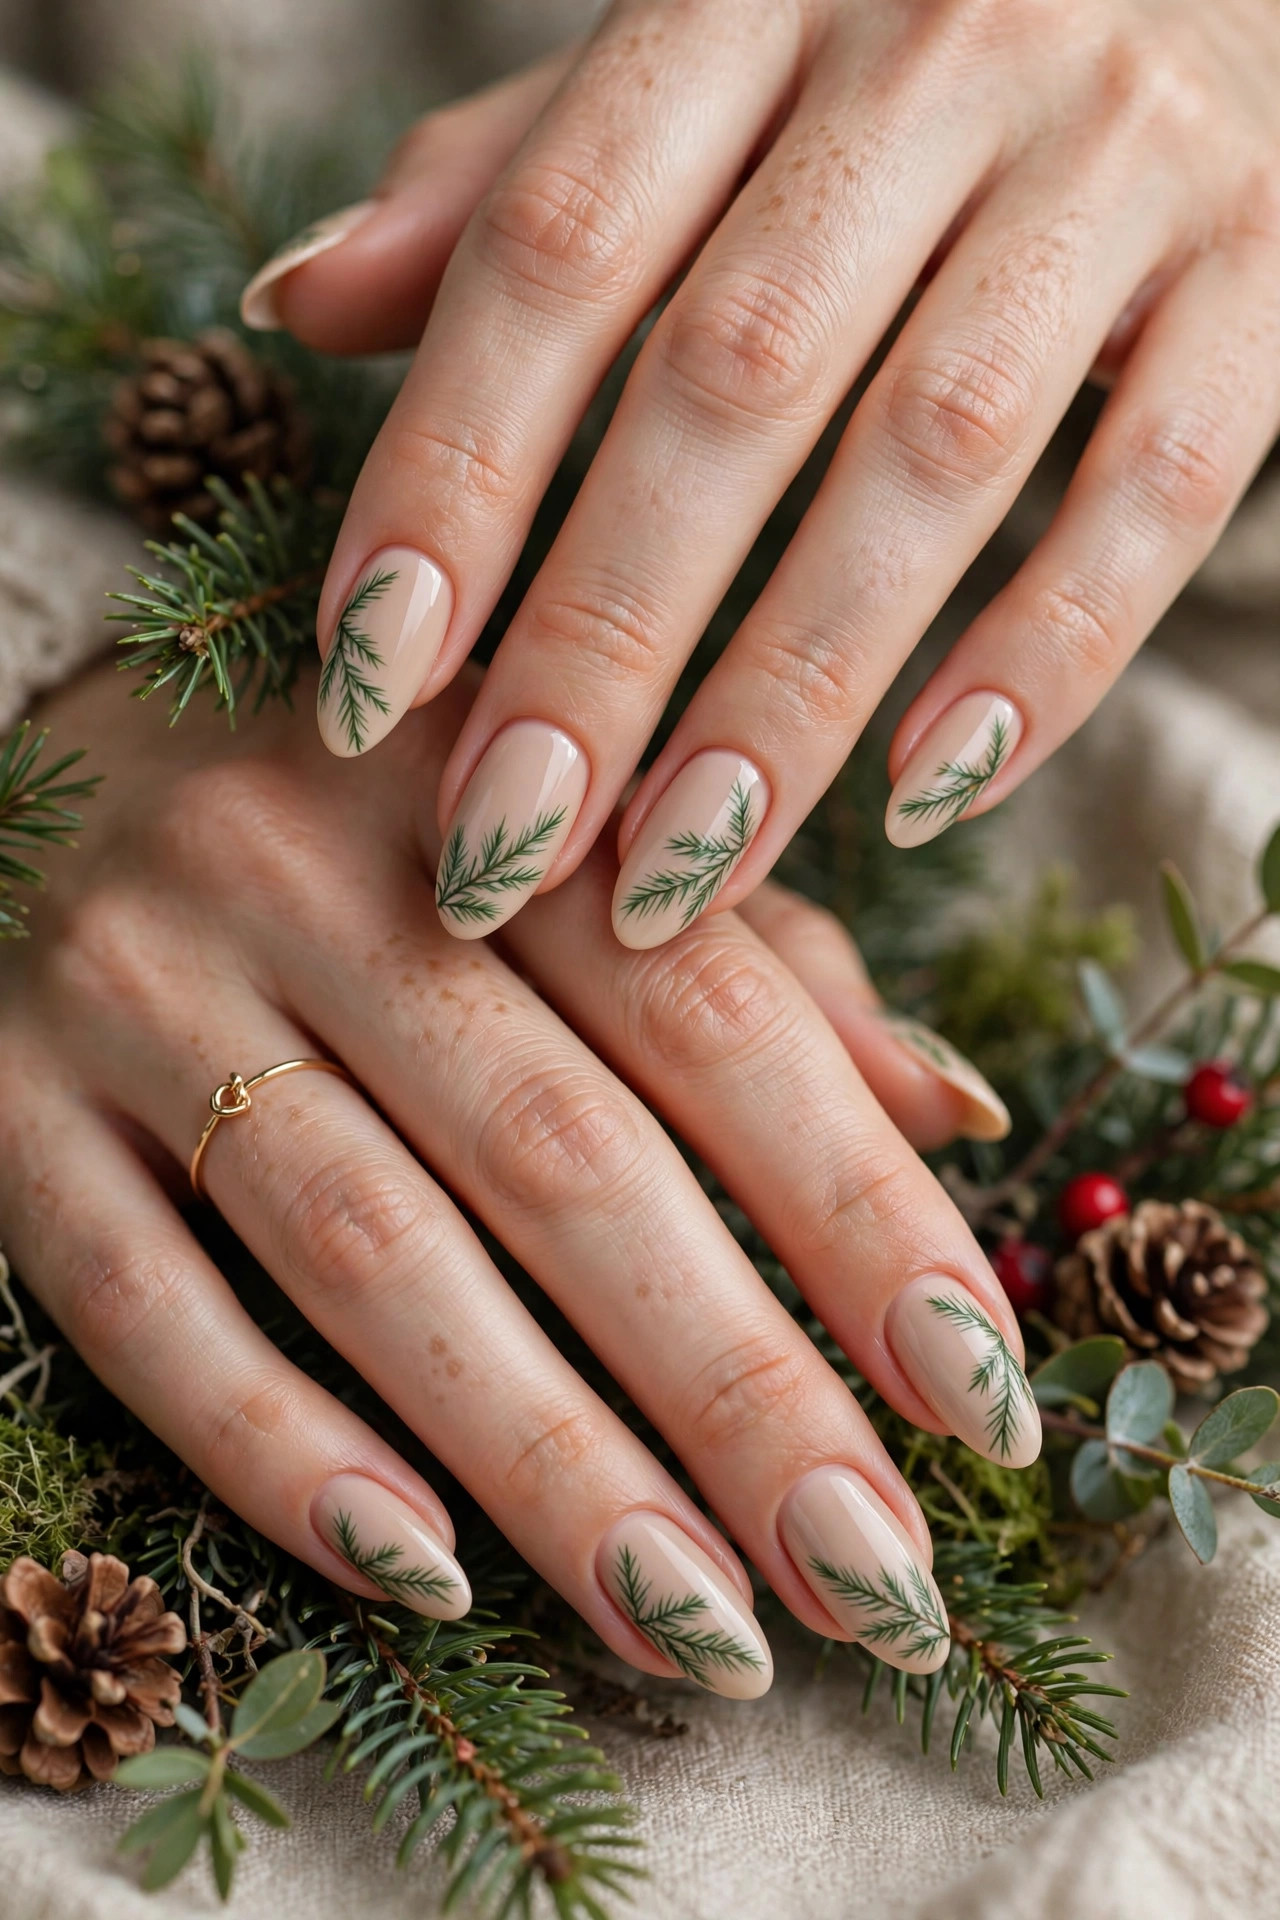
23. Evergreen Branch Strokes
Skill level: Intermediate | Time: 35 minutes | Key products: nude or white polish, green polish, detail brush
Paint two coats of nude and dry. With a detail brush and green polish, paint one diagonal branch line across each nail. Add short flicking strokes along both sides of the line — press and lift, press and lift — to form pine needles. Two or three branches per nail, varying the angles, looks like real evergreen boughs. The press-and-lift motion is the whole technique; practice it on paper first. Add 2 tiny red dots as berries on 2 accent nails. Top coat.
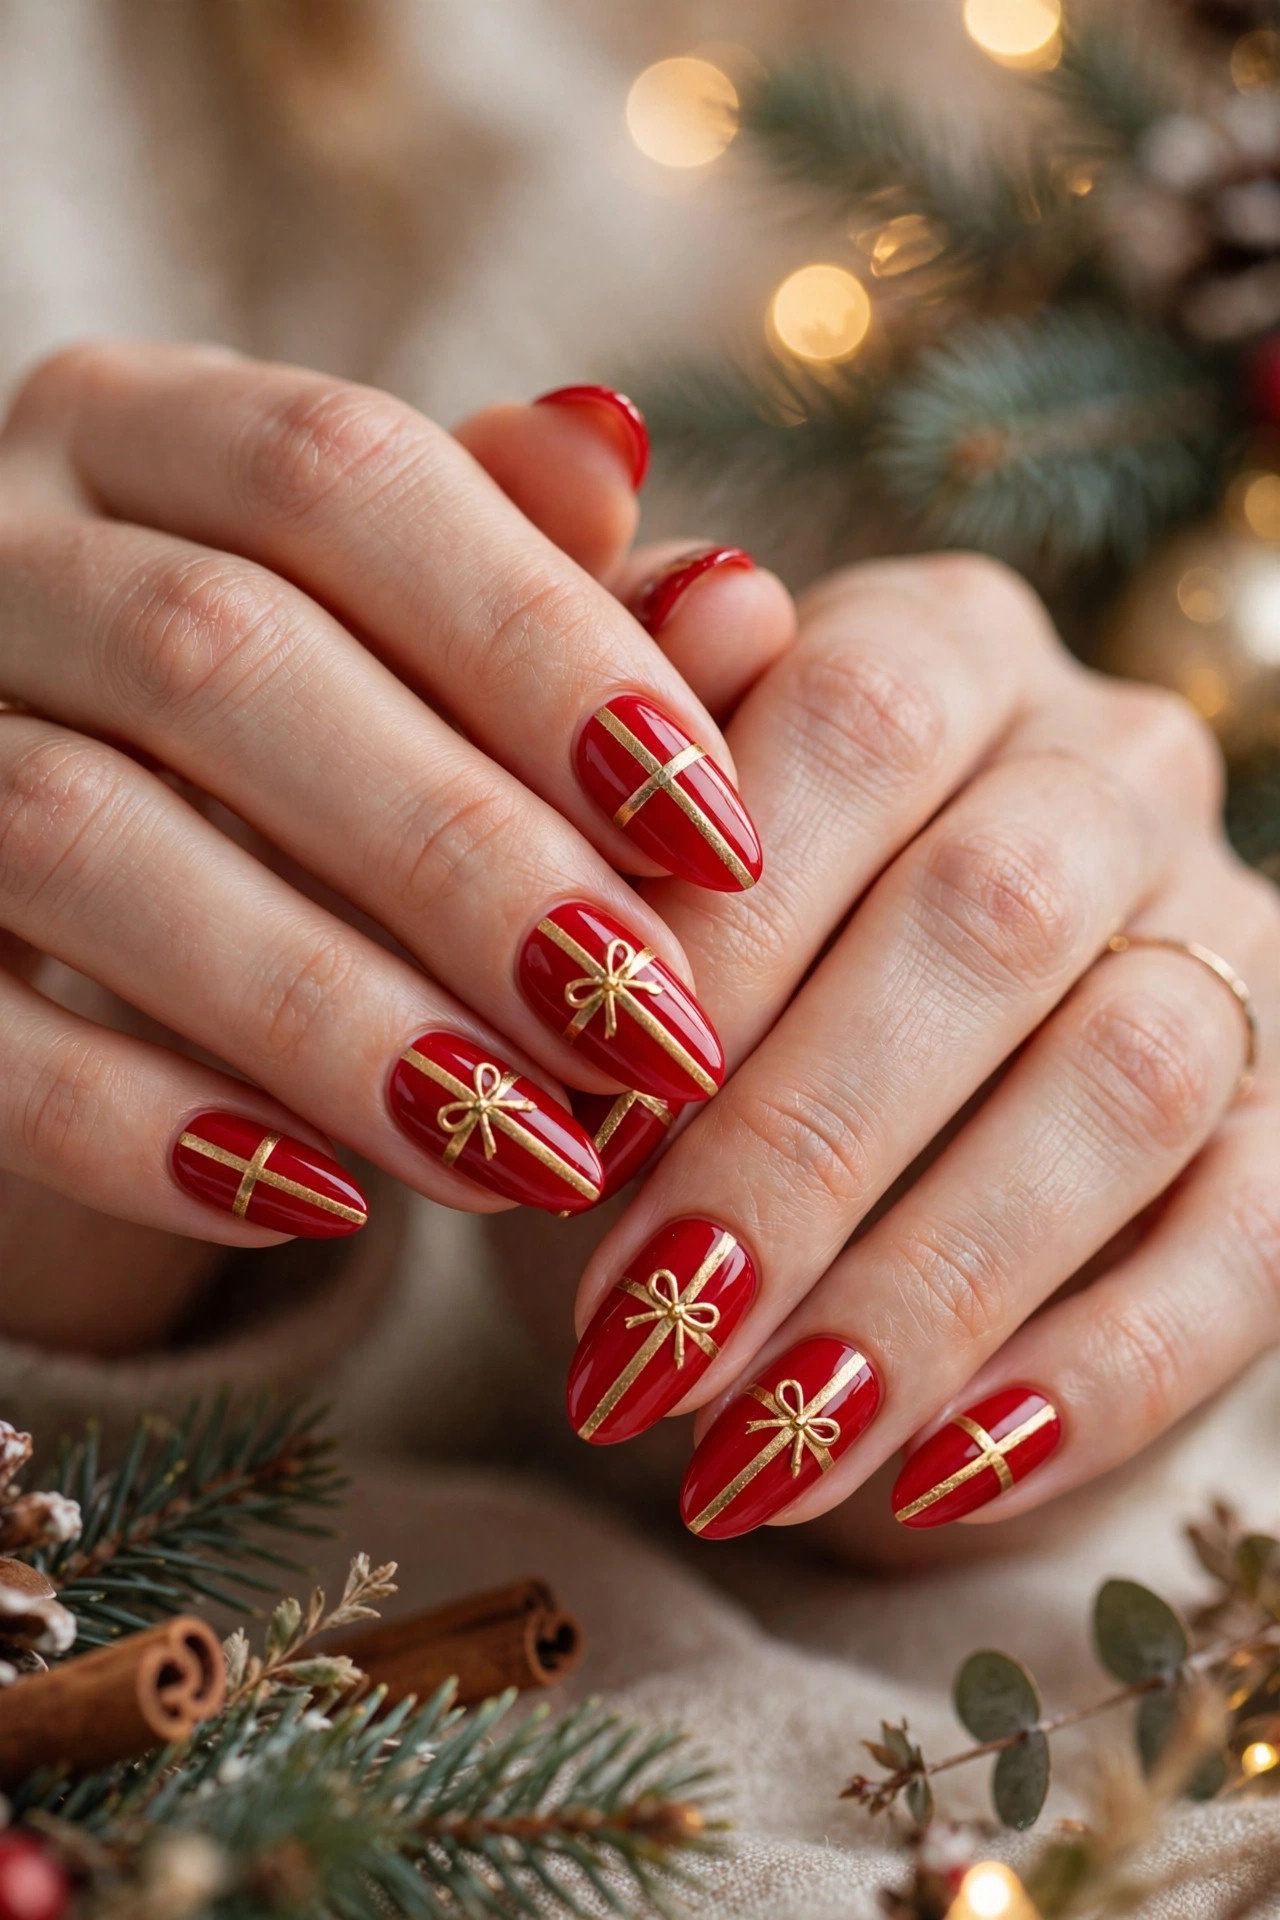
24. Gift Wrap Bows
Skill level: Intermediate | Time: 45 minutes | Key products: any base color polish, contrasting ribbon color, detail brush
Paint two coats of your base color — red with gold ribbon, green with white ribbon, or navy with silver all work. Let dry fully. With a detail brush, paint a vertical and horizontal stripe crossing in the center (the ribbon). At the intersection, paint two small triangles pointing outward (the bow loops) and two short lines hanging down (the ribbon tails). The bow sits at the center of the nail. Do the bow on every nail for maximum gift-wrap effect, or on 2 accents over a solid base. Top coat.
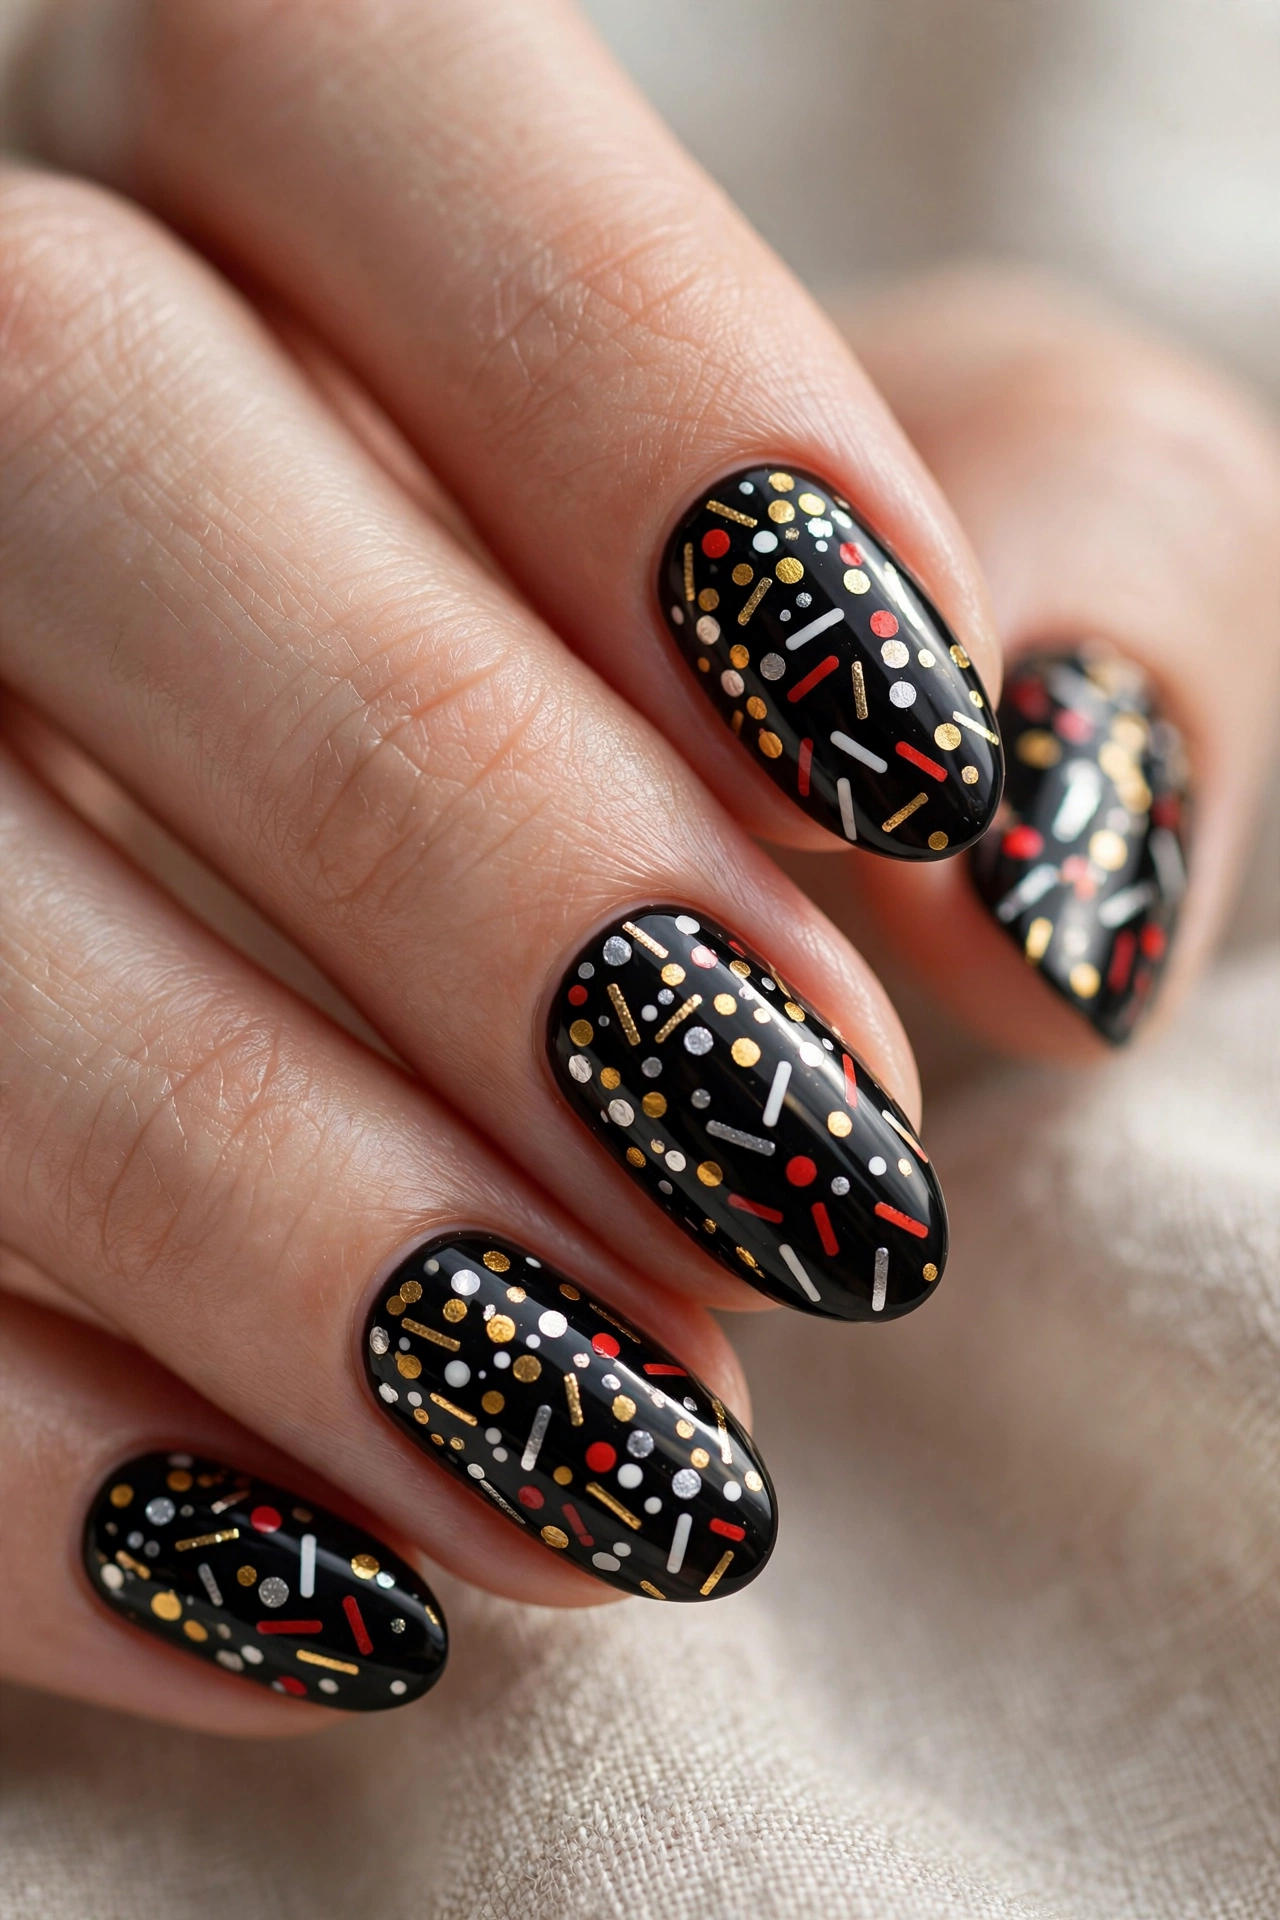
25. New Year’s Eve Confetti
Skill level: Beginner | Time: 20 minutes | Key products: black or deep navy polish, 3 to 4 bright polishes, dotting tool or toothpick
Paint two coats of black or deep navy and dry. Using a dotting tool dipped in bright colors — gold, silver, red, white — place random dots of varying sizes all over each nail. Add a few tiny dash marks with a toothpick for confetti-streamer variety. There is no pattern to mess up, which is exactly why this is the perfect last design: it takes 20 minutes, uses leftover polish, and carries your manicure straight from Christmas into New Year’s Eve. Two coats of top coat for a glass-smooth finish.
How Do You Make Christmas Nail Art Last Through the Holidays?
Holiday nail art takes real time, so protect the investment with these longevity rules:
- Cap the free edge: run your top coat brush along the very tip of each nail. This seals the edge where chips start and can add 3 to 4 days of wear.
- Reapply top coat every 2 to 3 days: one fresh layer revives shine and reseals any micro-lifts before they become chips.
- Wear gloves for dishes and cleaning: hot water and detergents are the fastest way to lift nail art. Keep a pair of rubber gloves by the sink from December 1.
- Apply cuticle oil daily: hydrated cuticles do not lift, and lifting cuticles pull polish up with them. One drop per nail, massaged in, takes 30 seconds.
If you want your Christmas designs to survive the full two weeks of holiday parties, consider doing them in gel instead of regular polish. Gel versions of these same designs last 2 to 3 weeks without chipping — start with what gel nails are to decide if the system suits you, then follow our full guide to doing and removing gel nails at home for the safe application and soak-off process.
How Do You Remove Glitter and Gel Christmas Nails Safely?
Glitter polish is notoriously stubborn, and peeling it off pulls up layers of your natural nail. The safe method: soak a cotton pad in acetone, place it on the nail, wrap the fingertip in foil, and wait 10 to 15 minutes. The glitter slides off with gentle pressure from a cuticle pusher — no scraping needed.
For gel versions of these designs, the same soak-off approach applies, and it genuinely matters: dermatologists warn that improper gel removal — peeling, picking, or aggressive scraping — is what causes most gel-related nail damage, not the gel itself, and they recommend protecting skin from UV exposure during curing as well (Newswise, via the American Academy of Dermatology). Never peel a lifting design; rewrap and soak instead.
Frequently Asked Questions
1. What is the easiest Christmas nail art for a complete beginner?
The glitter fade (design 5) and champagne sparkle dots (design 15) are the two easiest. Both need only a base color, a glitter polish, and 20 minutes. There are no lines to draw and no symmetry to match, so they look good even on your first try.
2. Can I do Christmas nail art without any special tools?
Yes. A bobby pin replaces a dotting tool, a toothpick replaces a detail brush for dots and drags, and tape from a drawer works for straight lines. The only thing worth buying is a good white polish and a quick-dry top coat, since those two products affect the final look the most.
3. How far in advance should I do my Christmas nails?
Do them 1 to 2 days before your main event. Regular polish nail art lasts 5 to 7 days with proper top coat maintenance, so nails done on December 23 look fresh on Christmas Day. Gel versions last 2 to 3 weeks and can be done up to 10 days early.
4. Which Christmas nail designs last the longest?
Solid colors with simple accents (designs 6, 15, 20) last longest because chips are less visible and there are fewer layered edges to lift. Intricate designs with many layers — plaid, snow globes — show wear first at the layer boundaries, so reserve those for the week of the event.
5. Can I do Christmas nail art on short nails?
Absolutely — most of these designs were described with short to medium nails in mind. Dots, glitter fades, and single-accent designs (tree, bauble, reindeer) actually look better on shorter nails because the design fills the nail nicely. Only the plaid and snow globe benefit from extra length.
6. How do I stop red polish from staining my nails?
Always use a base coat, and apply two thin coats of it under red or burgundy shades. If staining still happens, buff the nail surface lightly and soak fingertips in a mixture of warm water and lemon juice for 5 minutes. Prevention beats correction: never skip base coat with dark holiday colors.
7. What is the best top coat for glitter Christmas nails?
Use a thick, glossy top coat and apply two layers over any glitter design. Glitter has texture that a single thin top coat cannot smooth, and rough glitter catches on hair and fabric. Let the first top coat layer dry 5 minutes before the second for a glass-smooth finish.
8. Can I mix and match different Christmas designs on one hand?
Yes, and it usually looks better than ten identical nails. A good formula: solid color on 6 nails, one detailed design (tree, snowflake) on 2 accent nails, and glitter on 2 more. Keep all designs in the same color family — reds, greens, and golds together — so the mix looks intentional rather than random.
9. Where can I find good holiday polish shades?
Every major brand releases a holiday collection in October or November with festive reds, greens, and glitters. OPI’s official site is a reliable place to browse current seasonal shades, including their holiday collections, and most drugstore brands release affordable limited-edition holiday sets at the same time.
10. How do I fix a smudged Christmas nail design without starting over?
If the smudge is in the top coat only, let it dry completely, then buff the smudged area very lightly and apply a fresh top coat — it often disappears. If the design itself smudged, dip a small brush in remover, carefully wipe just the damaged nail back to the base color, and redo that one nail. Never try to paint over a wet smudge; it always makes it worse.