How to Do and Remove Dip Powder Nails at Home
Dip powder occupies an interesting middle ground in the world of at-home nail enhancements. It’s more durable than regular polish, doesn’t require a curing lamp the way gel does, and tends to build up a bit more structure than a standard gel manicure, all while still being genuinely doable at home once you understand the layering process. The removal side trips people up just as often as application, mainly because dip powder is more resistant to acetone than gel, which means rushing the process usually ends badly.
This guide covers exactly how dip powder application works from start to finish, what you’ll need, the correct layering and activator technique, how to remove a dip manicure safely, and the mistakes that most commonly cause problems on either end of the process.
How to Do Dip Powder Nails at Home: The Basic Process

Dip powder nails are built by applying a bonding base coat, dipping or brushing on colored powder in multiple thin layers to build opacity and structure, then sealing everything with an activator that chemically hardens the layers without needing a UV or LED lamp. Once fully set, the nail is filed and shaped, then finished with a top coat for shine.
Unlike gel, which cures under light, dip powder hardens through a chemical reaction triggered by the activator product, which is part of why it doesn’t require any lamp at all. This also means the working process moves at a different pace than gel, since you’re not racing against a curing timer between each individual step.
What You’ll Need

A handful of specific supplies make dip powder application possible, and most of them are designed to be reused across many future manicures.
A dip system typically includes a bonding base coat, a dehydrator or nail prep solution, your chosen colored dip powder, and an activator or sealer product that hardens the applied layers. You’ll also want a small, soft brush for applying powder if you’re avoiding the traditional dipping-into-a-shared-container method, along with standard prep tools like a file, buffer, and cuticle pusher for shaping and finishing the final result.
Is Dip Powder Safer or More Hygienic to Do at Home Than at a Salon?
Doing dip powder at home genuinely offers a hygiene advantage in one specific way: you’re using your own individual powder container rather than repeatedly dipping into a shared pot that multiple clients have used, which is a legitimate sanitation concern some salons haven’t fully addressed. Brushing powder onto the nail instead of dipping directly into a container, a technique many at-home kits now recommend, further reduces any risk of cross-contamination even within your own personal supply.
Step-by-Step: Applying Dip Powder
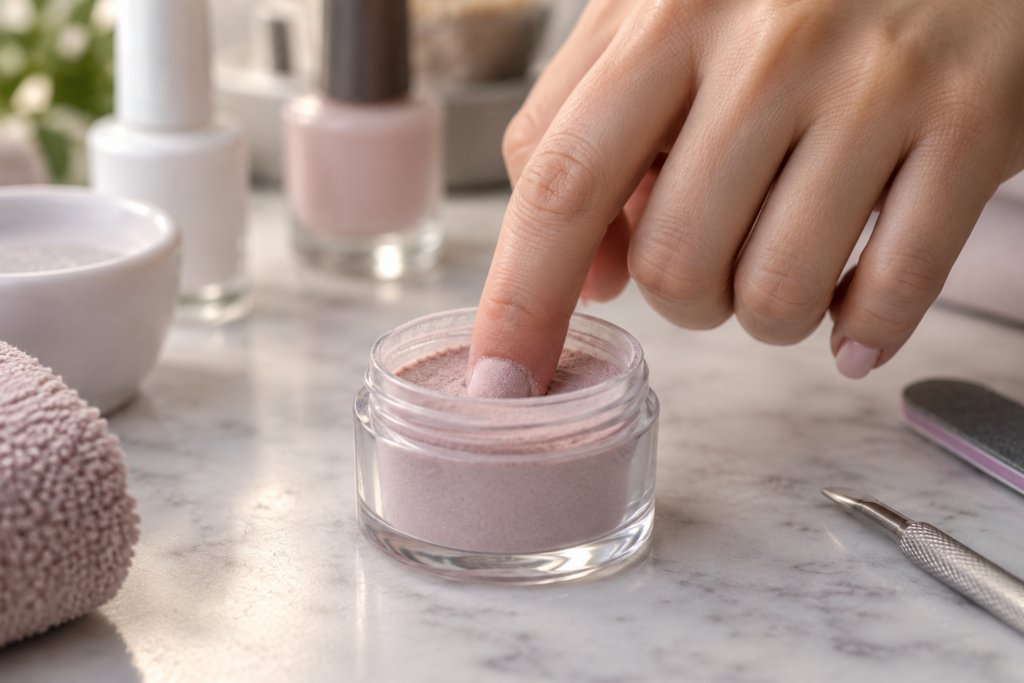
Start with clean, shaped nails, cuticles pushed back and the nail surface lightly buffed to remove shine, which helps the base coat adhere more effectively. Wipe nails with a dehydrator or prep solution to remove any remaining oils.
Apply a thin, even layer of the bonding base coat. While it’s still tacky, either dip the nail directly into the powder container or brush powder onto the nail, tapping off any excess. Repeat this process for two to three layers total, allowing each layer to build coverage and structure gradually rather than trying to achieve full opacity in a single dip.
Once you’ve built up enough layers, apply the activator or sealer product according to your specific system’s instructions, which chemically hardens the powder layers into a solid, durable surface. After the activator has set, file and shape the nail to smooth out any texture or unevenness from the dipping process, then buff lightly before applying a top coat for shine, since dip powder tends to dry with a naturally more matte finish underneath.
How Long Does It Take for Dip Powder Nails to Fully Cure?
Dip powder typically hardens within a few minutes of activator application, often reaching a workable, filing-ready state relatively quickly compared to waiting on individual gel cure cycles under a lamp. That said, giving the full set a bit of extra time before subjecting it to significant pressure or impact helps ensure the layers have fully set throughout, not just on the surface.
Can You Do Dip Powder Nails Without an Activator?
No, the activator or sealer step is a genuinely essential part of the dip powder system, since it’s what chemically hardens the powder layers into a durable, wearable finish. Skipping this step leaves the powder layers loose, chalky, and prone to crumbling rather than forming the solid, cohesive surface dip powder is known for.
How to Remove Dip Powder Nails Safely
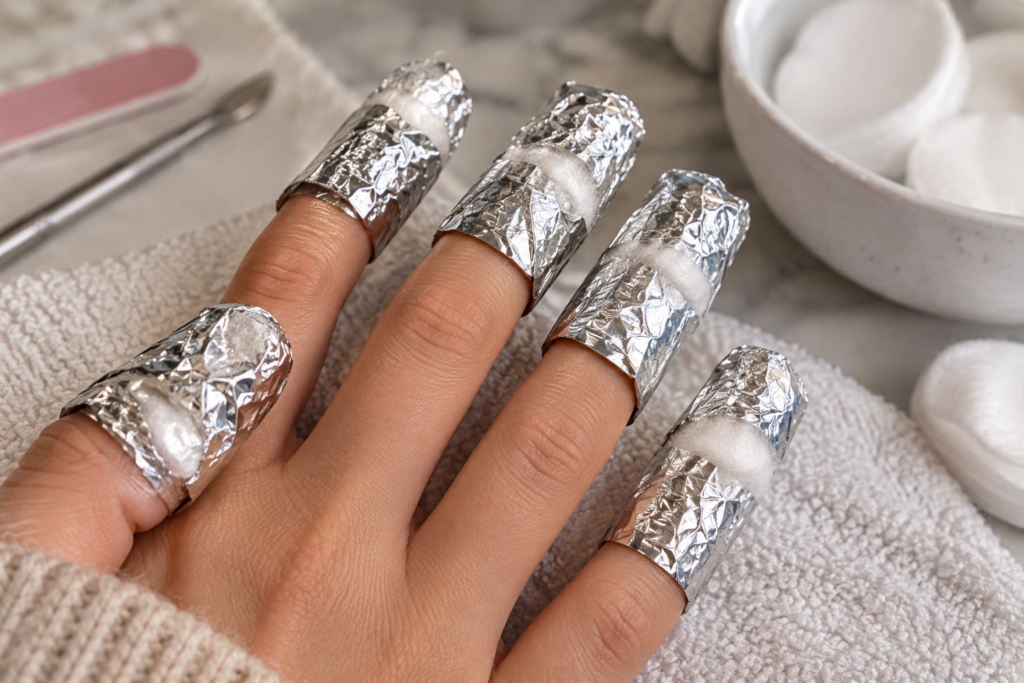
Dip powder removal follows the same core acetone soak-off principle as gel and acrylic, though it generally takes a bit longer than gel due to its thicker, more built-up layered structure.
File down the top sealed surface lightly to help acetone penetrate more effectively, then apply petroleum jelly around the surrounding skin to protect it from prolonged acetone exposure. Wrap each nail in an acetone-soaked cotton pad secured with foil, and let nails soak for roughly twenty to thirty minutes, checking periodically after the first fifteen.
Once the dip powder has softened enough to feel loose or start flaking, gently push it away with a cuticle pusher, working patiently rather than forcing any areas that still feel firmly attached. Rewrap and continue soaking any stubborn spots rather than trying to speed things along with extra pressure or scraping.
Why Does Dip Powder Take Longer to Remove Than Gel Polish?
Dip powder generally takes longer to remove than standard gel polish because it’s typically applied in thicker, more built-up layers, giving acetone more material to fully penetrate and soften before it can be safely removed. This is part of why patience matters so much during dip removal specifically, since rushing the process before it’s fully softened significantly increases the risk of damaging the natural nail underneath.
Common Mistakes With Dip Powder Application and Removal

A handful of recurring errors show up consistently in at-home dip powder attempts, both during application and later during removal.
Applying powder layers too thick, either by over-dipping or not tapping off excess properly, can lead to a bulky, uneven final result that’s harder to file smooth without excessive buffing. Skipping proper nail prep, particularly the dehydrating step, can lead to poor adhesion and premature lifting, similar to skipping primer with acrylic.
On the removal side, giving up on soaking too early and trying to force off dip powder that hasn’t fully softened remains the most common and most damaging mistake, since it risks pulling away layers of the natural nail plate the same way improperly removed gel or acrylic can.
Frequently Asked Questions
1. How long does a dip powder manicure typically last?
A dip powder manicure generally lasts about three to four weeks before noticeable regrowth or wear makes removal and reapplication worthwhile, often slightly longer than a standard gel manicure due to its more durable, built-up structure.
2. Can you apply dip powder directly over gel polish or regular polish?
No, dip powder needs to be applied to a clean, properly prepped natural nail or an existing dip application, since applying it over gel or regular polish would prevent proper adhesion and likely result in poor durability and premature lifting.
3. Does dip powder smell as strong as acrylic during application?
No, dip powder application generally has a much milder odor than acrylic, since it doesn’t involve the same liquid monomer used in acrylic systems, making it a more comfortable option for anyone sensitive to strong chemical smells.
4. Can you add nail art on top of a dip powder manicure?
Yes, nail art can be applied on top of finished dip powder, either with regular polish, gel polish, or hand-painted designs, typically added as a final step once the dip layers are fully shaped, buffed, and sealed with a top coat.
5. Is dip powder more durable than gel polish for people who work with their hands a lot?
Yes, dip powder is generally considered more durable and chip-resistant than standard gel polish, largely due to its layered, built-up structure, making it a popular choice for people whose daily activities put more wear and tear on their nails.
6. Can you use the same dip powder container indefinitely, or does it need replacing?
Dip powder containers can be used for an extended period as long as they’re kept clean and free of contamination, though many people eventually replace them once the powder runs low or shows signs of clumping or discoloration from repeated use.
7. Does dip powder require a UV or LED lamp at any point in the process?
No, dip powder hardens entirely through the chemical activator rather than light-based curing, which is one of its key differences from gel and part of why it doesn’t require any lamp equipment at all.
8. Why does my dip powder manicure look bumpy or uneven after application?
Uneven texture usually results from inconsistent powder application, excess powder that wasn’t properly tapped off, or insufficient filing and buffing after the activator sets, and taking extra time during the shaping and smoothing step generally resolves this.
9. Can you remove dip powder without acetone at all?
Removing dip powder without acetone is genuinely difficult and would require extensive filing alone, which risks significantly thinning the natural nail, making acetone the recommended and considerably safer removal method for this particular system.
10. Is dip powder a good option for people with weak or damaged natural nails?
Dip powder can offer some added structural support for naturally weak or thin nails, though it’s still worth giving significantly damaged nails some recovery time before applying any enhancement, since the application and later removal process still place some demand on the nail underneath.