How to Do Highlights at Home: Step-by-Step Guide for Natural Results
A good set of highlights can make hair look brighter, more dimensional, and surprisingly polished. A bad set can produce thick stripes, orange sections, spotted roots, or fragile ends that take months to grow out.
The difference is rarely just the lightener. Placement matters. Section size matters. Your starting color, previous dye history, hair condition, and even the amount of product on the brush can change the result.
At-home highlights are most manageable when the goal is modest: a few brighter pieces around the face, subtle ribbons through naturally light to medium hair, or refreshing an existing highlight pattern. Trying to transform very dark, repeatedly dyed, fragile, or heavily processed hair into a dramatically lighter shade is much less predictable.
The safest approach is to work slowly, keep the sections controlled, and stop chasing perfect blonde in a single session. Hair can always be lightened again after it has recovered. Hair that has been overprocessed cannot simply be put back together.
Before You Highlight Your Hair at Home
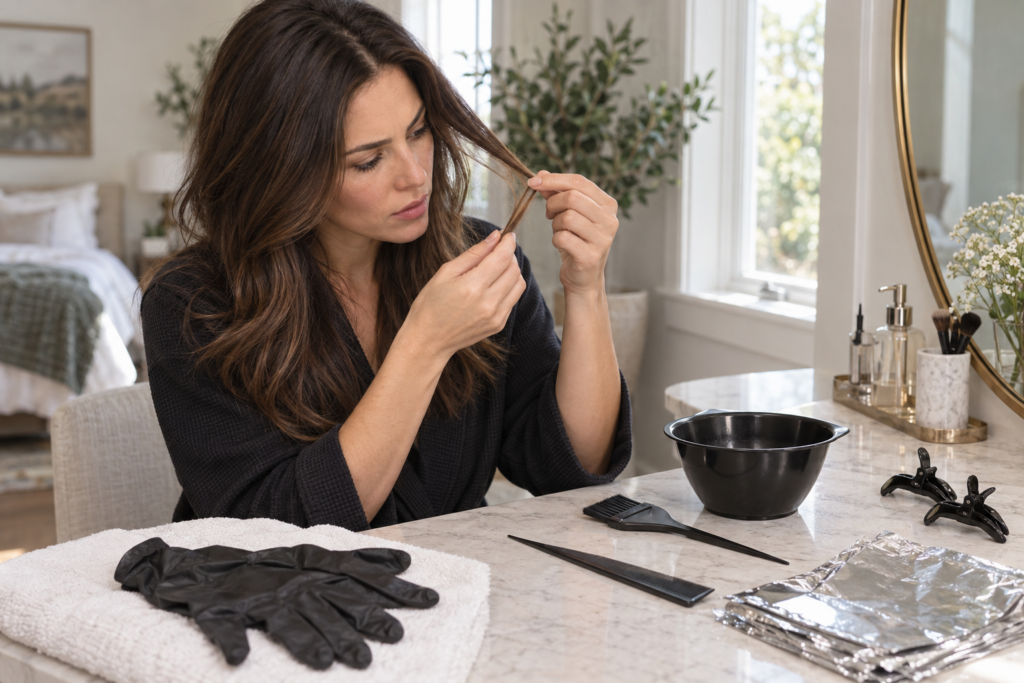
Successful home highlights start before any lightener touches the hair. Check your color history, examine the condition of your ends, perform the recommended allergy and strand tests, gather every tool you need, and decide exactly where the lighter pieces will go. Improvising halfway through application is one of the easiest ways to create uneven color.
Start by looking at your hair in daylight.
Separate a few sections and inspect the roots, mid-lengths, and ends individually. Hair can look healthy from a distance while the last several inches are actually porous from old bleach, permanent dye, heat styling, or sun exposure.
Stretch a damp strand gently. Healthy hair has some resilience. Hair that feels unusually gummy, mushy, rough, or snaps with little tension is not a good candidate for another lightening session.
Previous color history matters just as much.
Natural brown hair behaves differently from brown hair that has been repeatedly covered with permanent brunette dye. Lightener may lift virgin roots relatively quickly while previously dyed lengths stay orange, red, or much darker.
That is how accidental color bands happen.
If your hair contains black box dye, layers of dark permanent color, metallic or unknown colorants, henna mixtures, or several rounds of bleach, professional correction is usually the safer choice.
Perform the allergy test required by the coloring system even if you have colored your hair before. Sensitivity can develop over time.
A strand test serves a different purpose. It shows what the lightener actually does to your hair.
Choose a small hidden section and apply the exact mixture you intend to use. Watch how quickly it changes, how light it becomes, what undertone appears, and how the strand feels afterward.
Do not judge only by whether the strand becomes lighter.
If it reaches a pretty color but feels dramatically weaker, your hair is telling you that pushing the rest of your head to the same level may be a poor trade.
Can You Highlight Previously Dyed Hair at Home?
You can highlight some previously colored hair at home, but the result is less predictable than highlighting virgin hair. Artificial pigment can resist lightening and expose strong red, orange, or yellow undertones. Hair with repeated dark dye, bleach damage, or uneven color bands is better handled professionally because different sections may require completely different treatment.
Think about your color history rather than the shade you see in the mirror today.
A brunette who used permanent dark brown dye six months ago still has that artificial pigment through the lengths even if the color has faded.
New root growth may lift differently.
Old highlighted ends may lift differently again.
Applying one lightener mixture across all three zones can create pale roots, orange mid-lengths, and overprocessed ends.
If your color history is simple and the strand test behaves well, subtle highlights may still be possible. Keep the goal conservative and avoid repeatedly painting areas that are already light.
Choose Your Highlight Placement Before Mixing Anything

Natural-looking highlights are created by deliberate placement, not by making every strand lighter. For most home applications, concentrating brightness around the face, along the part, and through selected surface sections creates more impact with less chemical processing than trying to highlight the entire head evenly.
Decide first whether you want fine traditional highlights, soft face-framing pieces, or a loose balayage effect.
Fine woven highlights create the most blended result. They work well when you want brightness distributed through the hair without obvious chunks.
Face-framing highlights concentrate light around the hairline. They can make the entire color appear brighter even when most of the back remains natural.
Balayage-style placement creates softer growth because the lightener begins below the root and is painted through selected mid-lengths and ends. It is often easier to maintain, although painting the back of your own head evenly can be difficult.
Avoid making every highlighted section the same width.
Realistic dimensional color contains variation. Fine ribbons near the hairline can sit beside slightly broader pieces underneath. Leaving plenty of untouched natural hair between highlights keeps the finished result from becoming one solid lighter color.
Your part deserves particular attention.
Highlights placed directly along a center part are highly visible. Thick sections here can look striped. Very fine sections usually blend more naturally.
The hairline behaves differently because those hairs are often finer and may lighten faster. Use delicate sections rather than heavily saturating large pieces around the temples.
How Many Highlights Should You Do at Home?
There is no ideal number of highlights because density depends on your haircut, thickness, existing color, and desired brightness. For a first home attempt, fewer carefully placed sections are usually better than covering the entire head. Face-framing pieces and selected highlights along the top can create noticeable dimension without making correction difficult later.
Start visually rather than numerically.
Imagine where sunlight would naturally brighten the hair: around the face, across the crown, and on the upper layers.
Those areas usually deserve attention first.
Hair underneath the back sections contributes far less to the overall appearance when the hair is worn down. Spending excessive time highlighting every hidden strand increases processing without necessarily improving the finished look.
Spacing is equally important.
If you place one highlighted slice directly beside another, they visually merge into a larger blonde block. Leaving natural hair between them creates contrast, and contrast is what makes highlights visible.
How to Do Highlights at Home Step by Step
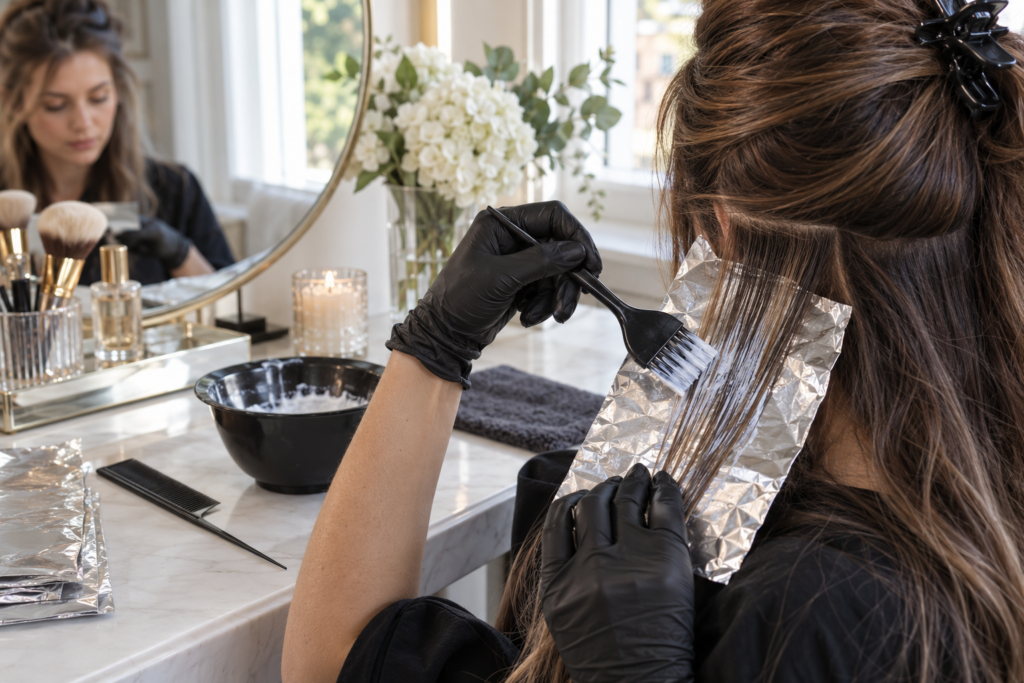
For controlled home highlights, work on dry, detangled hair and divide it into clean sections before applying color. Prepare only the system you intend to use, follow its mixing instructions precisely, work with thin sections, fully saturate the hair you choose to lighten, and check development regularly rather than relying only on the clock.
Step 1: Prepare Your Hair and Workspace
Begin with dry hair that is easy to section.
Hair should not be coated in heavy oils, dry shampoo, styling wax, or layers of leave-in products. You want to see and control individual strands clearly.
Detangle carefully before you start.
Once lightener is on the hair, you should not be aggressively brushing knots apart.
Cover the working surface and wear clothing you do not mind staining. Put on gloves before mixing the color.
Keep your tint brush, nonmetallic bowl, tail comb, clips, foils or other separation material, old towel, timer, and mirror within reach.
If you need to walk around the house looking for clips after application has started, your first sections are processing while the later ones have not even been applied.
That timing difference can become visible.
Step 2: Divide the Hair Into Manageable Sections
Create a clean center or usual part first.
Then divide the hair into larger working sections around the front, sides, crown, and back. Secure each section separately.
Do not release the entire head at once.
Work through one controlled area before moving to another.
If you are new to highlighting your own hair, begin where precision matters most, usually the front and visible upper sections. The back is harder to see and often benefits from fewer, simpler placements.
Use a second mirror if you plan to work behind the crown.
Step 3: Select Thin Highlight Sections
Release a small amount of hair from your first working section.
For classic highlights, use the pointed end of a tail comb to weave through the section, picking up alternating fine strands.
The thinner and more irregular the weave, the softer the highlight tends to look.
Very thick, perfectly rectangular sections often create the obvious striped effect people associate with unsuccessful home highlights.
Keep your first few sections conservative.
You can always add more brightness later.
Step 4: Apply Lightener Carefully
Place your foil or chosen support beneath the selected strands and hold the section with enough tension to keep it controlled.
Apply the prepared lightener according to its instructions.
Coverage should be even. Dry patches within a highlighted strand can create uneven lifting.
At the same time, more product is not automatically better. You need complete saturation, not a dripping mass that squeezes out of the foil.
Keep the product where you intend it to be.
Bleach that expands or smears onto neighboring hair can cause spots and unintended light sections.
Fold or secure each section carefully before moving on.
Step 5: Keep Root Placement Soft
Natural highlights rarely look best when every piece begins as a hard horizontal line at exactly the same distance from the scalp.
For traditional foil highlights, work carefully near the root without overlapping unnecessarily onto the scalp or previously lightened hair.
For a softer effect, some sections can begin slightly lower.
Face-framing pieces may sit closer to the root because that is where visible brightness has the most impact.
Balayage placement is different. The color is intentionally feathered upward, leaving a diffused transition rather than a solid line.
Whatever technique you choose, consistency matters more than perfection.
Do not switch randomly between thick foils, chunky painted sections, and fine weaves simply because you become impatient halfway through.
Step 6: Watch the Hair as It Processes
Set a timer according to the coloring system’s directions, but physically inspect the hair during processing as instructed.
Hair goes through warm stages while lightening.
Dark brunette hair may expose red and orange before reaching lighter yellow tones. That does not mean something has automatically gone wrong. Natural underlying pigment becomes visible as darker color is removed.
Do not keep extending processing simply because you want icy blonde.
There is a limit to how far one session should push the hair.
If the strand has reached the maximum processing time stated for your system, or if the hair begins to feel compromised, rinse.
The health of the hair matters more than forcing one specific shade.
Step 7: Rinse Thoroughly
Once the highlights have reached an appropriate level, rinse the lightener completely from the hair.
Take your time.
Residual lightener hidden inside thick hair can continue affecting the strand.
Use comfortable water and gently separate the highlighted pieces as you rinse. Avoid rough scrubbing or piling wet processed hair on top of the head.
Freshly lightened hair is more vulnerable to mechanical damage.
Follow the cleansing and conditioning directions for the color system you used.
Step 8: Assess the Tone Before Making Another Decision
Dry a small area enough to evaluate the actual color.
Wet hair often appears darker and can make tone difficult to judge.
You may discover that the highlights are a warm caramel, golden blonde, yellow blonde, or somewhere in between.
Do not immediately panic because the hair looks warmer than the inspiration photo.
Lightening and toning are separate processes.
The lightener creates the underlying level. Toner adjusts the visible tone afterward.
Step 9: Tone Only If the Hair Needs It
If the highlights have reached the correct lightness but the undertone is warmer than you want, an appropriate toner or deposit-only color can refine the finish.
Toner cannot turn dark orange hair into pale blonde.
It can only adjust the tone of hair that has already been lightened enough for that target shade.
This distinction prevents a lot of failed home corrections.
A beige finish may need a balance of warmth and coolness. A cooler blonde may require more neutralization. Caramel highlights should retain some warmth rather than being pushed toward gray.
Follow the toner directions exactly and watch porous ends closely because they may absorb pigment faster than healthier areas.
Step 10: Condition and Style Gently
After the final rinse, use a suitable conditioning treatment and handle the hair gently.
Blot excess water rather than aggressively rubbing with a towel.
If possible, keep heat styling modest immediately after highlighting. Freshly lightened hair has already undergone chemical stress.
Once dry, look at the finished color in natural daylight.
Do not judge it only under warm bathroom lighting. Indoor bulbs can make blonde appear much more yellow or orange than it looks outside.
How to Avoid Stripes, Orange Highlights, and Bleach Damage
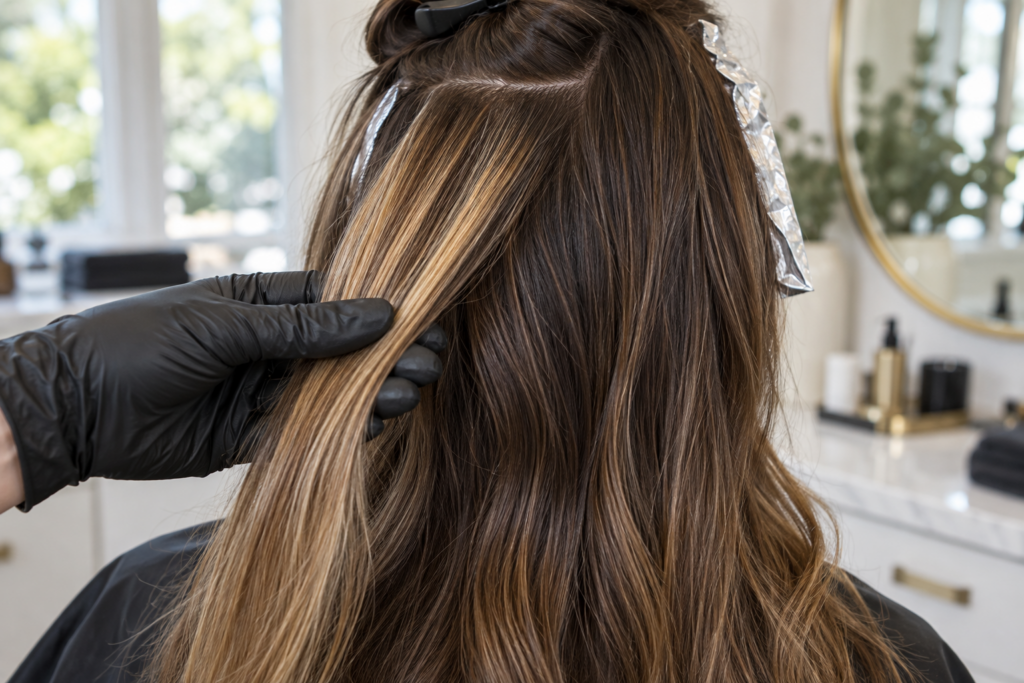
Most home highlighting problems come from placement, uneven saturation, unrealistic lightening goals, or overlap onto previously bleached hair. Thin sections, consistent application, controlled processing, and leaving enough natural hair between highlights prevent many visible mistakes. The most important rule is to avoid repeatedly lightening already fragile sections simply to make the overall result brighter.
Chunky stripes usually begin with sections that are simply too large.
If a half-inch-wide piece is completely lightened from the root, it will look like a half-inch-wide blonde ribbon. Toner cannot make that physical section thinner.
The correction would require introducing darker pieces or waiting for natural growth.
Spacing prevents this.
You should be able to see natural hair between highlighted pieces.
Another common problem is spotting near the roots. This can happen when lightener leaks out of a foil, when too much product is applied close to the scalp, or when the foil shifts during processing.
Keep your sections clean and avoid overloading the brush.
Orange highlights are a different issue.
Brown hair contains warm underlying pigment. If the lightening process stops while a significant amount of that pigment remains, the resulting highlight may appear orange or copper.
Sometimes that warm caramel result is attractive.
Problems arise when you expected pale beige blonde.
Do not try to solve insufficient lightening by repeatedly applying ash toner. Toner can neutralize some warmth, but it cannot replace the missing lightening step.
Bleach overlap is far more serious.
If you are refreshing existing highlights, identify the previously lightened sections and avoid painting strong lightener repeatedly through those same fragile ends.
The new growth may need lightening. The existing blonde often does not.
Repeated overlap is one of the fastest ways to produce breakage.
Why Did My Highlights Turn Orange?
Highlights usually turn orange because the hair did not lighten far enough to move beyond its underlying warm pigment. This is especially common on naturally dark hair and previously dyed brunette hair. A toner may soften orange only if the hair is already light enough; strongly orange sections may require additional controlled lightening at another session.
Do not automatically bleach the hair again the same day.
Assess condition first.
If the strand feels dry but stable, you may be able to revisit it after giving the hair time and care. If it stretches excessively, breaks, feels gummy, or looks severely compromised, further lightening is not worth the risk.
Warmth itself is not always a failure.
Caramel, honey, bronze, and warm beige highlights deliberately contain golden or copper tones. The real question is whether the warmth fits the result you intended.
How to Make Home Highlights Look More Natural
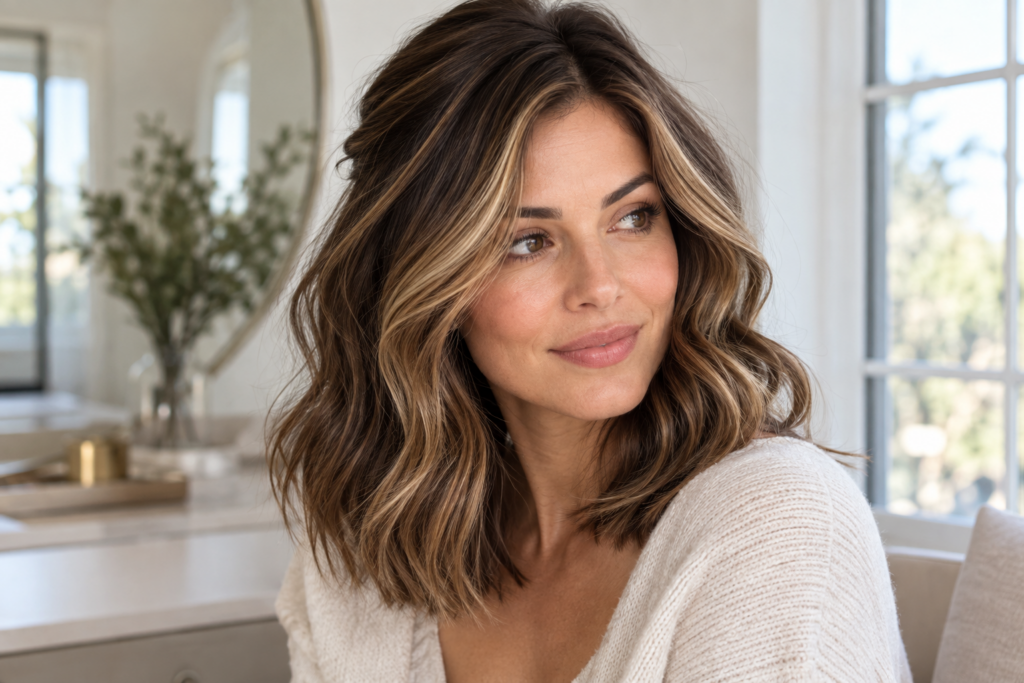
Natural-looking highlights rely on contrast, variation, and thoughtful placement rather than maximum brightness. Keep some natural depth at the roots, use finer pieces around the part and hairline, vary the width slightly, and avoid lightening every visible strand. A few strategically brighter pieces can make the whole head appear highlighted.
The face frame is where a small amount of lightness can make the biggest visual difference.
Take finer pieces around the temples and front hairline. These hairs are often delicate, so they should not be overloaded with lightener.
Move backward with slightly more spacing.
Around the crown, think about how the hair falls when styled. Highlighting only according to rigid section lines can create an unnatural pattern once the hair moves.
Leave depth underneath.
A brunette with caramel highlights looks dimensional because brunette remains visible. If every strand becomes caramel, the result is no longer highlighted brunette. It is essentially an all-over lighter color.
Root softness helps too.
Perfectly uniform bright pieces beginning directly at the scalp create a stronger grow-out line. Slight variation in placement, particularly away from the face, produces a more lived-in effect.
After processing, tonal balance ties everything together.
Very cool highlights against a warm natural brunette can sometimes look disconnected. A neutral, beige, honey, caramel, or softly cool finish may integrate more naturally depending on the base shade.
Your haircut also changes where highlights should sit.
Layered hair exposes the ends of many different sections, so subtle highlights through those layers create movement.
On a blunt bob, large contrasting sections can appear much stronger because several highlighted ends finish along the same horizontal line.
Curly hair benefits from placement that respects the curl pattern. Selecting complete individual curls or strategic ribbons often creates more visible dimension than extremely fine highlights that disappear once the hair coils.
How Do You Do Face-Framing Highlights at Home?
For face-framing highlights, select a few fine sections around the front hairline and temples rather than bleaching one large chunk on each side. Keep the pieces delicate near the roots, increase brightness through the mid-lengths and ends if desired, and regularly check processing because fine hair around the face may lighten faster.
Look at where your hair naturally separates around the face.
The strongest highlight does not necessarily need to sit directly beside the center part.
A slightly deeper root with brightness beginning just below it often looks softer and grows out more gracefully.
Avoid making the two sides perfectly identical. Natural hair movement rarely looks completely symmetrical.
Frequently Asked Questions
Can You Do Highlights at Home Without Foil?
Yes. Some highlighting techniques use a cap, open-air painting, or balayage-style application instead of foil. Foil provides greater separation and helps keep selected strands controlled, while open-air painting can create a softer effect. The best method depends on your experience, hair length, texture, and the result you want.
Should Hair Be Clean or Dirty Before Highlighting?
Hair should be dry, detangled, and reasonably free of heavy styling buildup before highlighting. A small amount of natural scalp oil is not usually a problem, but heavily oily hair covered in dry shampoo, wax, oils, or styling products can make clean sectioning and consistent application more difficult.
Can You Highlight Dark Brown Hair at Home?
Dark brown hair can be highlighted at home, but it often exposes strong red, orange, and gold pigment as it lightens. A subtle caramel or warm brown result is usually more realistic for a conservative home session than trying to achieve very pale blonde immediately, especially on previously colored hair.
How Do You Keep Highlights From Looking Chunky?
Use thin woven sections, leave natural hair between highlighted pieces, and make the finest sections around the part and hairline. Avoid selecting broad slices of hair and saturating them completely from root to end unless a deliberately bold highlight is the goal.
Can Toner Fix Orange Highlights?
Toner can neutralize unwanted warmth when the hair has already been lightened close enough to the desired level. It cannot make significantly under-lightened orange hair pale blonde. If the hair is still too dark, repeatedly applying cool toner may simply create a muddy or dull result.
How Soon Can You Highlight Your Hair Again?
The right timing depends on hair condition rather than a universal schedule. Hair that feels strong and healthy can tolerate future maintenance more easily than hair that is dry, stretchy, brittle, or breaking. Avoid immediately re-bleaching disappointing sections simply to force them lighter.
Can You Highlight Hair That Has Already Been Bleached?
Yes, but previously bleached sections require careful handling. New growth can be highlighted while existing lightened lengths are protected from unnecessary overlap. Repeatedly applying bleach to already pale, porous hair increases the risk of severe dryness and breakage.
Why Are My Roots Lighter Than the Rest of My Highlights?
Roots may lighten faster because natural regrowth has no artificial pigment and receives warmth from the scalp during processing. Previously dyed mid-lengths can resist lightening, creating brighter roots and darker warm lengths. This is particularly common when highlighting hair with a history of permanent brunette color.