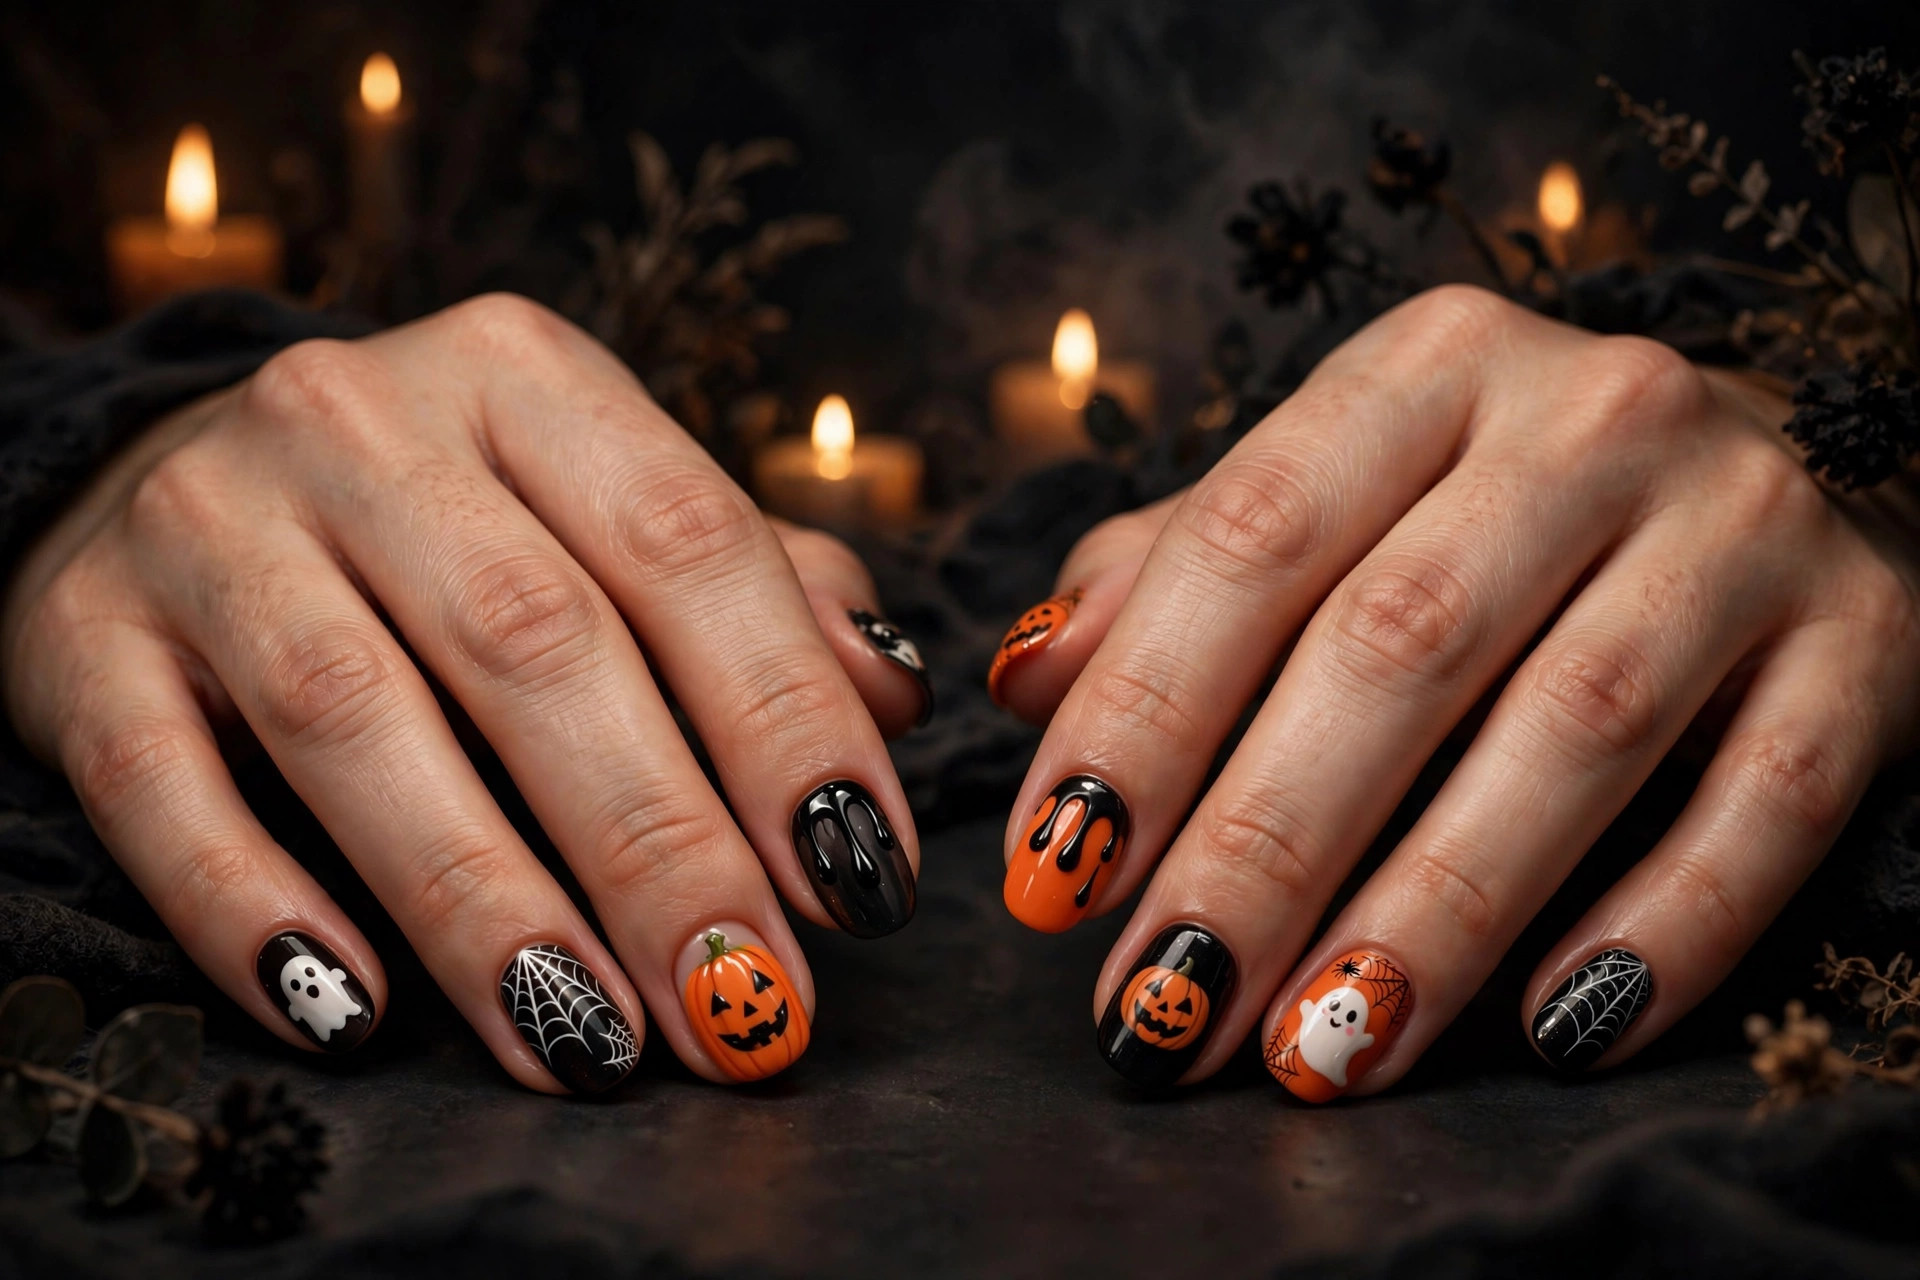
Halloween Nail Art: 20 Spooky-Cute DIY Designs
You want Halloween nails that look spooky but not sloppy — the kind people notice at the party, not the kind that looks like you painted them in the car. The good news is that Halloween nail art is the most forgiving nail art there is. Wobbly lines become cobwebs. Uneven dots become ghosts. Imperfection is literally the aesthetic.
This guide gives you 20 spooky-cute Halloween nail art designs with real mini how-tos. Every design includes a skill level, the key products you need, and exactly how long it takes. Most are beginner-friendly, and the scariest-looking ones are often the easiest to pull off.
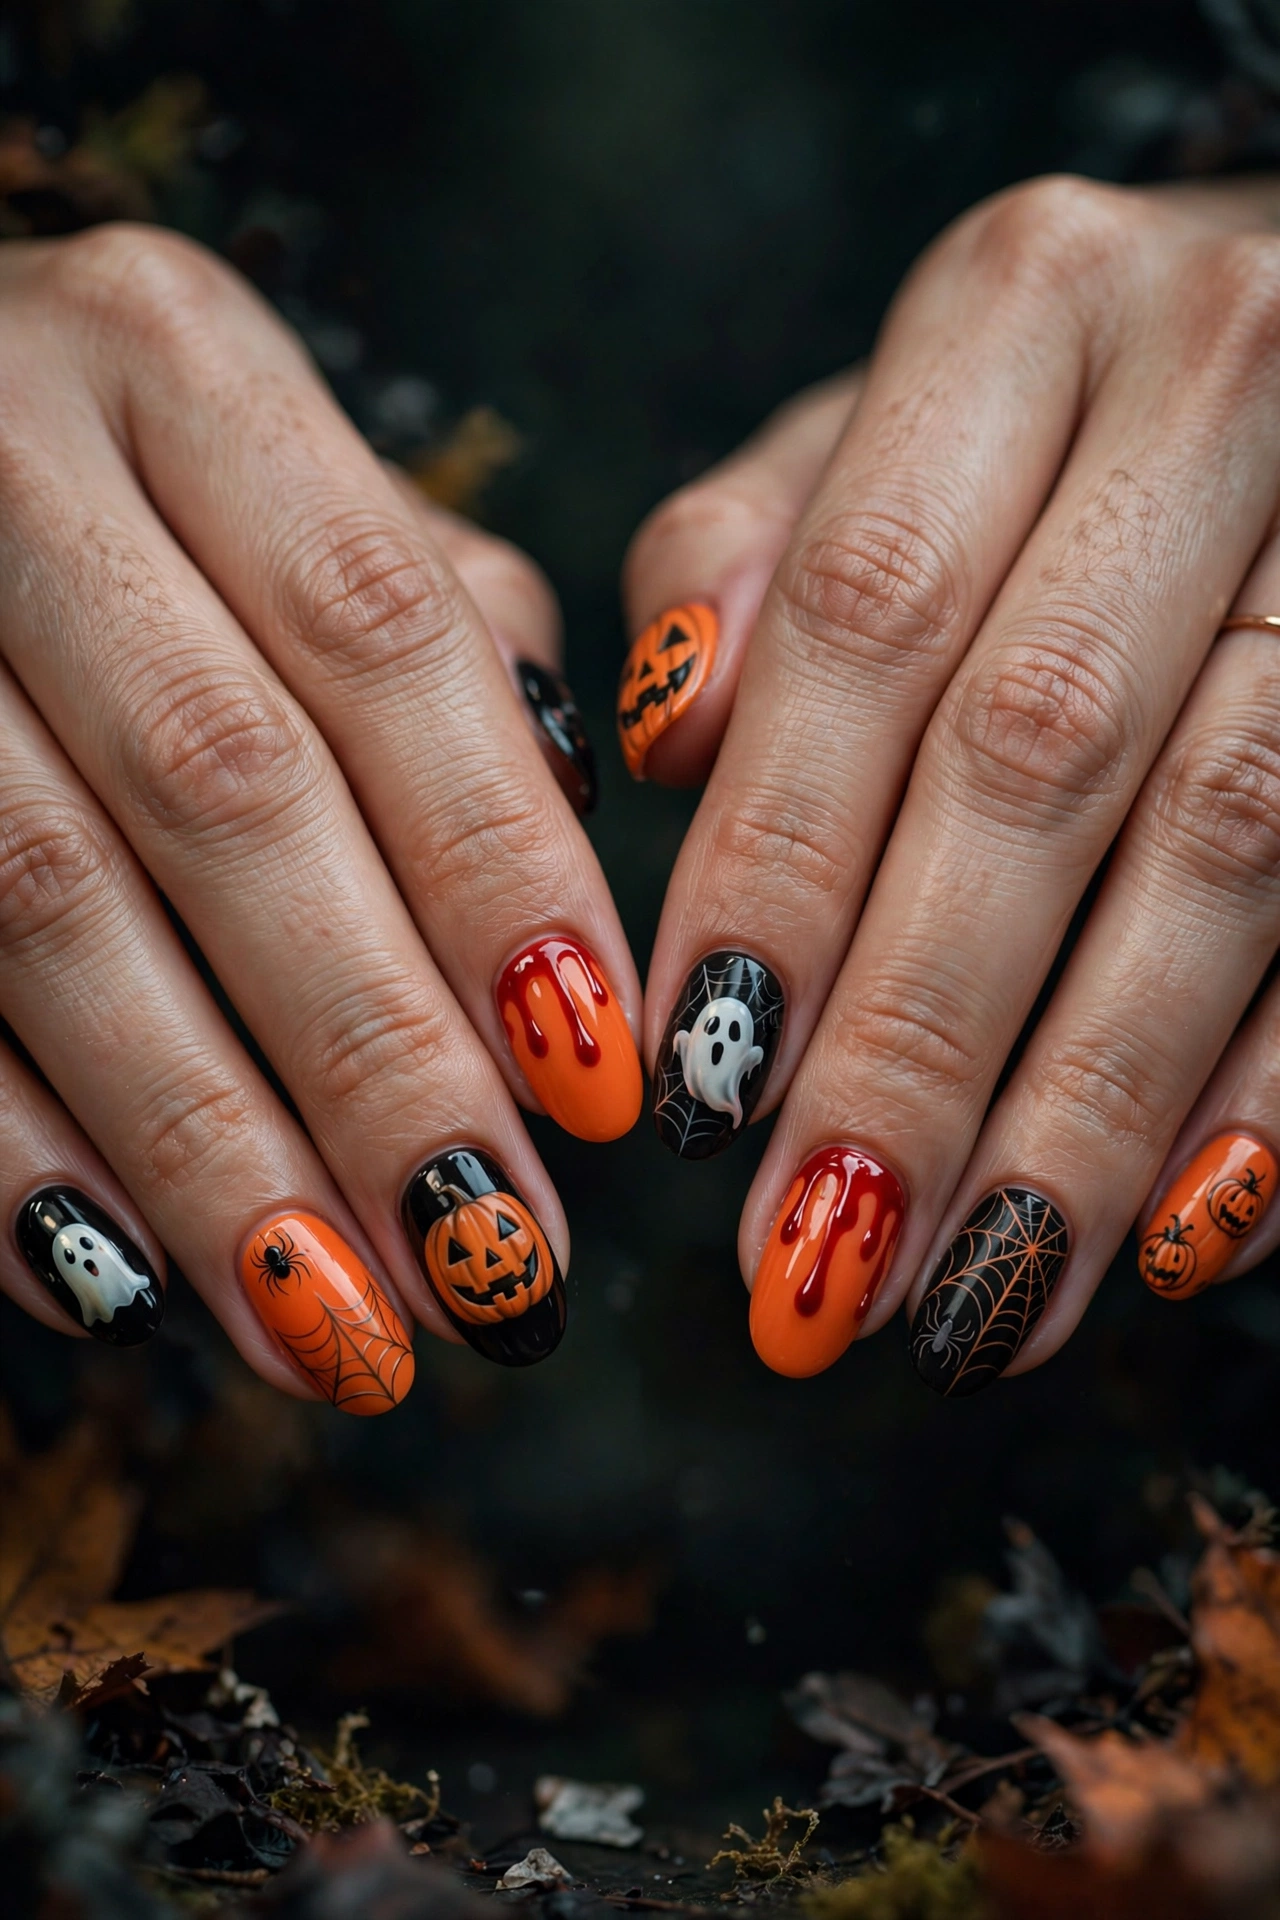
The fastest answer: yes, you can DIY Halloween nail art at home with regular polish, a black and white polish, and a toothpick or bobby pin for details. Beginner designs like ghost faces and blood drips take 20 to 30 minutes, while detailed looks like spider webs or haunted houses take 40 to 55 minutes. You need no special tools and no lamp — and Halloween is the one holiday where messy actually looks intentional.
What Do You Need to DIY Halloween Nail Art?
Halloween nail art needs a smaller kit than Christmas because the palette is so limited. Gather these before you start.
The polish essentials
- Black, white, and orange: the Halloween trinity. These three cover 15 of the 20 designs here. Buy a good orange — cheap oranges go on streaky and need three coats.
- Accent colors: blood red, slime green, purple, and a silver or gold glitter. Red doubles for blood drips and vampire lips; green covers Frankenstein, zombies, and slime.
- Base coat and quick-dry top coat: same as always, but especially important here because dark Halloween colors stain nails badly without a proper base.
The tools
- Dotting tool or bobby pin: ghost faces, spider bodies, pumpkin dots, and eyes are all dots.
- Toothpick or detail brush: for web lines, fangs, and fine details. A toothpick dipped in polish draws surprisingly clean lines.
- Small cleanup brush and remover: black polish on skin is unforgiving, so clean edges as you go.
If your nails need shaping before you start, our guide to how to shape nails covers the almond, coffin, and stiletto shapes that suit Halloween designs best — coffin and stiletto in particular make spooky designs look sharper.
How Long Does Halloween Nail Art Take?
- Beginner designs (designs 1, 2, 4, 5, 10, 12, 16, 18, 20): 20 to 30 minutes. Dots, drips, and simple shapes.
- Intermediate designs (designs 3, 6, 7, 9, 11, 13, 15, 17, 19): 30 to 45 minutes. Lines, layering, and two-step techniques.
- Advanced designs (designs 8, 14): 45 to 60 minutes. Detailed silhouettes that need a steady hand.
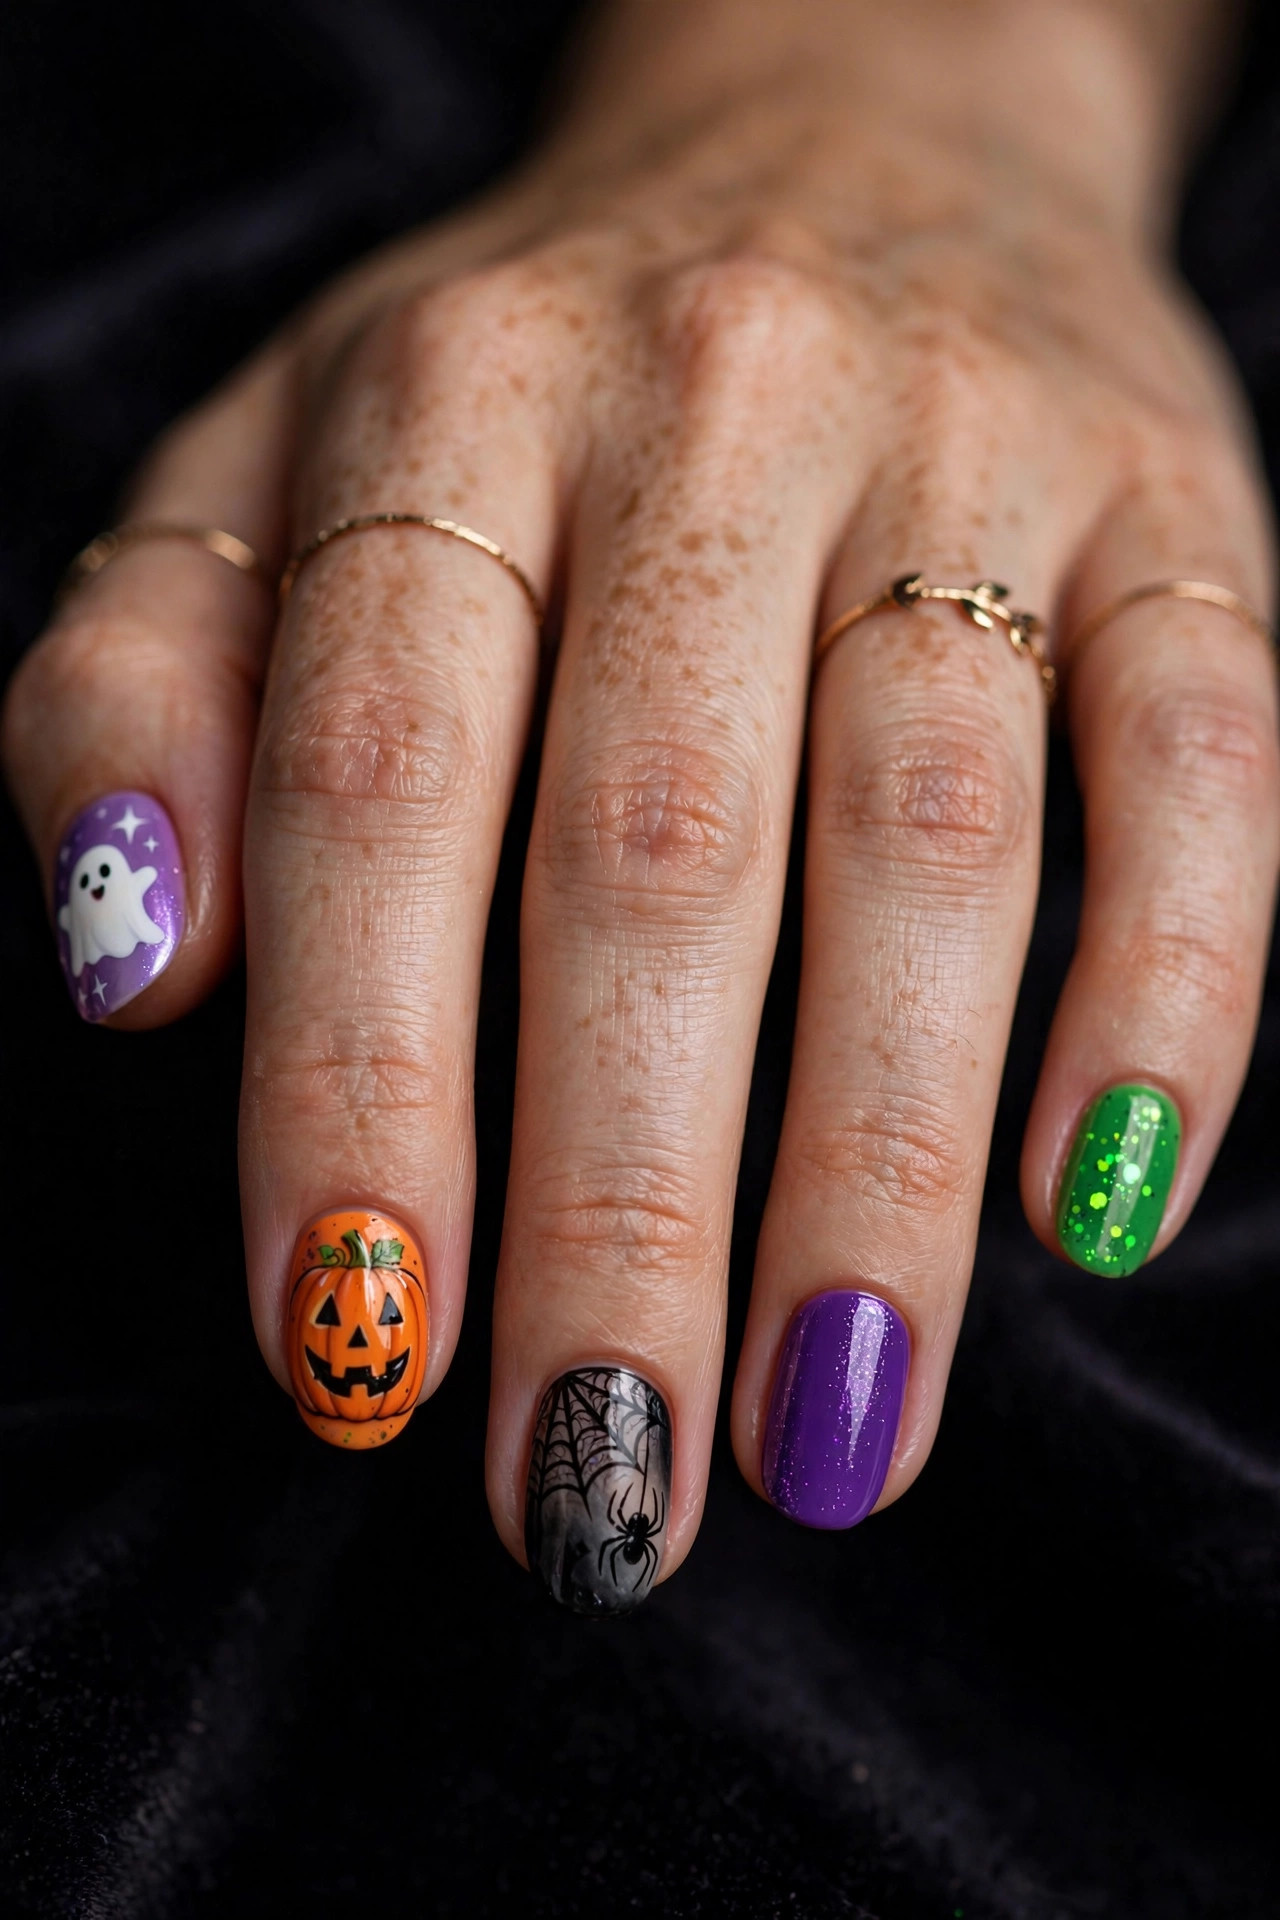
Halloween designs are layered by nature — black over orange, white over black — so let each layer dry 3 to 5 minutes. Black polish smears into everything when it is even slightly tacky.
20 Spooky-Cute Halloween Nail Art Designs to DIY
Each design includes a skill level, key products, real timing, and numbered steps. Start easy and work your way up, or jump straight to the design that matches your costume.
1. Ghost Faces
Skill level: Beginner | Time: 25 minutes | Key products: black polish, white polish, dotting tool
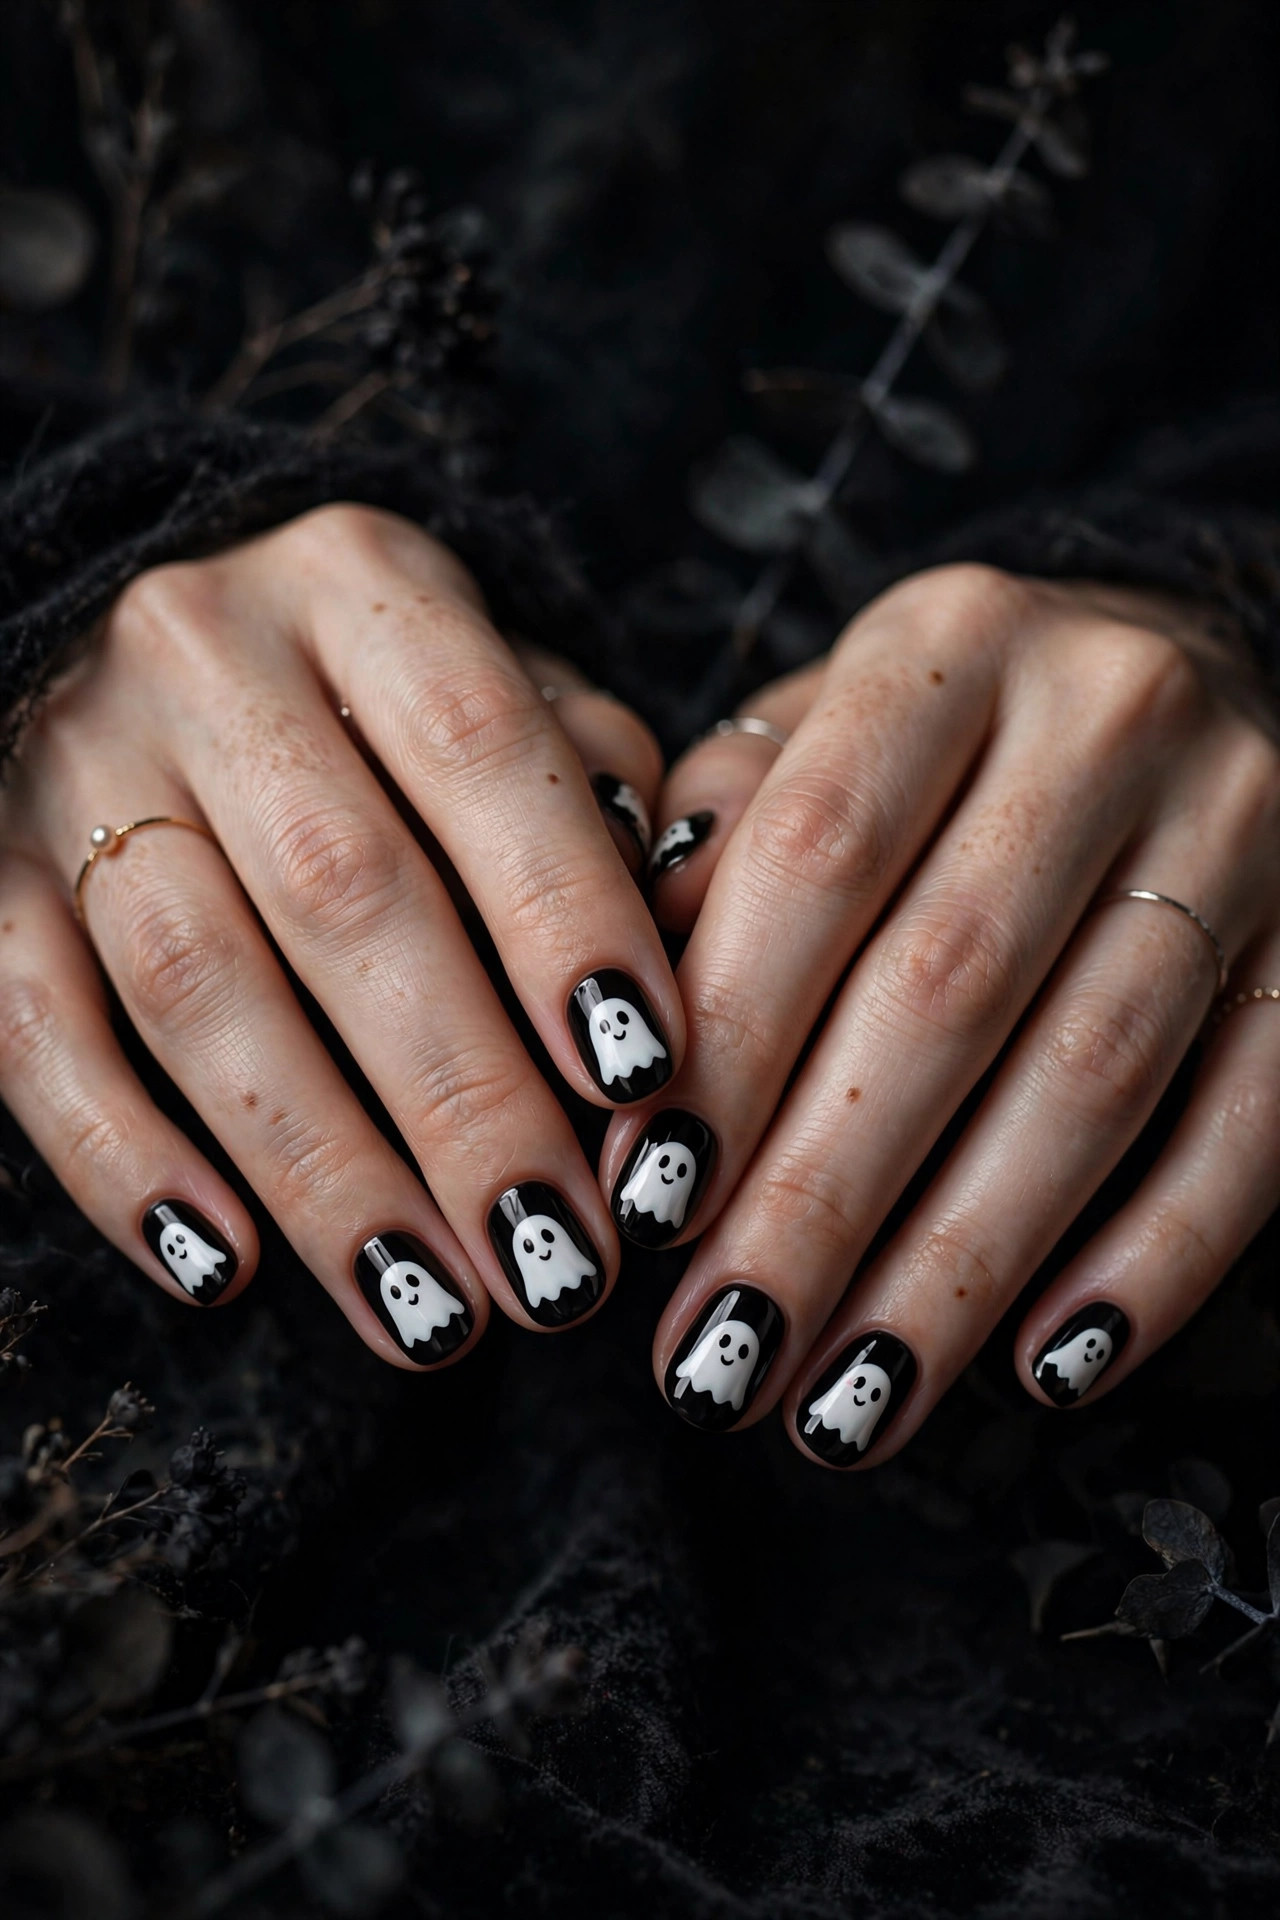
Paint two coats of black and dry fully. With the large end of a dotting tool dipped in white, place one big white blob per nail — irregular shapes are fine, ghosts are not symmetrical. Let the white dry 5 minutes. With a toothpick dipped in black, add two small dots for eyes and one slightly larger oval for the mouth. That is the entire design, and it takes about 2 minutes per nail. Cute on every nail, or do ghosts on 2 accent nails over plain black.
2. Candy Corn Tips
Skill level: Beginner | Time: 30 minutes | Key products: white, orange, and yellow polishes
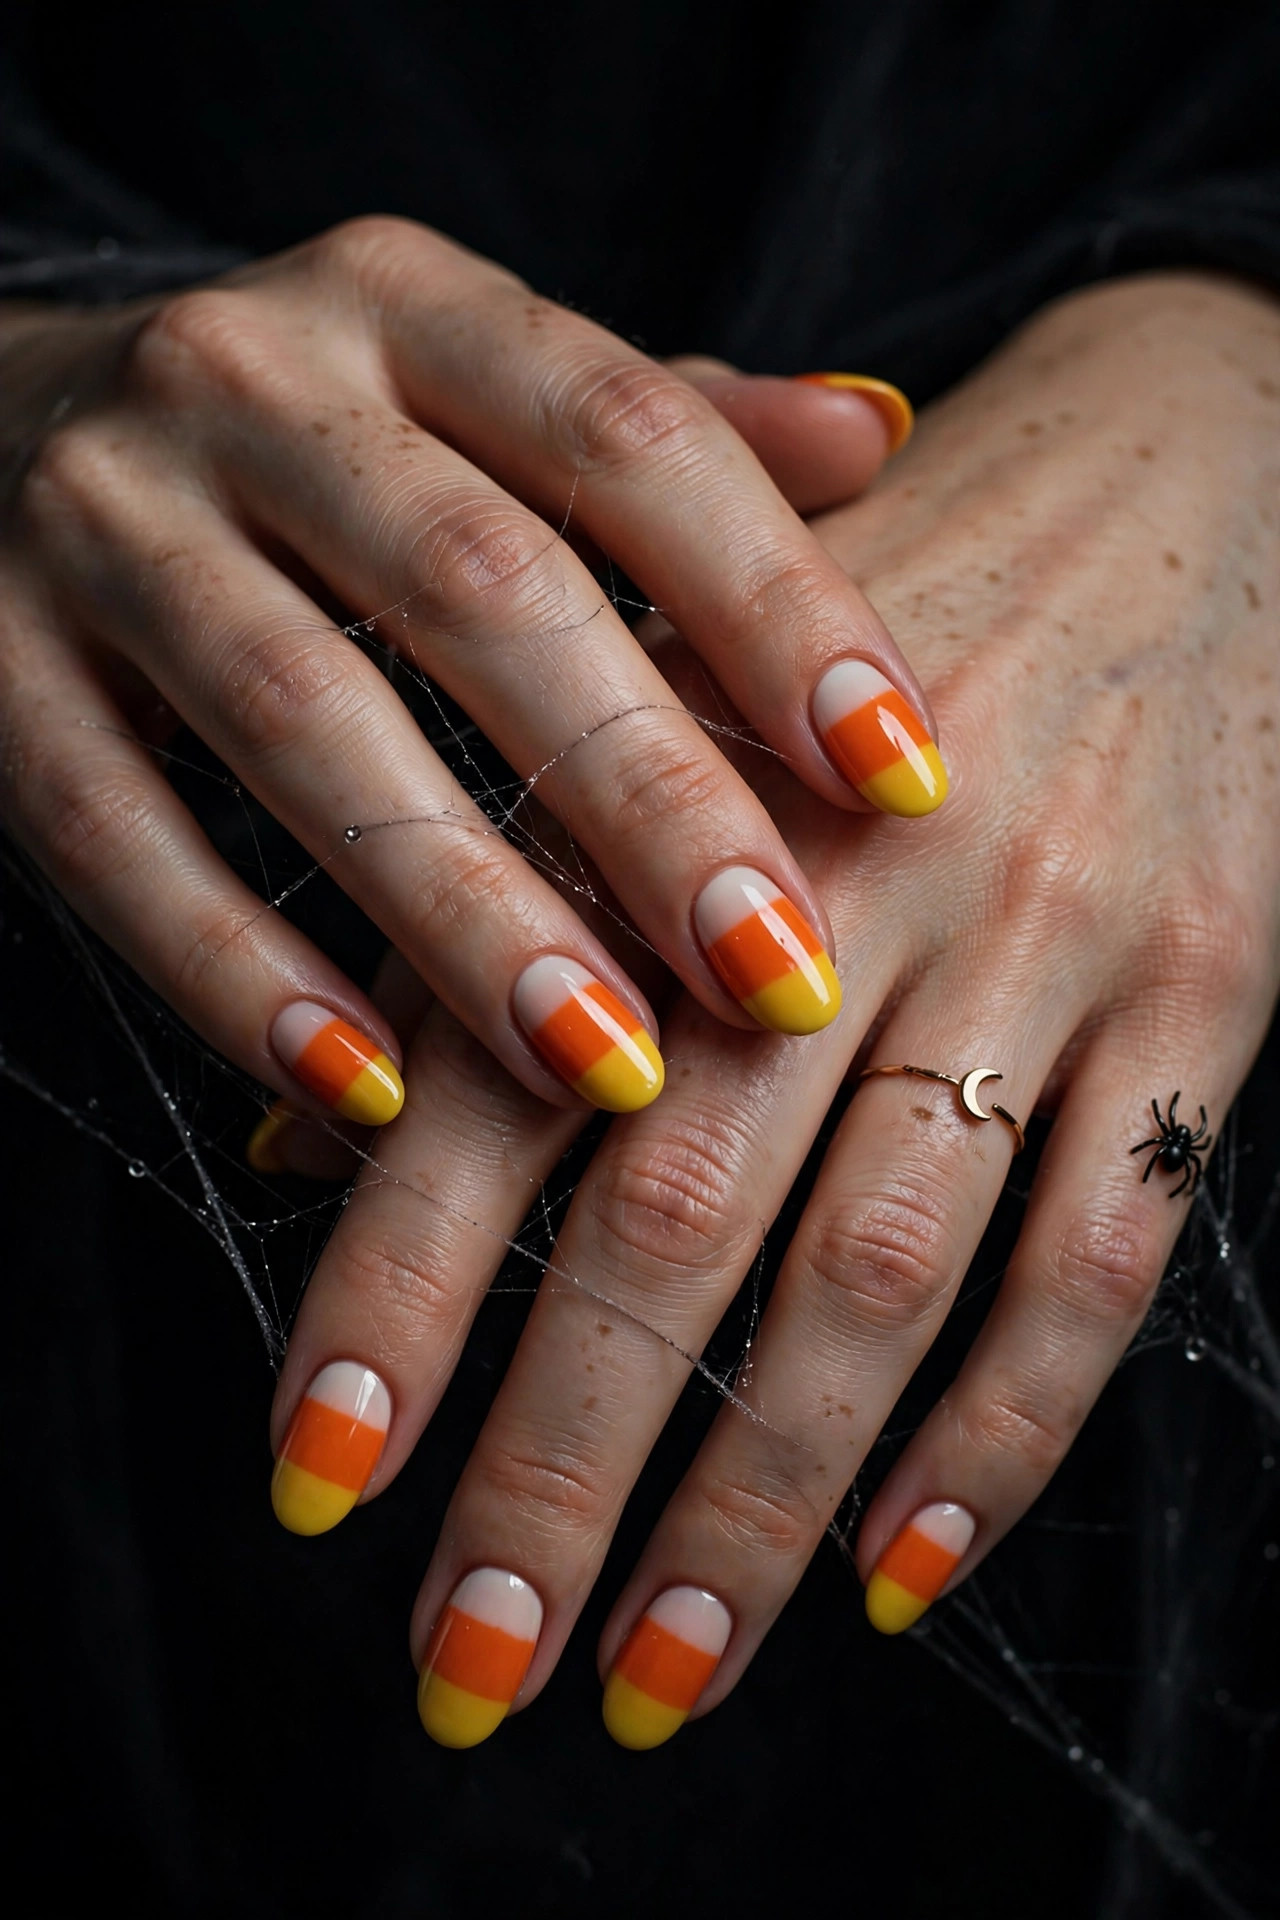
Paint two coats of white on all nails and dry. Paint the middle third of each nail orange, leaving white at the cuticle. Paint the tip third yellow. The three bands mimic a candy corn stripe. The lines do not need to be perfectly straight — candy corn is a rustic candy. Let each band dry 3 minutes before the next to prevent dragging. Top coat. This design reads as Halloween instantly and uses zero tools.
3. Spider Web
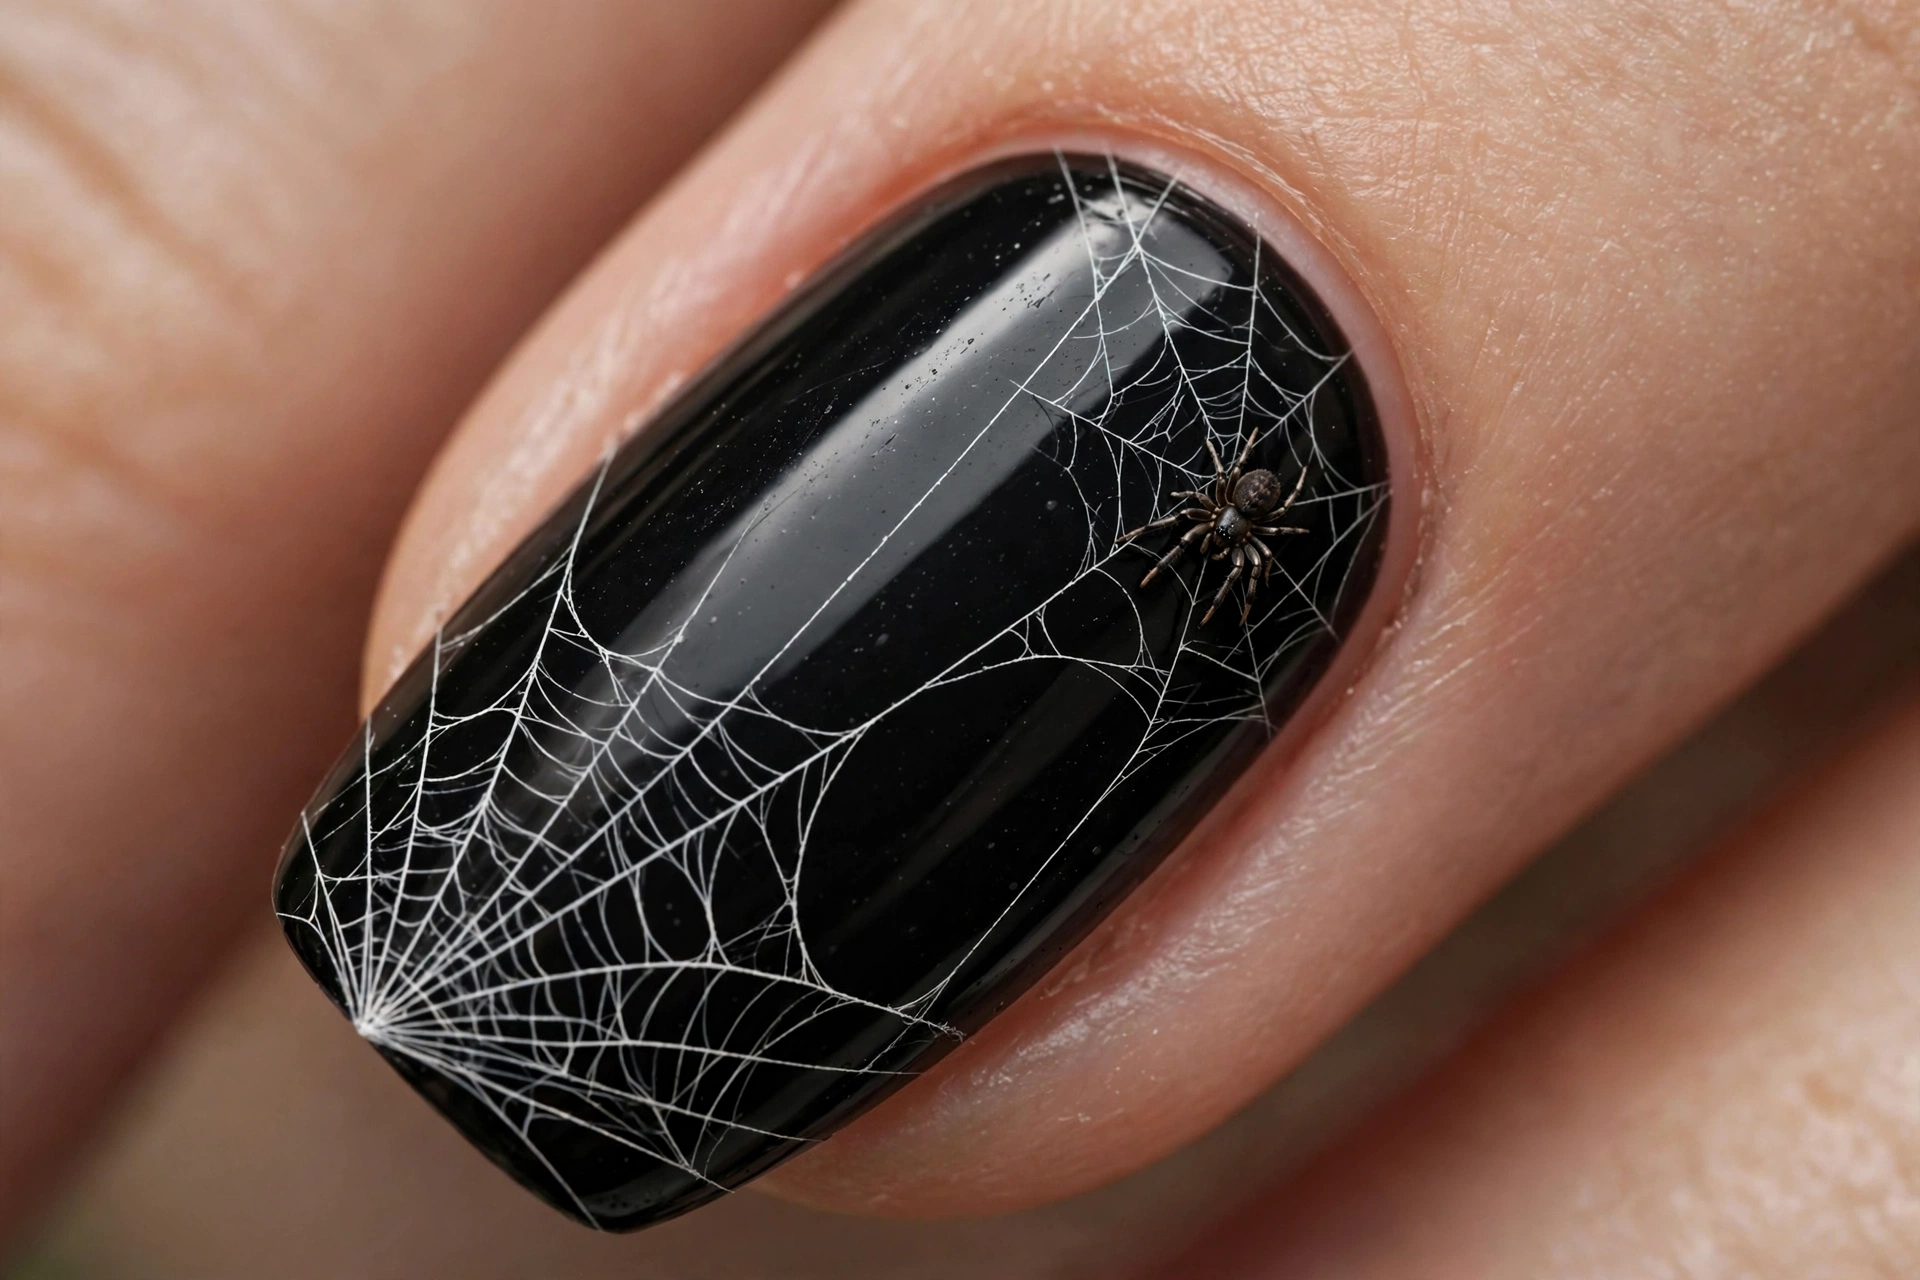
Skill level: Intermediate | Time: 40 minutes | Key products: black polish, white or silver polish, detail brush or toothpick
Paint two coats of black and dry completely — at least 10 minutes. With a toothpick dipped in white, draw 4 to 5 straight lines radiating from one corner of the nail, like bicycle spokes. Then connect the spokes with small curved arcs, working from the center outward. Add a small black dot spider body with 4 tiny leg lines on one of the web strands. Webs look best in the corner of the nail, not centered — asymmetry sells it. Top coat after 5 minutes.
4. Pumpkin Faces
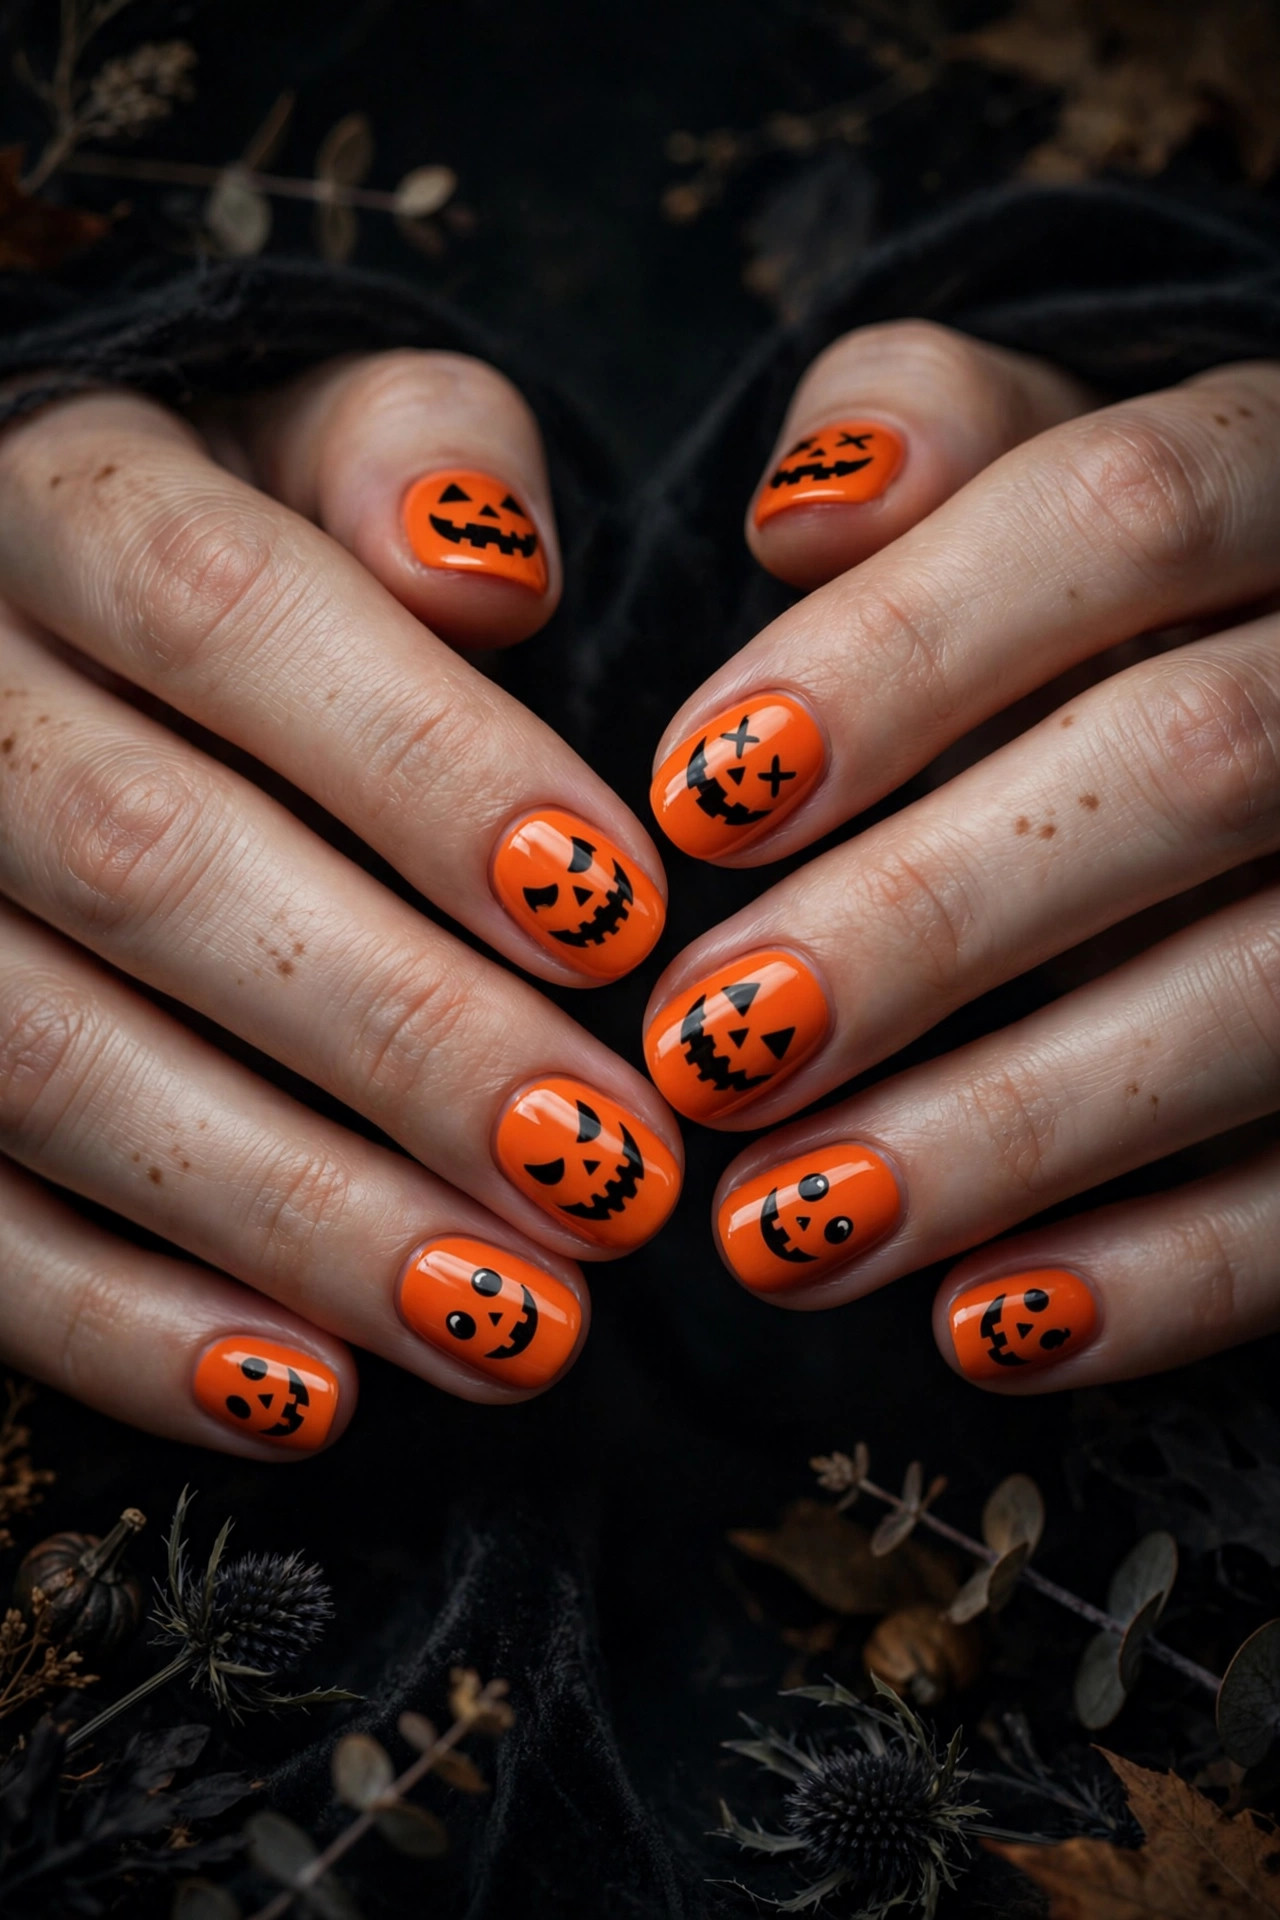
Skill level: Beginner | Time: 30 minutes | Key products: orange polish, black polish, green polish, dotting tool
Paint two coats of orange and dry. With a toothpick dipped in black, draw a jack-o-lantern face: two triangle eyes, one triangle nose, and a jagged smiling mouth. Keep faces small — about half the nail. Add a tiny green rectangle at the top as the stem. Vary the faces across nails: happy, spooky, surprised. Different faces on each nail is the charm of this design. Top coat. Orange needs two full coats for opacity; thin orange looks washed out.
5. Blood Drip Tips
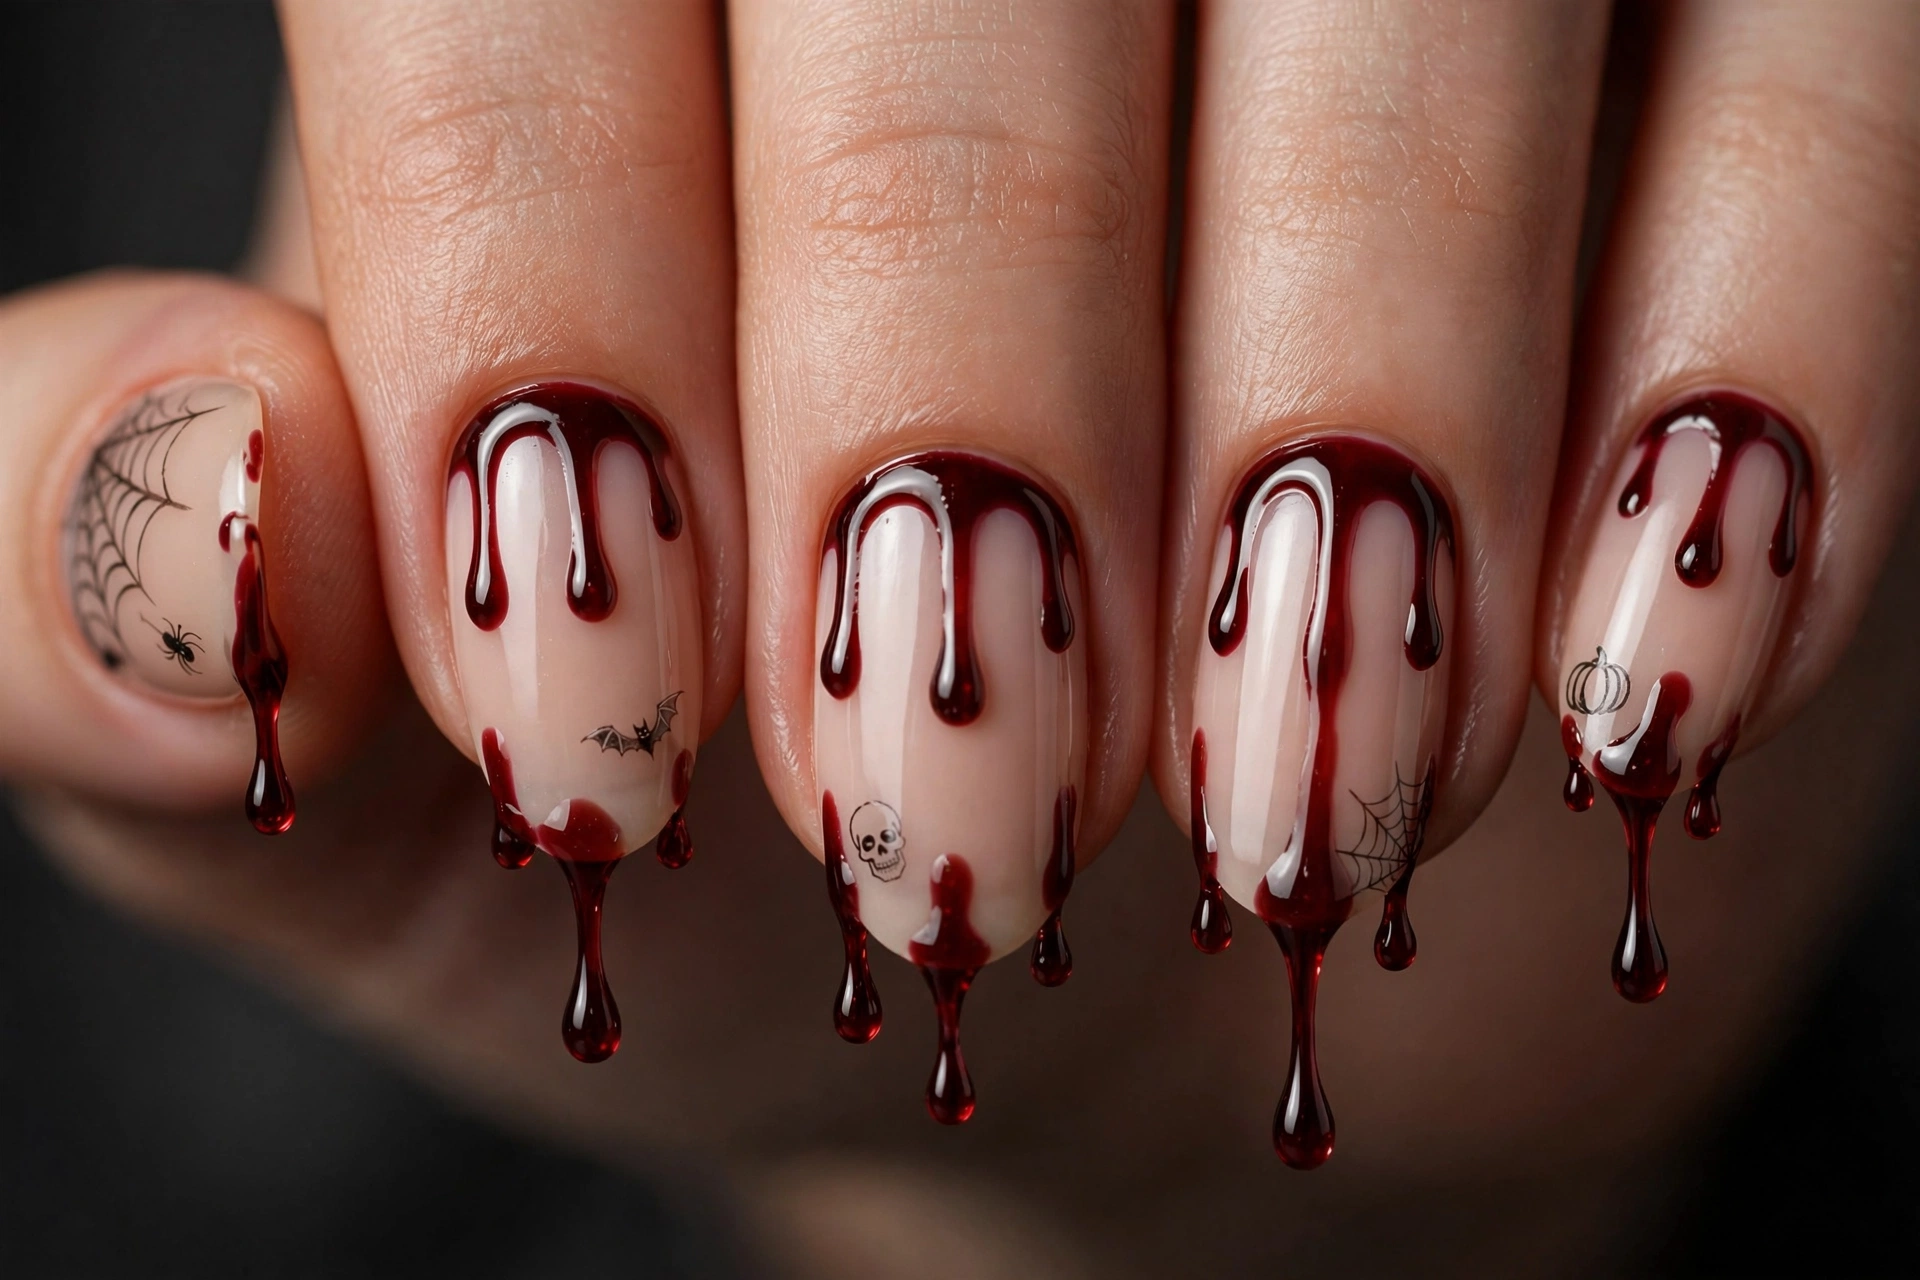
Skill level: Beginner | Time: 25 minutes | Key products: nude or white polish, blood red polish, dotting tool
Paint two coats of nude or white and dry fully. Dip the large end of a dotting tool in blood red polish and place dots along the cuticle edge. While still wet, drag the dotting tool downward from each dot to different lengths — long drips and short drips mixed look most realistic. The wet-drag technique is the whole design. Let dry 5 minutes, then top coat. This is a 25-minute design that looks like it took an hour, and it pairs with any costume.
6. Cat-Eye Orange and Black
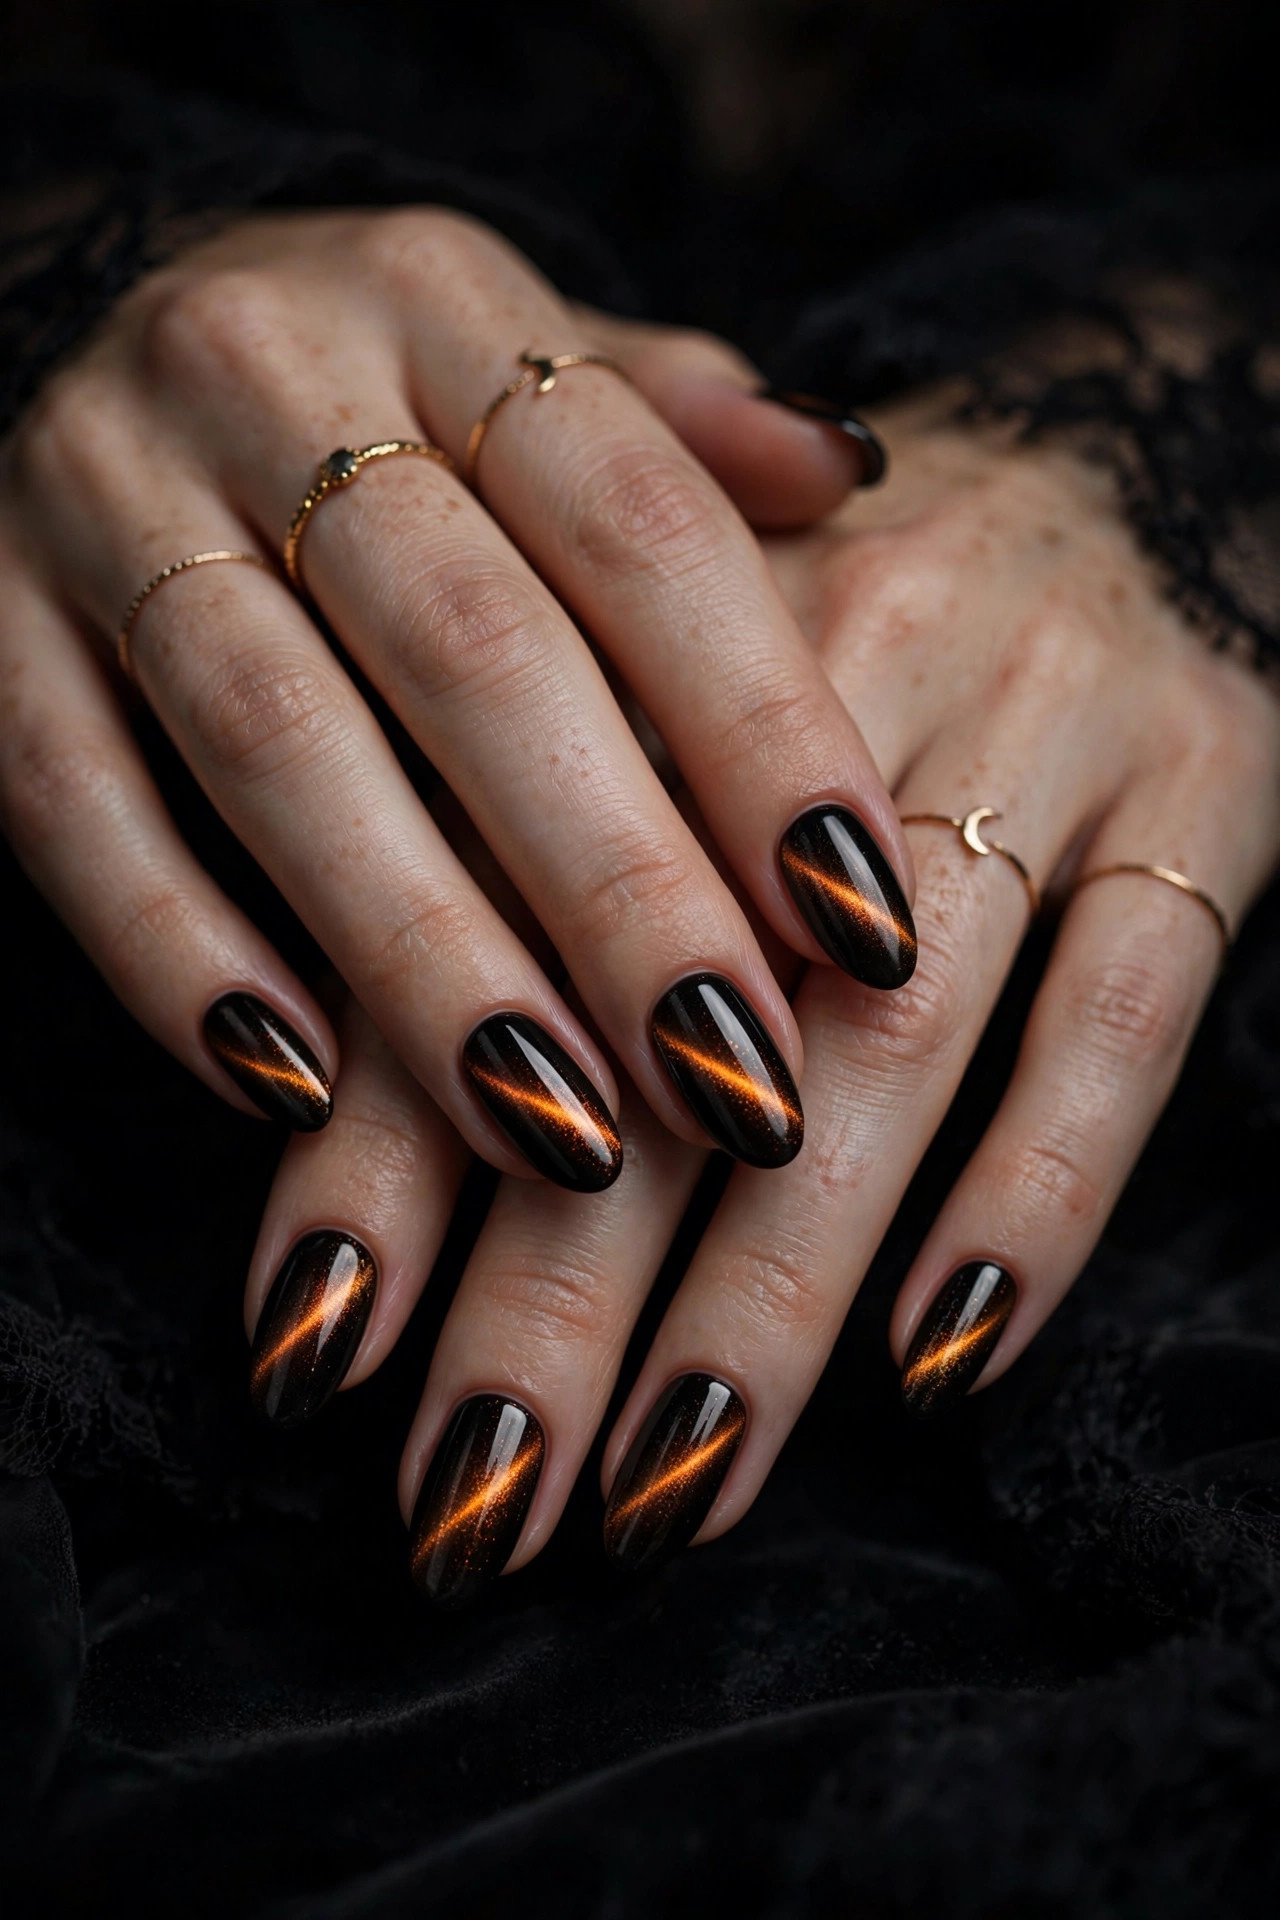
Skill level: Intermediate | Time: 40 minutes | Key products: magnetic cat-eye gel polish or metallic orange polish, magnet, black polish
Paint two coats of black as the base. Apply magnetic cat-eye polish (orange or gold works best for Halloween) and hold the magnet over each nail for 10 to 15 seconds before it dries — the magnet pulls the metallic particles into a glowing line. The effect looks like a cat’s eye or a potion bottle. For the full technique with timing details, see our cat-eye nails tutorial. Finish with top coat. Non-magnetic metallic orange over black gives a simpler version of the same vibe.
7. Bat Silhouettes
Skill level: Intermediate | Time: 40 minutes | Key products: purple or dark blue polish, black polish, detail brush
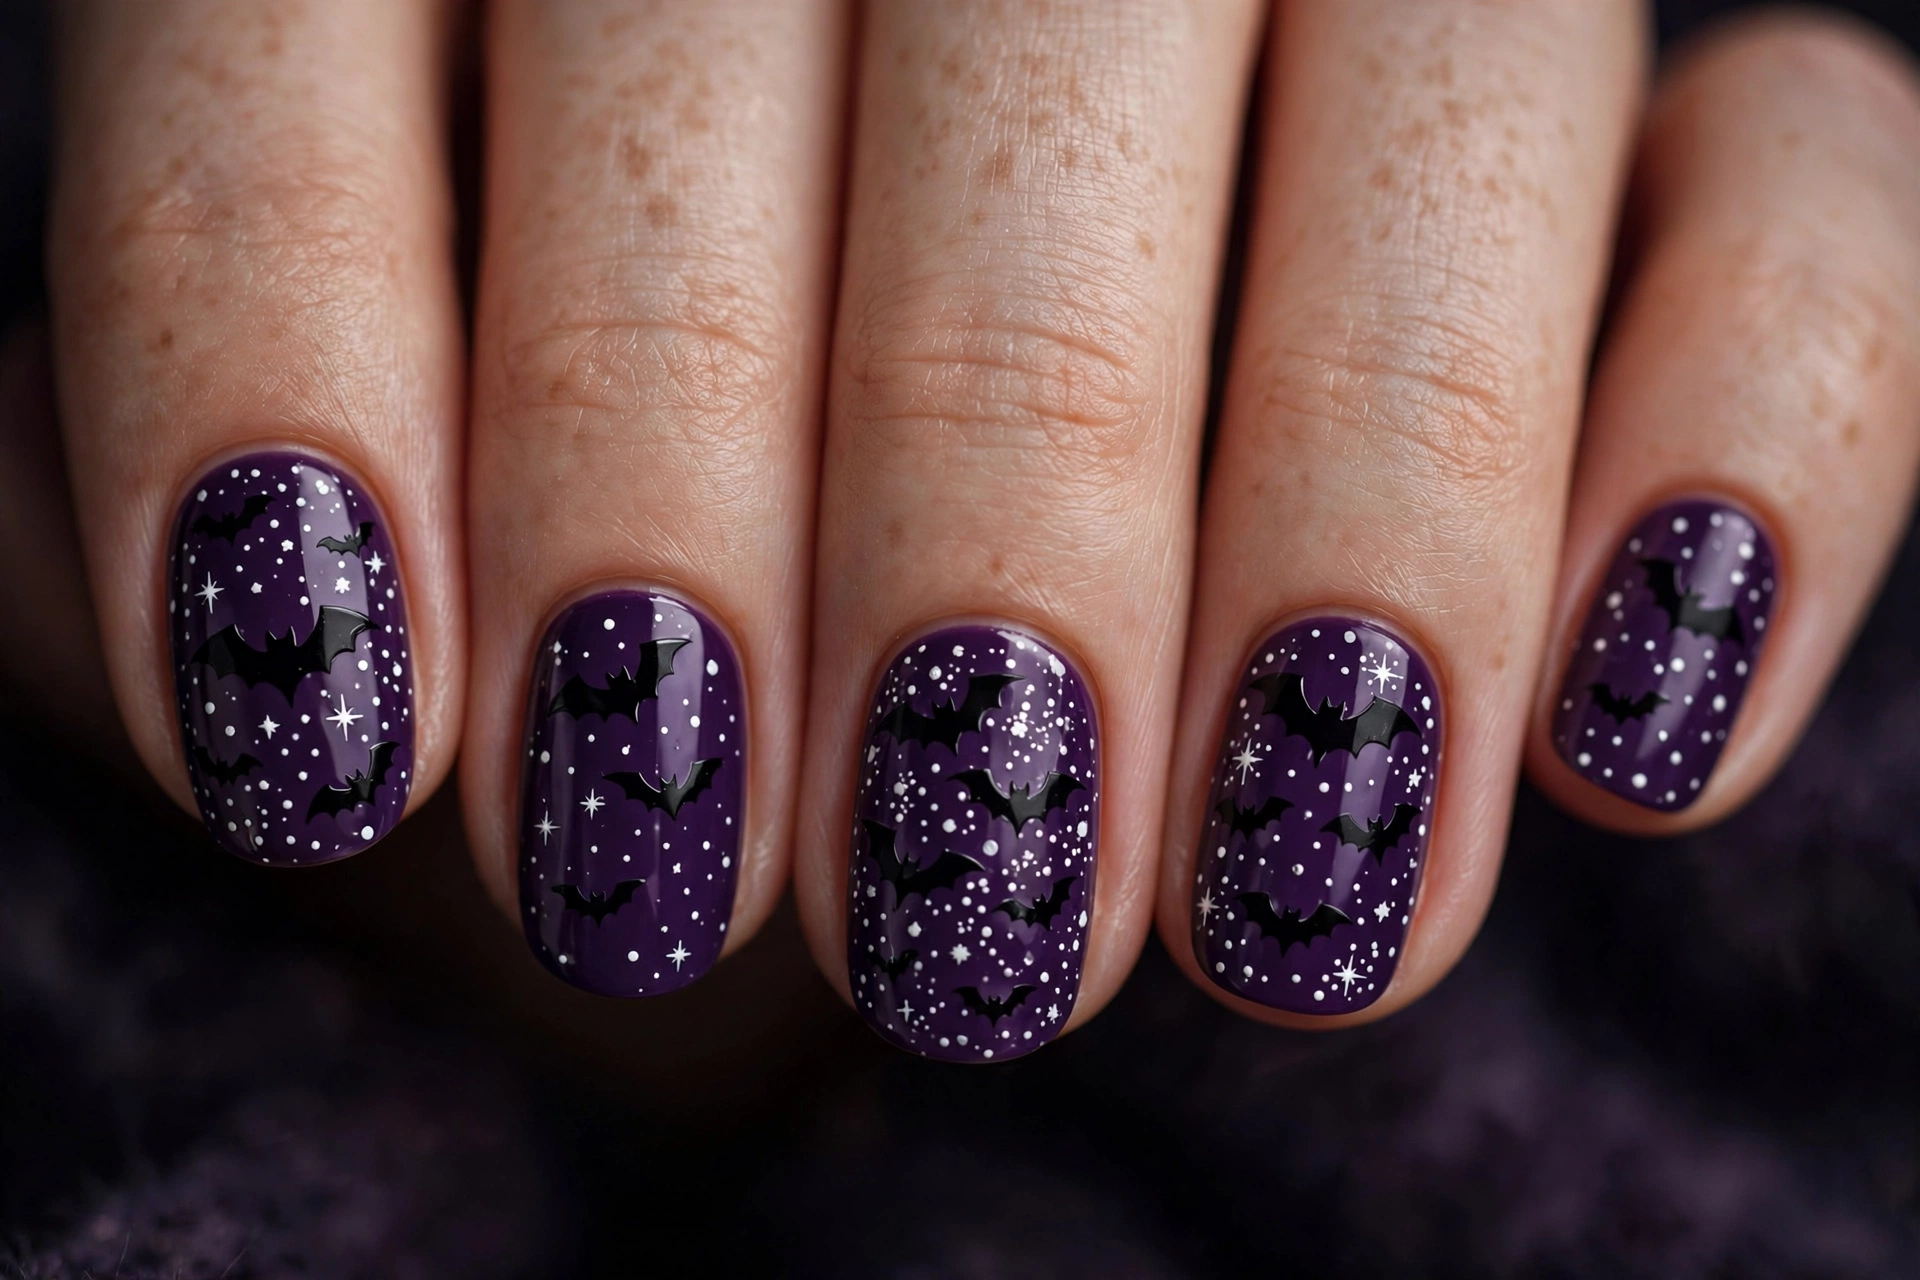
Paint two coats of deep purple (a night sky) and dry. With a detail brush and black polish, paint bat shapes: a small oval body with two wide, scalloped wings. The classic bat is just two connected humps on each side of the body. Paint 2 to 3 bats per nail at different sizes — smaller bats in the distance sell the night-sky effect. Add tiny white dots as stars. Bats do not need to be perfect; at small scale, any winged blob reads as a bat. Top coat.
8. Witch Hat Accent
Skill level: Advanced | Time: 55 minutes | Key products: black polish, purple polish, orange polish, detail brush, gold glitter
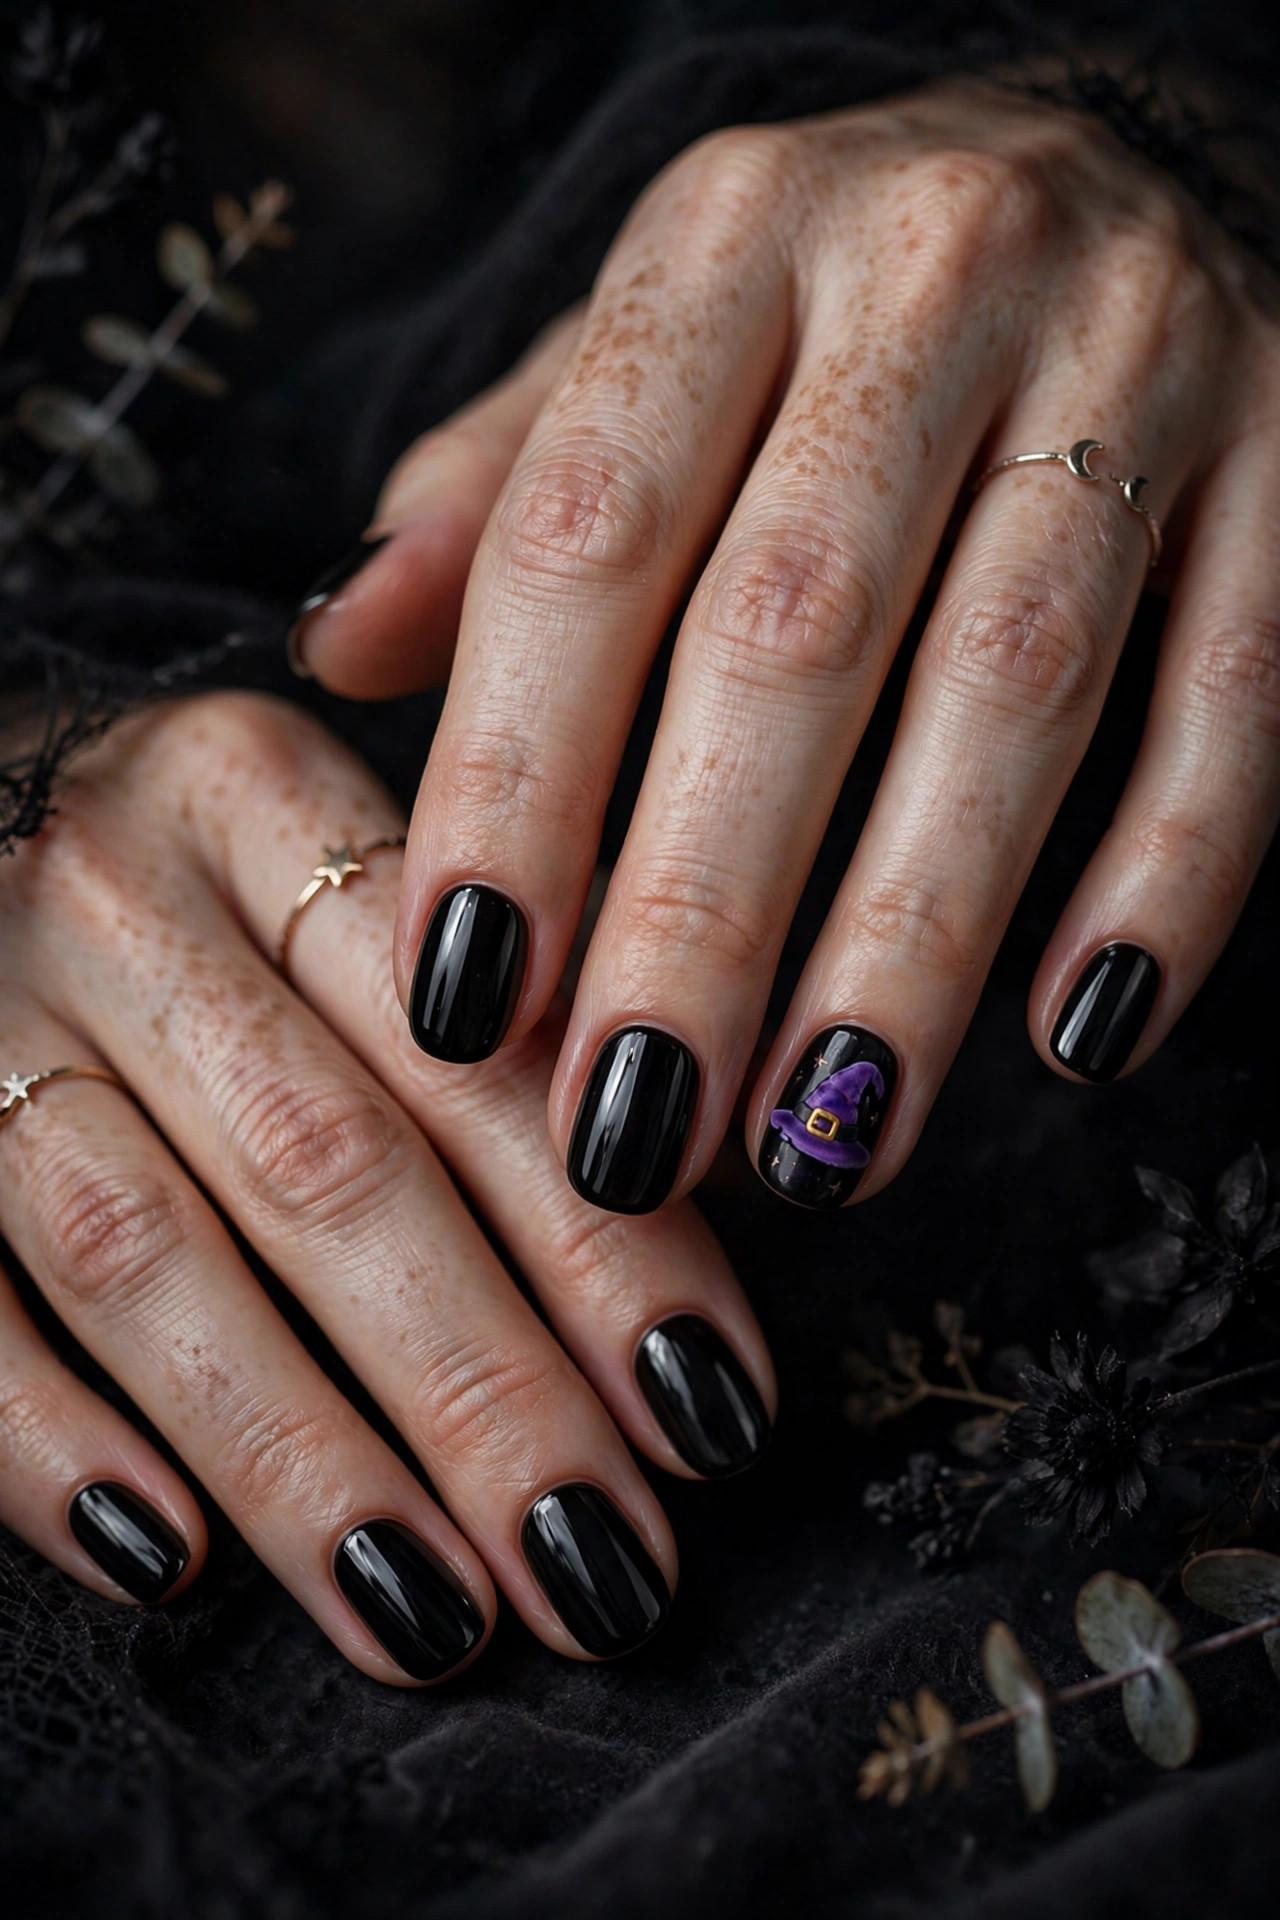
Paint all nails black; do the witch hat on the ring finger. With a detail brush, paint a wide triangle (the hat brim is a horizontal line, the cone rises from its center) in black over a purple base — or paint the hat directly on one purple accent nail. Add an orange band across the hat and a small gold buckle square. Paint a tiny bent tip on the cone. This is fiddly work at nail scale; do it on one accent nail per hand and keep the other eight simple black or purple. Top coat.
9. Mummy Wrap Stripes
Skill level: Intermediate | Time: 35 minutes | Key products: white or cream polish, black polish, detail brush
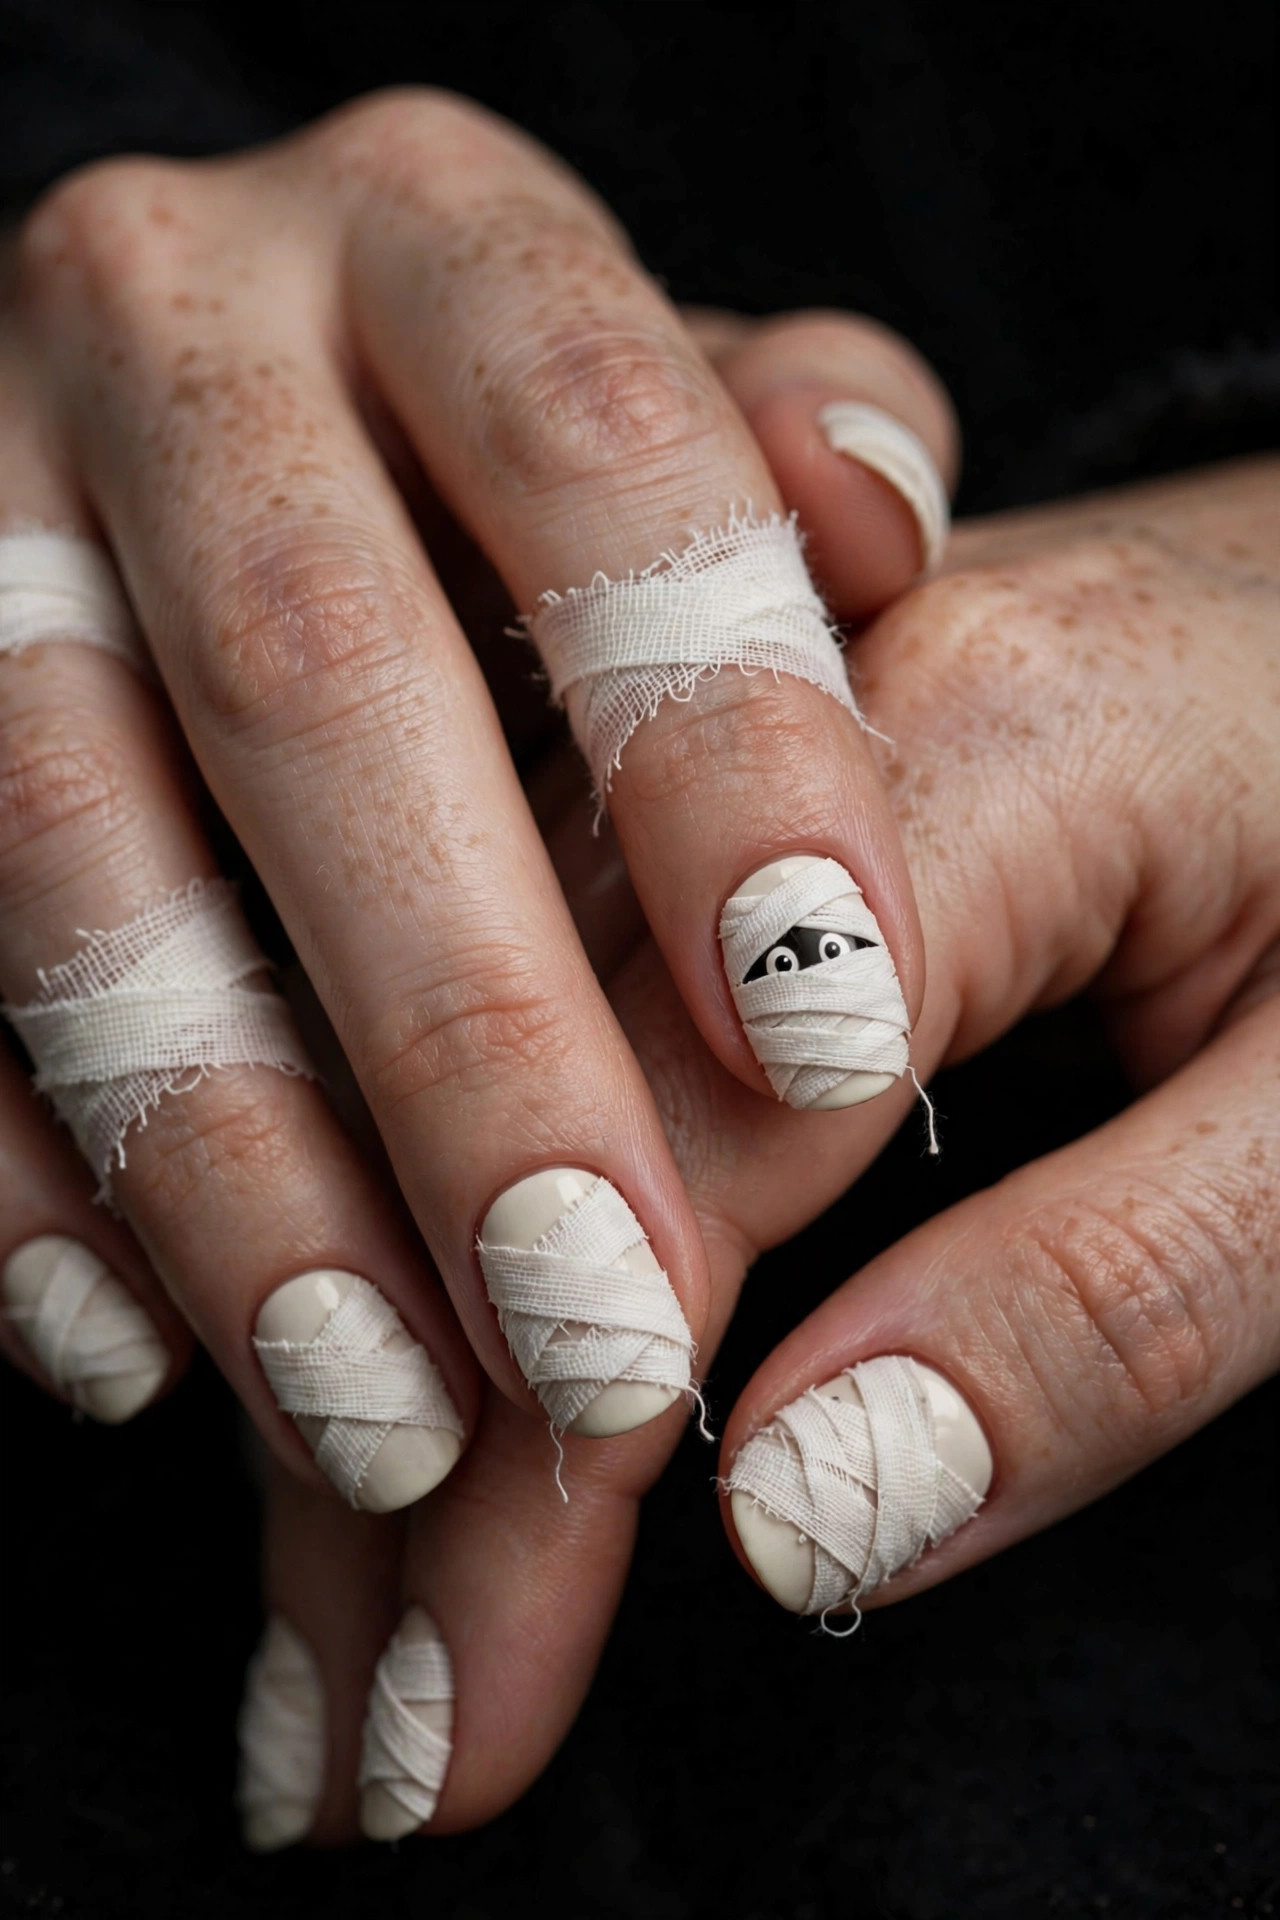
Paint two coats of cream and dry. With a detail brush and white polish, paint diagonal strips across each nail at varying angles, leaving thin gaps of the cream base showing — the gaps read as shadow between bandages. Add two tiny black dots as eyes peeking through on 2 accent nails. The irregular angles are what make it look like wrapped bandages rather than neat stripes. This design is fast, cute rather than scary, and great for workplaces that frown on gore. Top coat.
10. Frankenstein Green
Skill level: Beginner | Time: 25 minutes | Key products: green polish, black polish, dotting tool
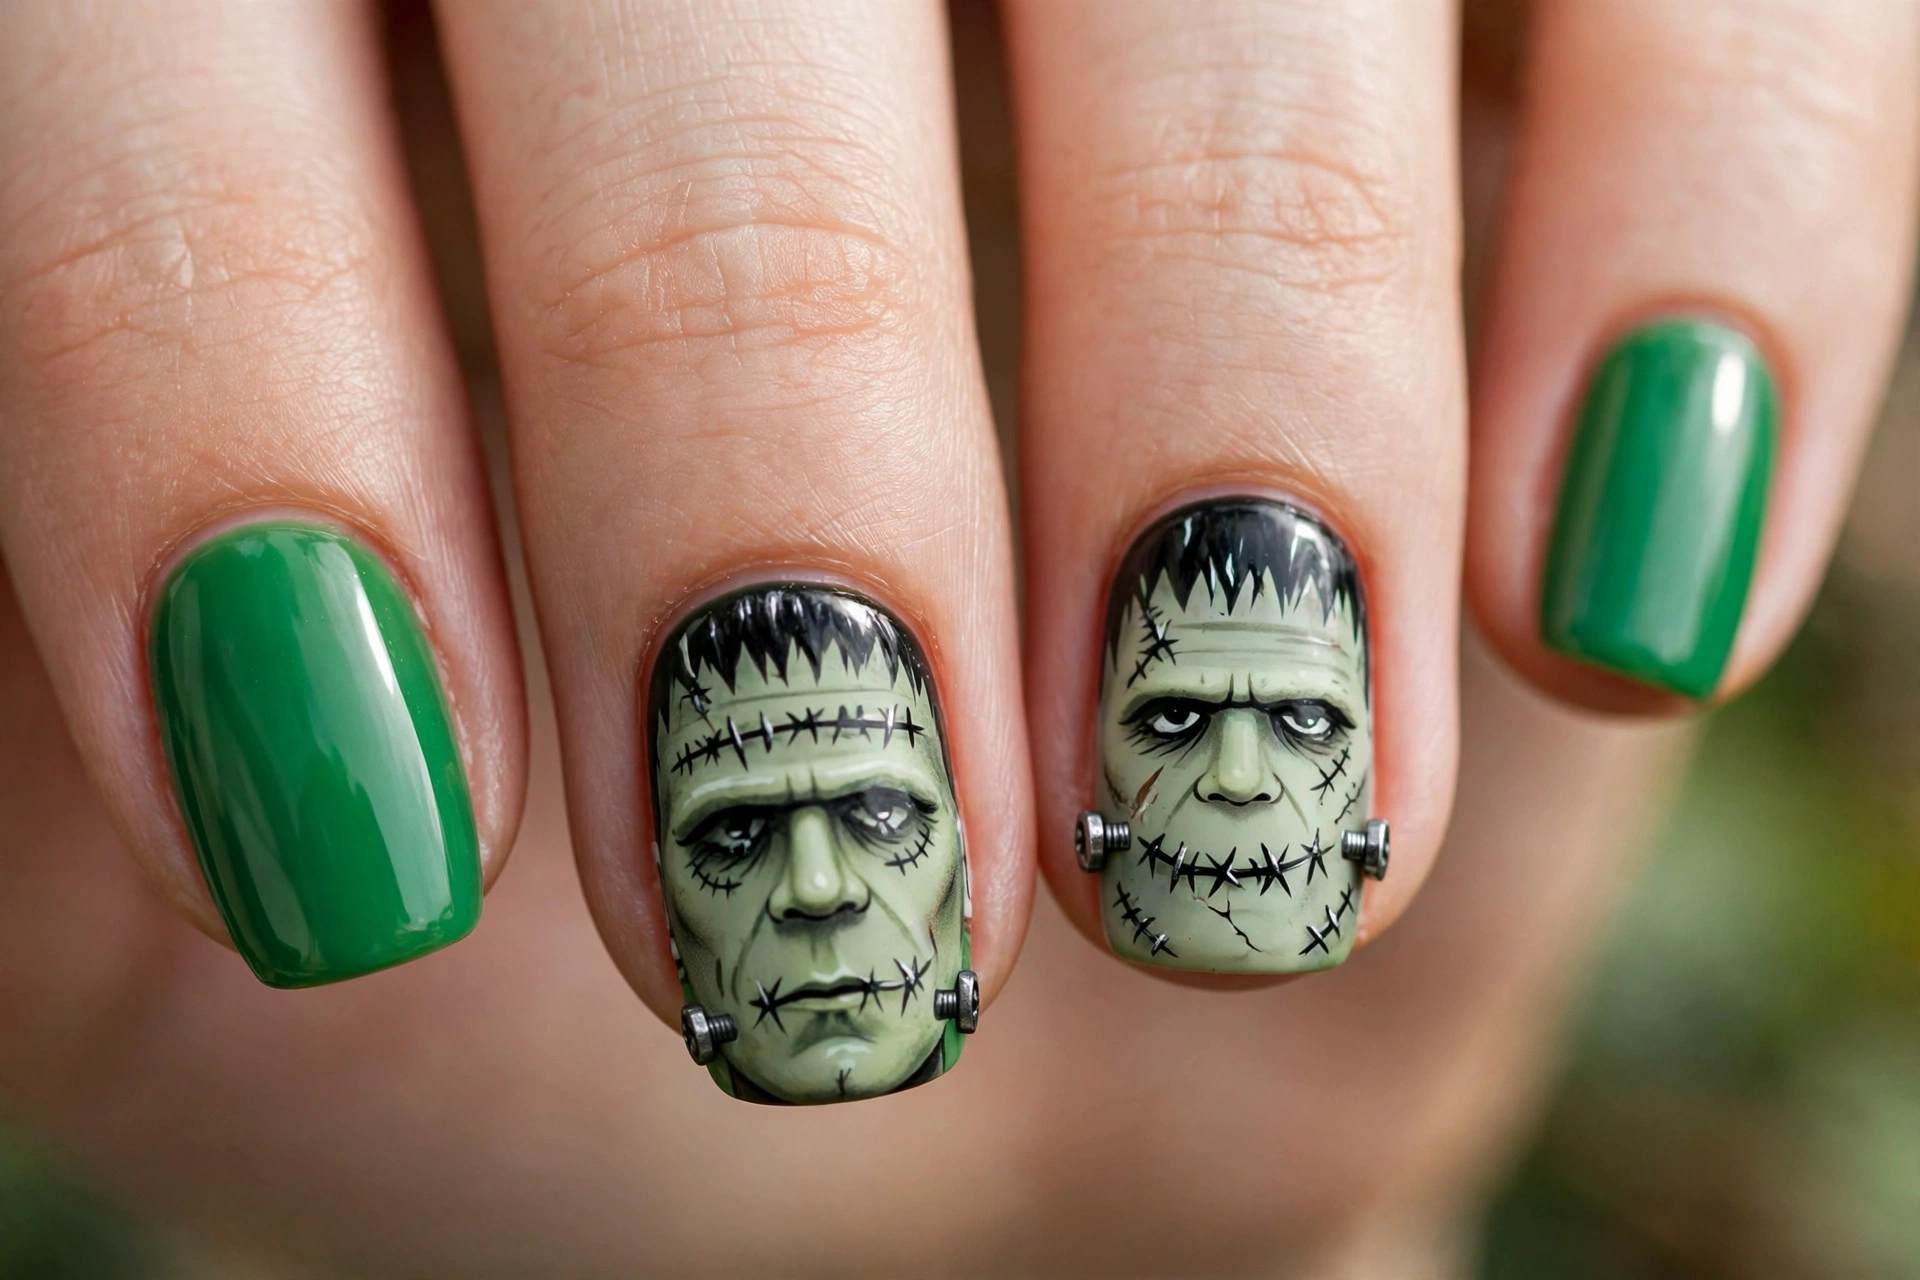
Paint two coats of green and dry. With a toothpick dipped in black, draw a flat line across the upper third of the nail (the hairline), then add 2 short vertical lines sticking up from it as bolts on each side. Add two white dots with black pupils as eyes below the hairline, and a stitched-looking dashed line as the mouth. Frankenstein’s face is geometric — straight lines and dots — which is why beginners can nail it. Do the face on 2 accent nails, solid green on the rest. Top coat.
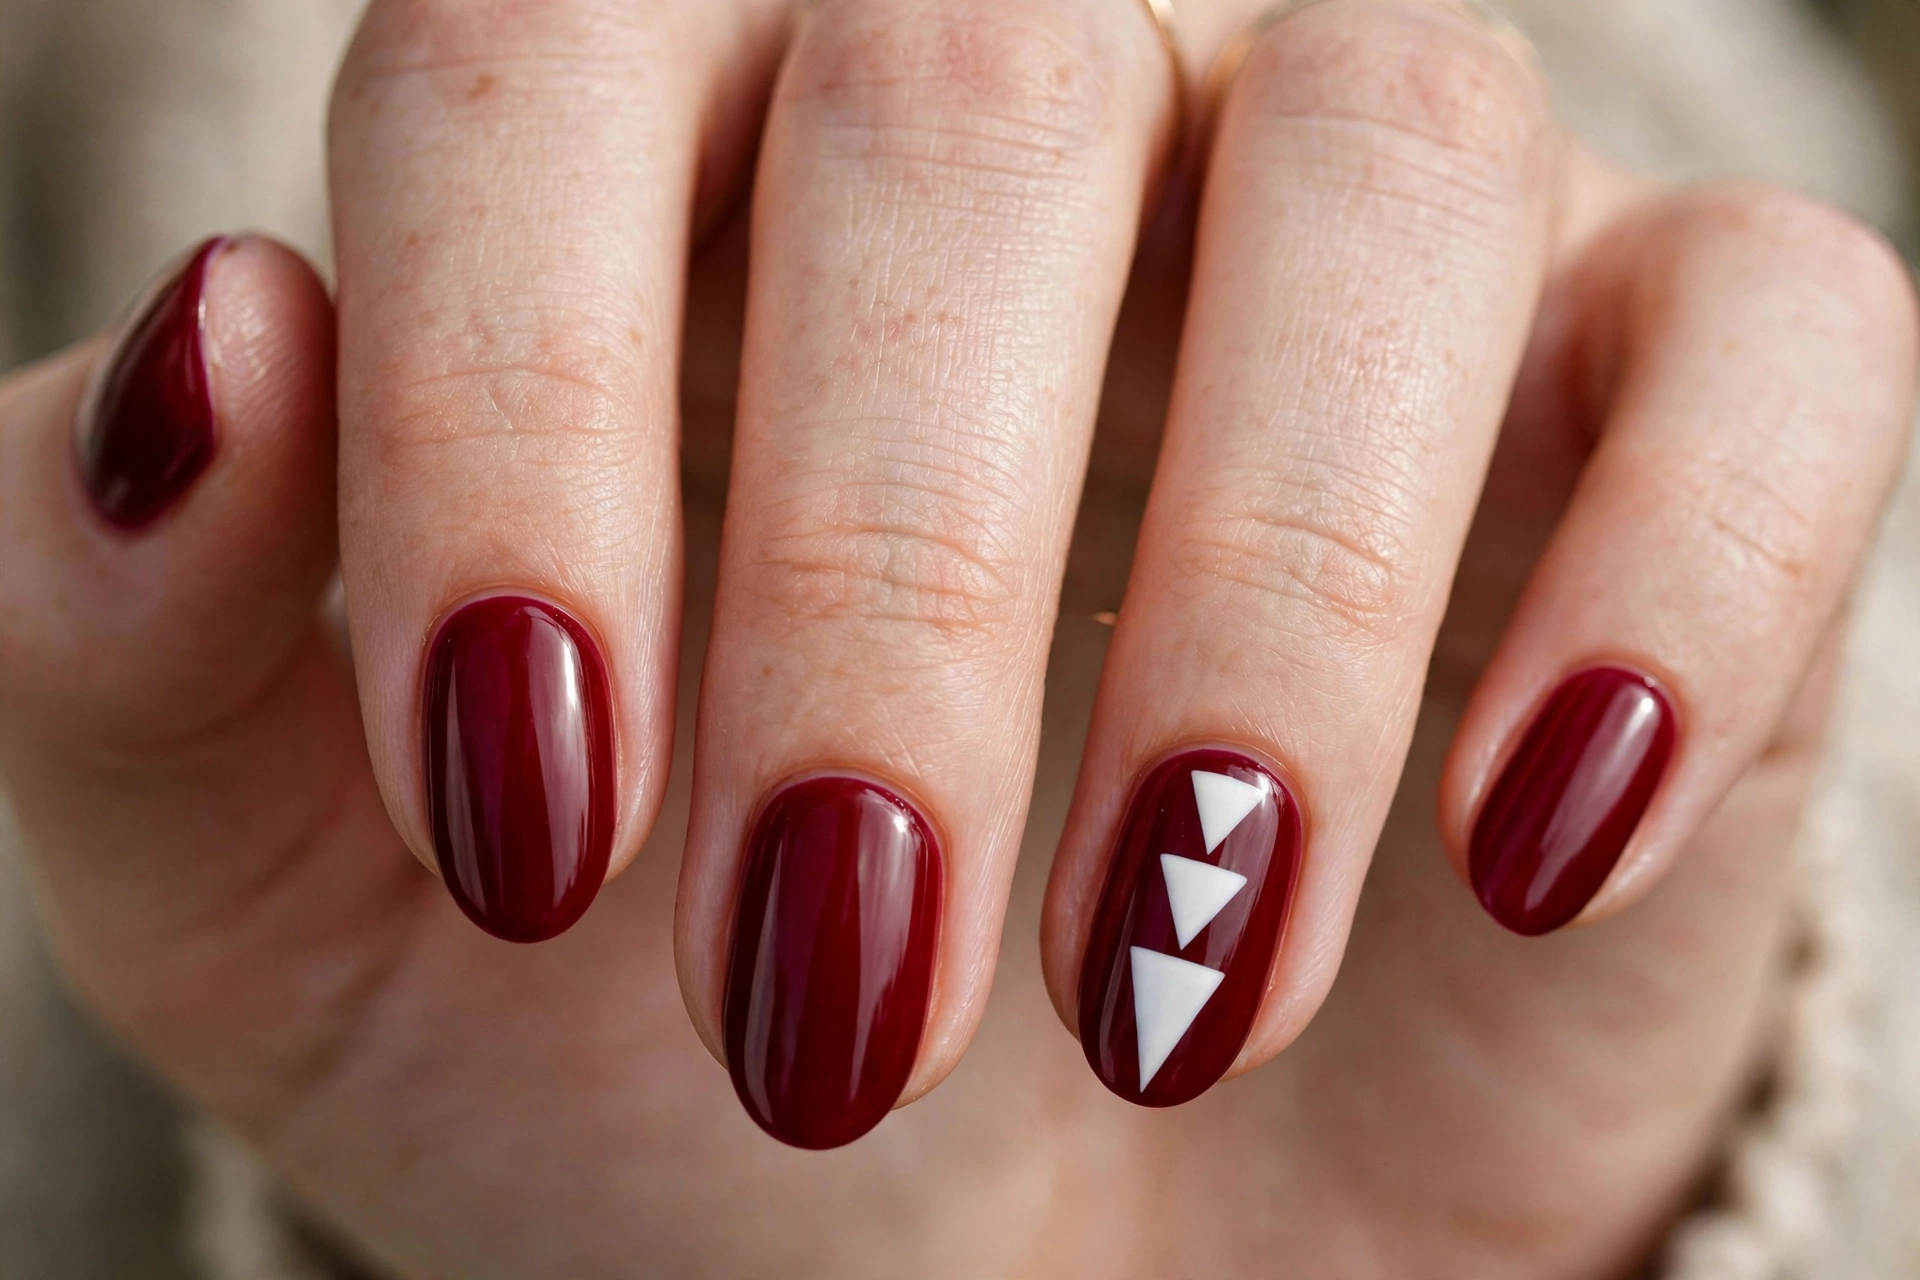
11. Vampire Fangs Accent
Skill level: Intermediate | Time: 35 minutes | Key products: blood red polish, white polish, black polish, detail brush
Paint all nails deep blood red. On the ring finger, paint two white triangles pointing downward from the cuticle — the fangs. Add a tiny red dot at the tip of each fang as a blood drop. On the other nails, keep the red solid or add a black French tip for a vampire-cape feel. The fangs need to be sharp triangles; round them and they read as bunny teeth. White fangs over red is high contrast, so steady your hand on the table. Top coat after 5 minutes.
12. Skull Faces
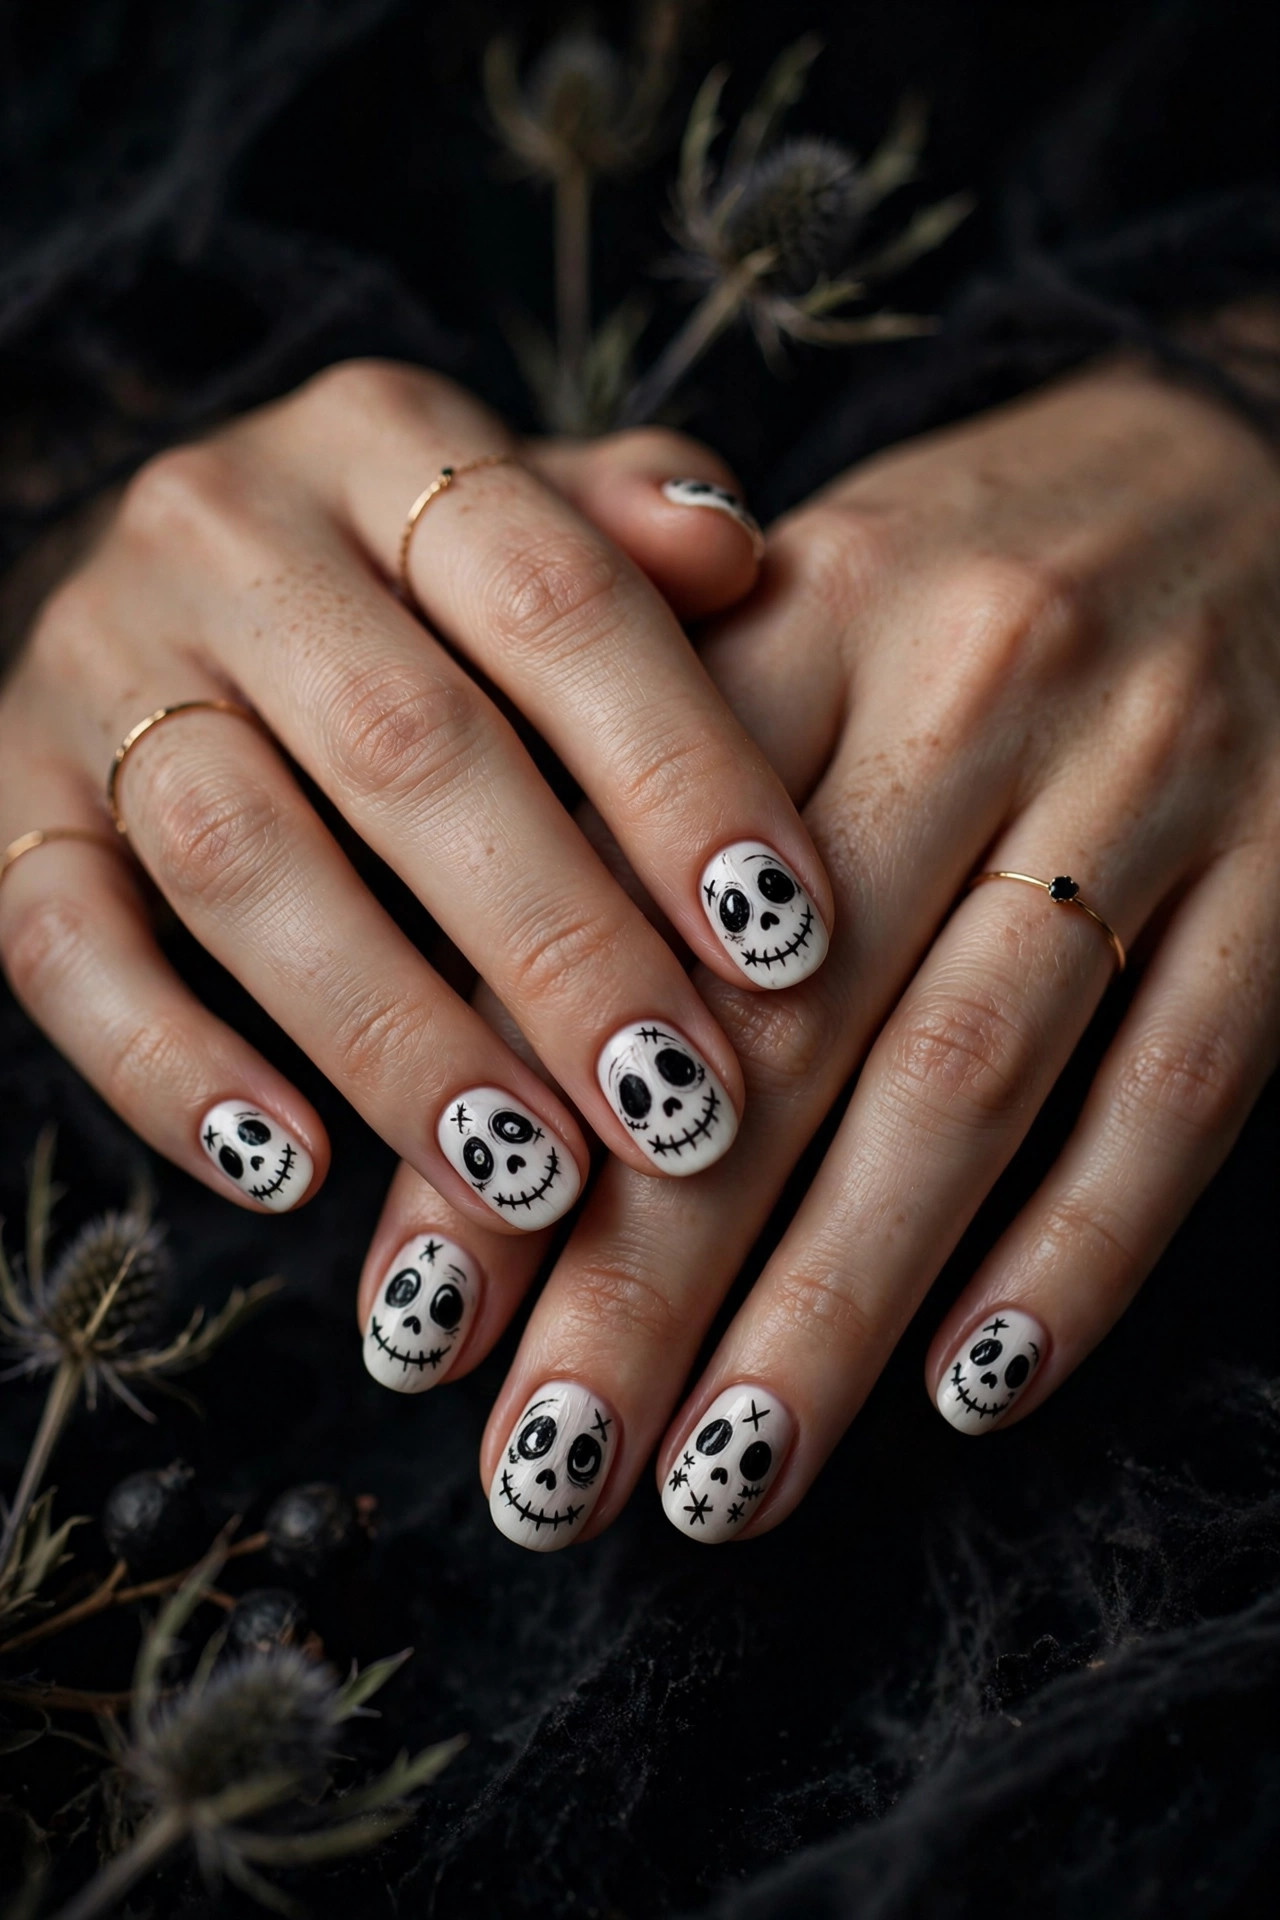
Skill level: Beginner | Time: 30 minutes | Key products: white polish, black polish, dotting tool
Paint two coats of white and dry fully. With a dotting tool dipped in black, place two large dots as eye sockets and one small triangle or dot as the nose. Add 3 to 4 short vertical lines at the tip of the nail as teeth. The skull is just dots and dashes — genuinely one of the easiest recognizable designs in nail art. Vary the expressions: round eyes look cute, angled eyes look menacing. Skulls look great on every nail or as accents over black. Top coat.
13. Spooky Glow Eyes
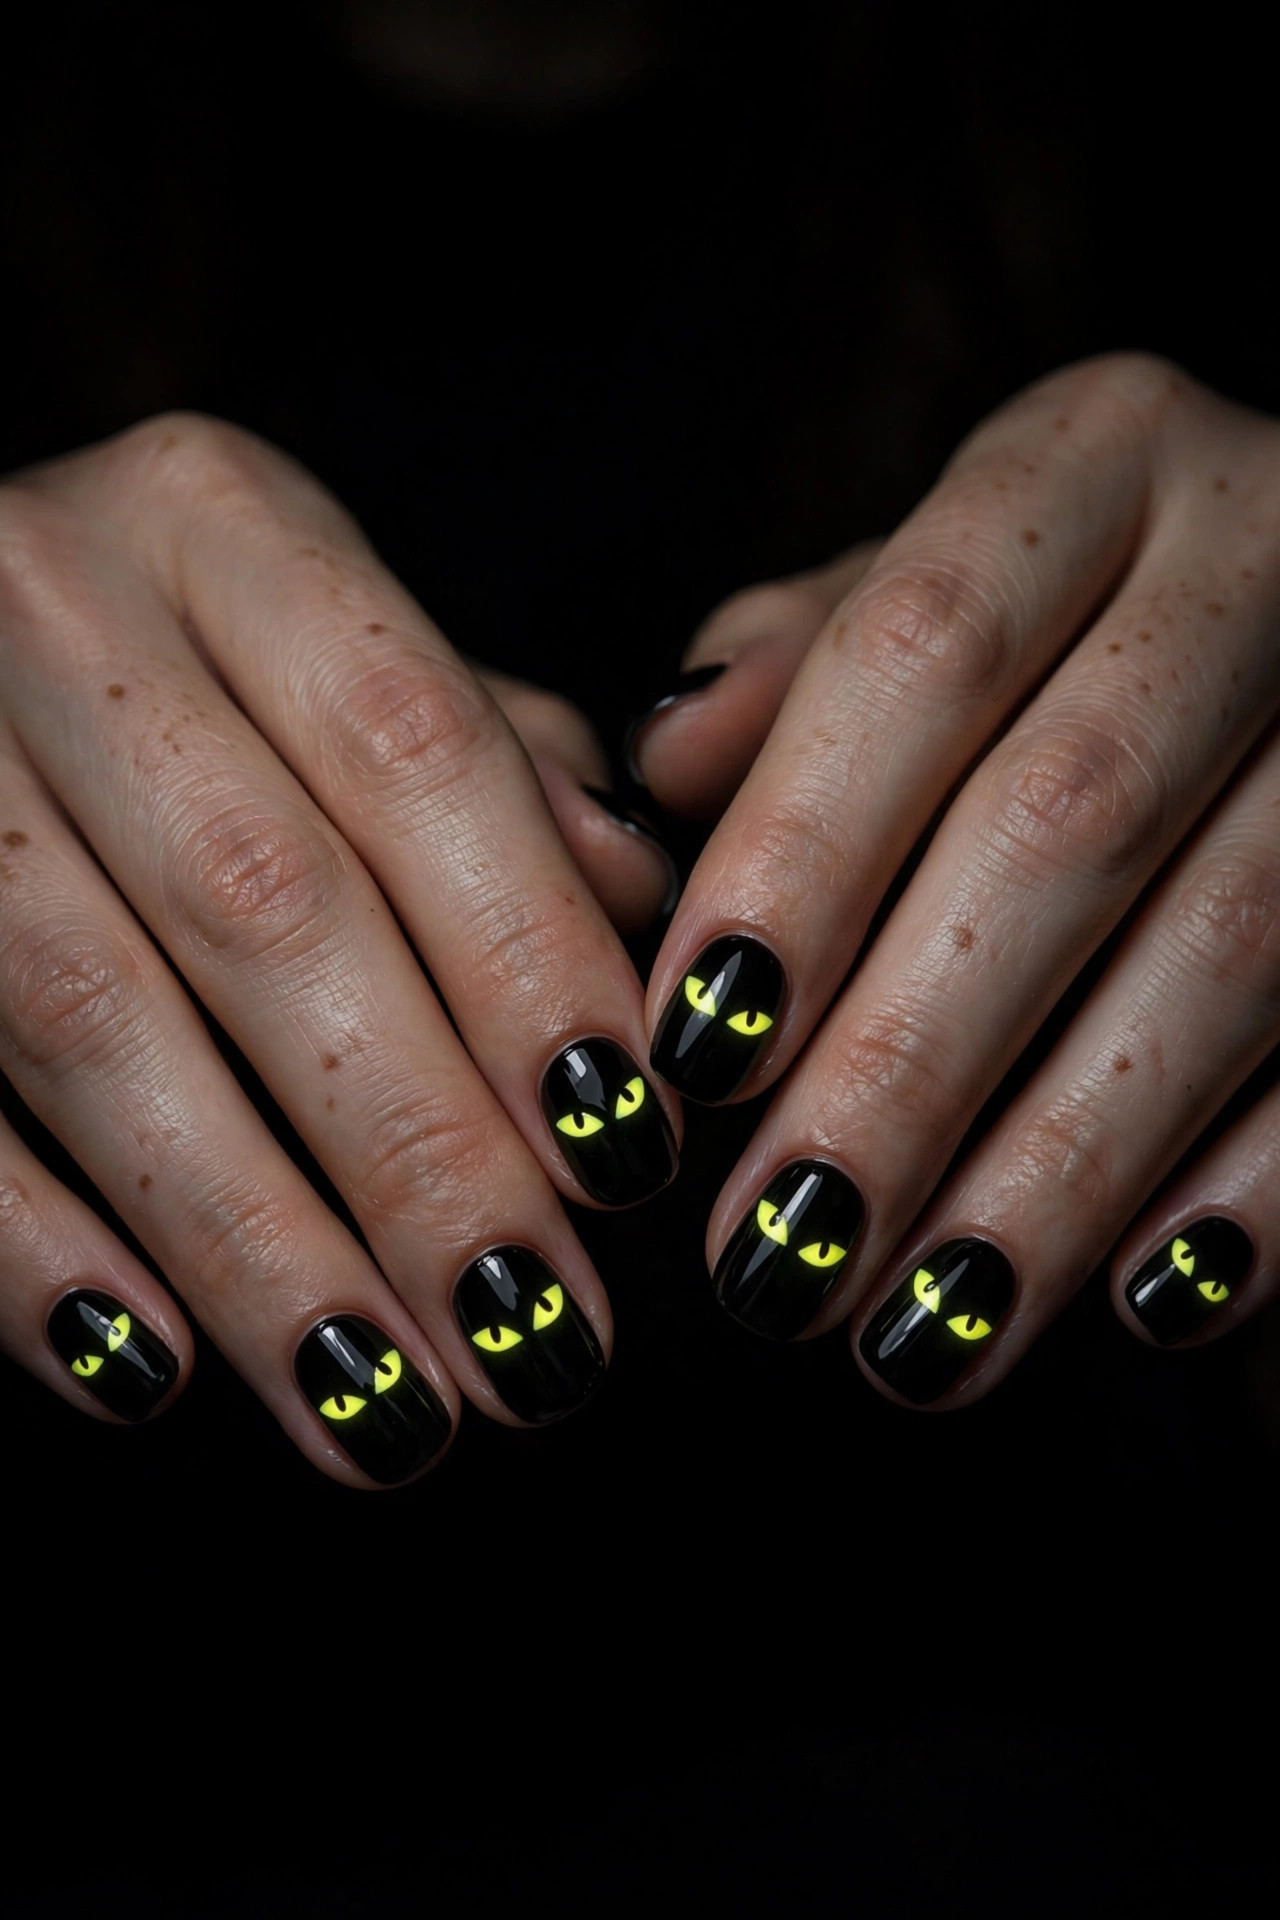
Skill level: Intermediate | Time: 35 minutes | Key products: black polish, neon yellow or glow-in-the-dark polish, dotting tool
Paint two coats of black and dry. With a dotting tool, place pairs of neon yellow dots — two dots close together read as eyes staring out of the dark. Scatter 2 to 3 pairs per nail at different heights. If you use glow-in-the-dark polish for the dots, charge the nails under a lamp for 30 seconds before the party for the full effect. This design is minimalist, genuinely spooky, and takes almost no skill. It also looks incredible in party photos with flash. Top coat.
14. Black Cat Silhouette
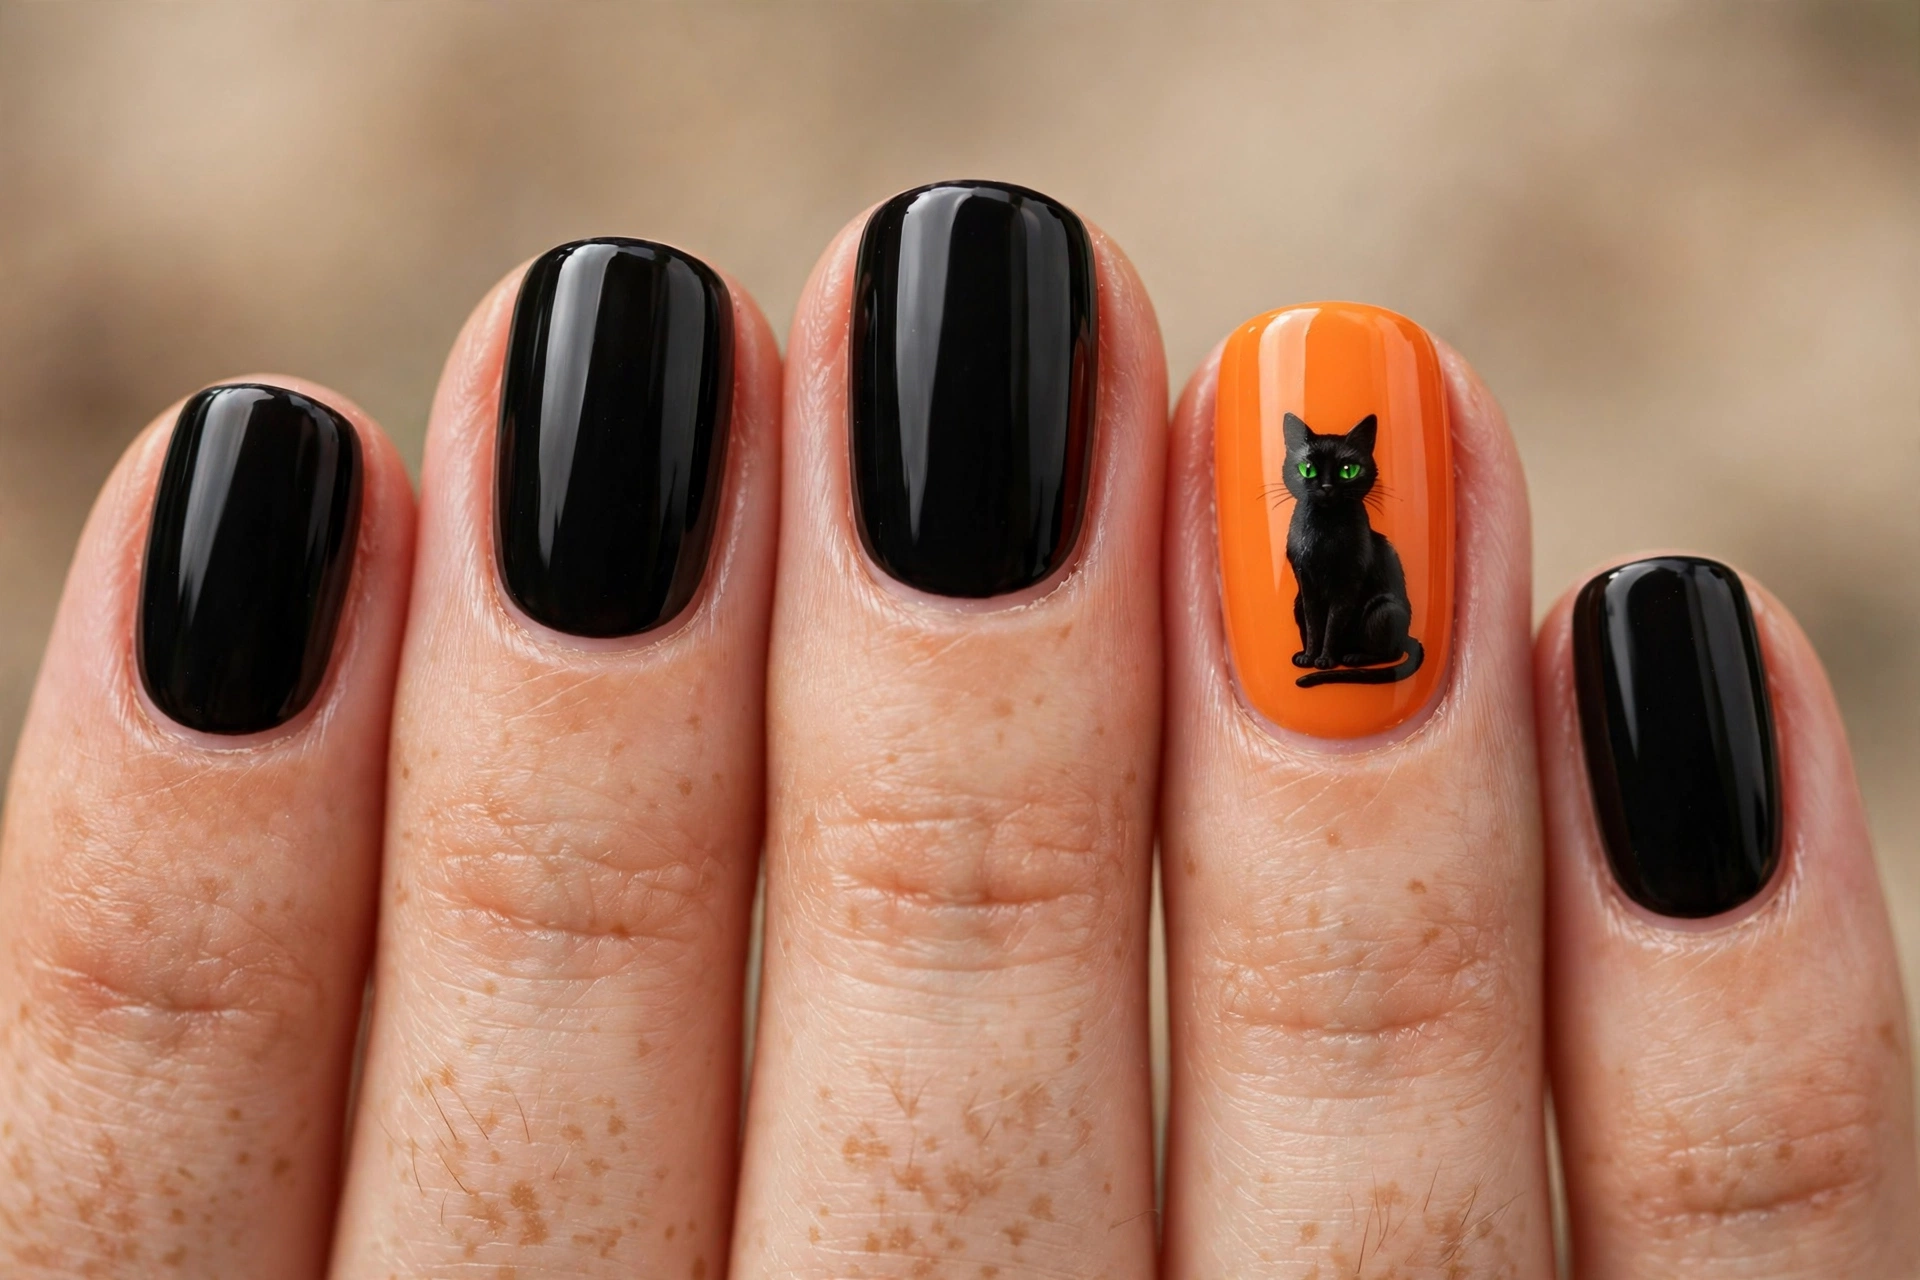
Skill level: Advanced | Time: 55 minutes | Key products: orange polish, black polish, green polish, detail brush
Paint two coats of orange (a harvest moon background) and dry. With a detail brush and black polish, paint a sitting cat silhouette on the ring finger: an oval body, a round head, two triangle ears, and a curved tail wrapping around. Add two tiny green dots as eyes. Silhouettes are forgiving because there are no internal details — it is all one shape. Practice the cat on paper twice before the nail. Do the cat on 1 to 2 accent nails; solid orange or black on the rest. Top coat.
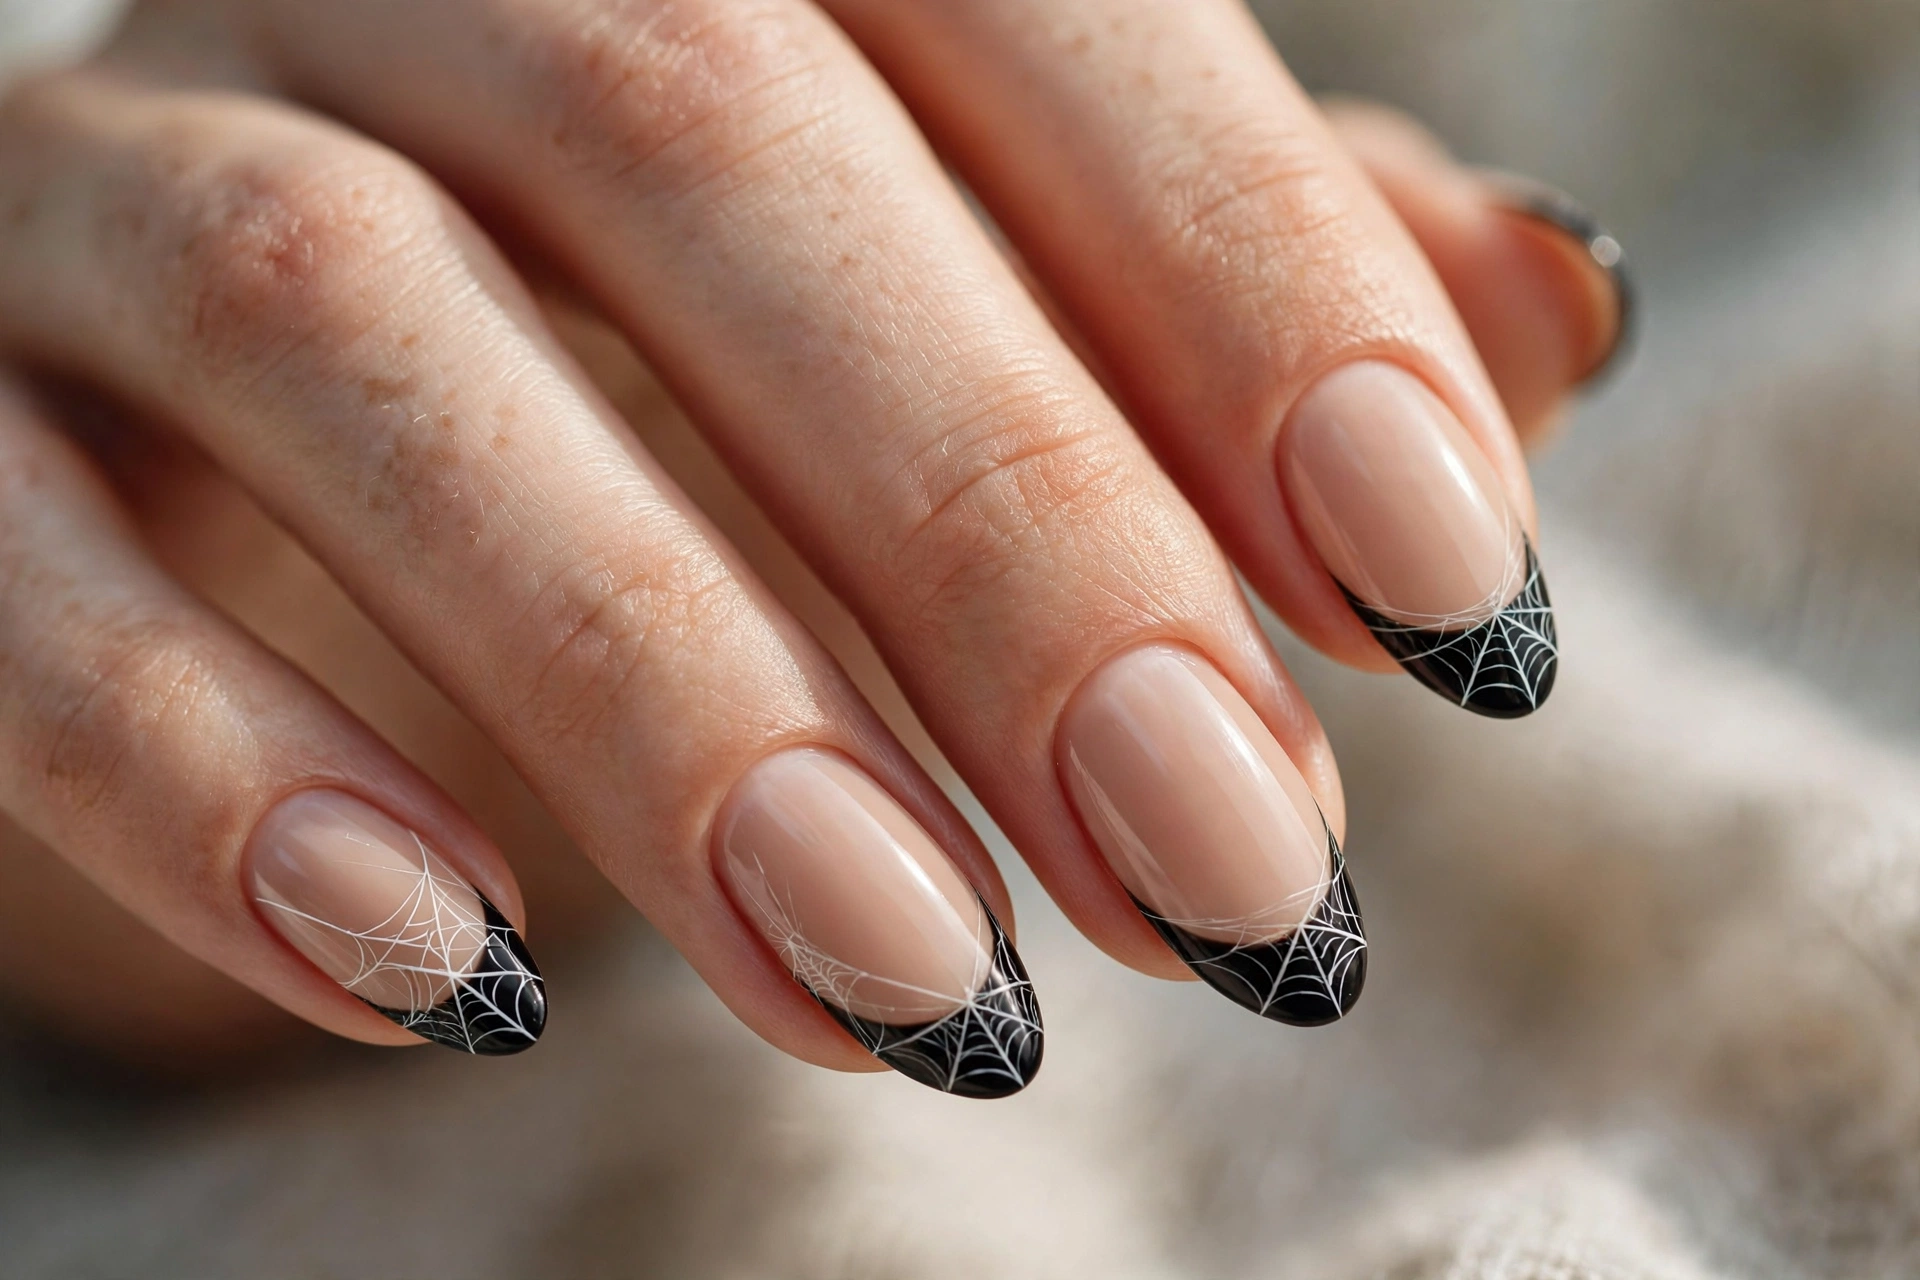
15. Cobweb French Tips
Skill level: Intermediate | Time: 40 minutes | Key products: nude polish, black polish, toothpick or detail brush
Paint two coats of nude and dry. Paint black French tips — a thick band across the free edge. While the concept is simple, the web detail goes on the black tip: with a toothpick dipped in white or silver, draw 3 radiating lines from the corner of the tip and connect them with small arcs. The web sits entirely on the black tip area, which keeps it neat and contained. This is the most wearable Halloween design in the guide — spooky up close, just dark tips from a distance. Top coat.
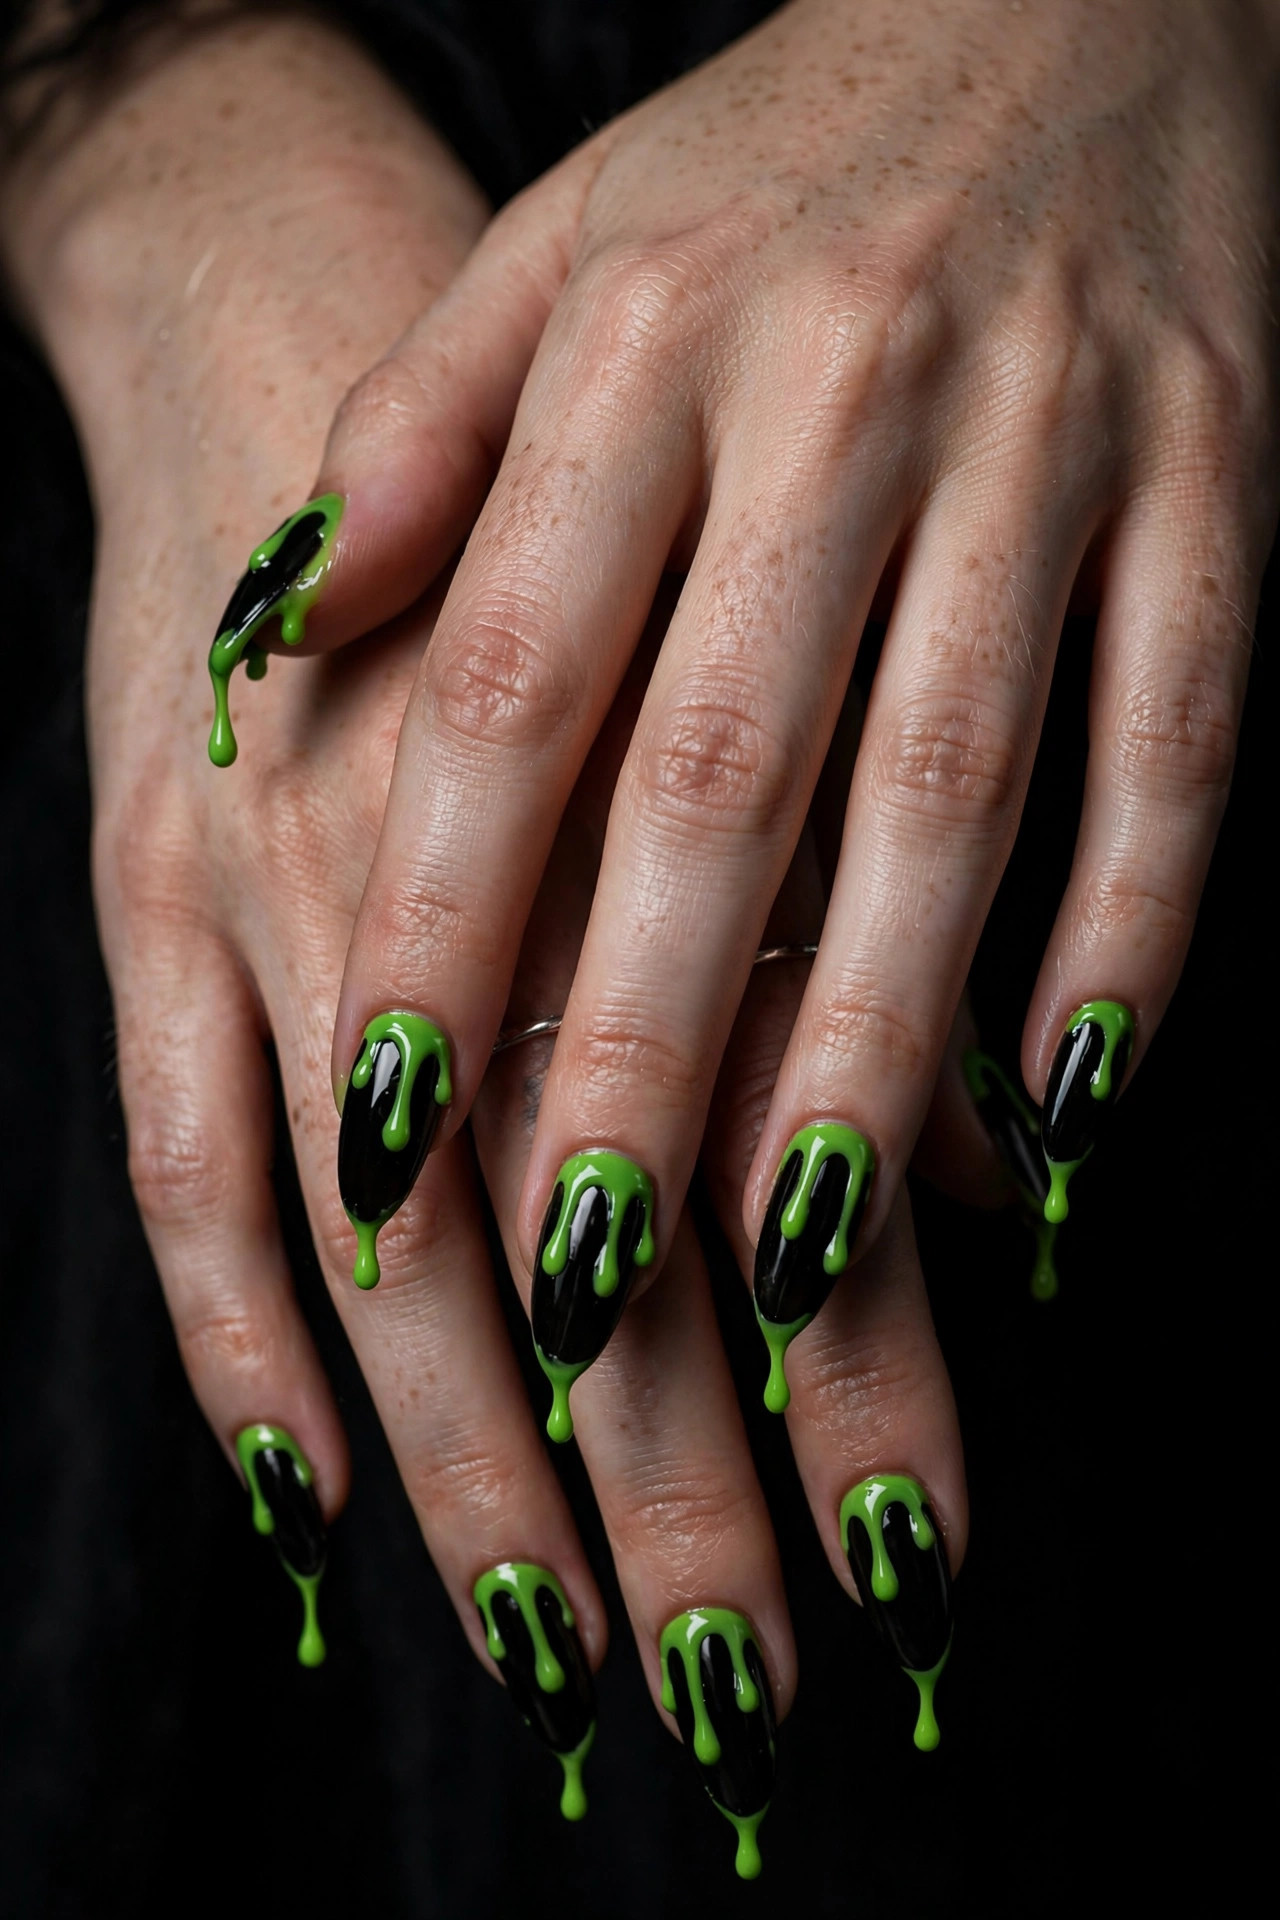
16. Slime Green Drip
Skill level: Beginner | Time: 25 minutes | Key products: black polish, slime green polish, dotting tool
Paint two coats of black and dry fully. Using the same wet-drag technique as the blood drips (design 5), place slime green dots along the cuticle and drag downward to varying lengths. Green slime over black is pure Halloween cartoon energy. Add a second smaller drip layer in a lighter green on 2 accent nails for dimension. The key difference from blood drips: slime drips look better chunkier and more irregular. Top coat after 5 minutes of drying.
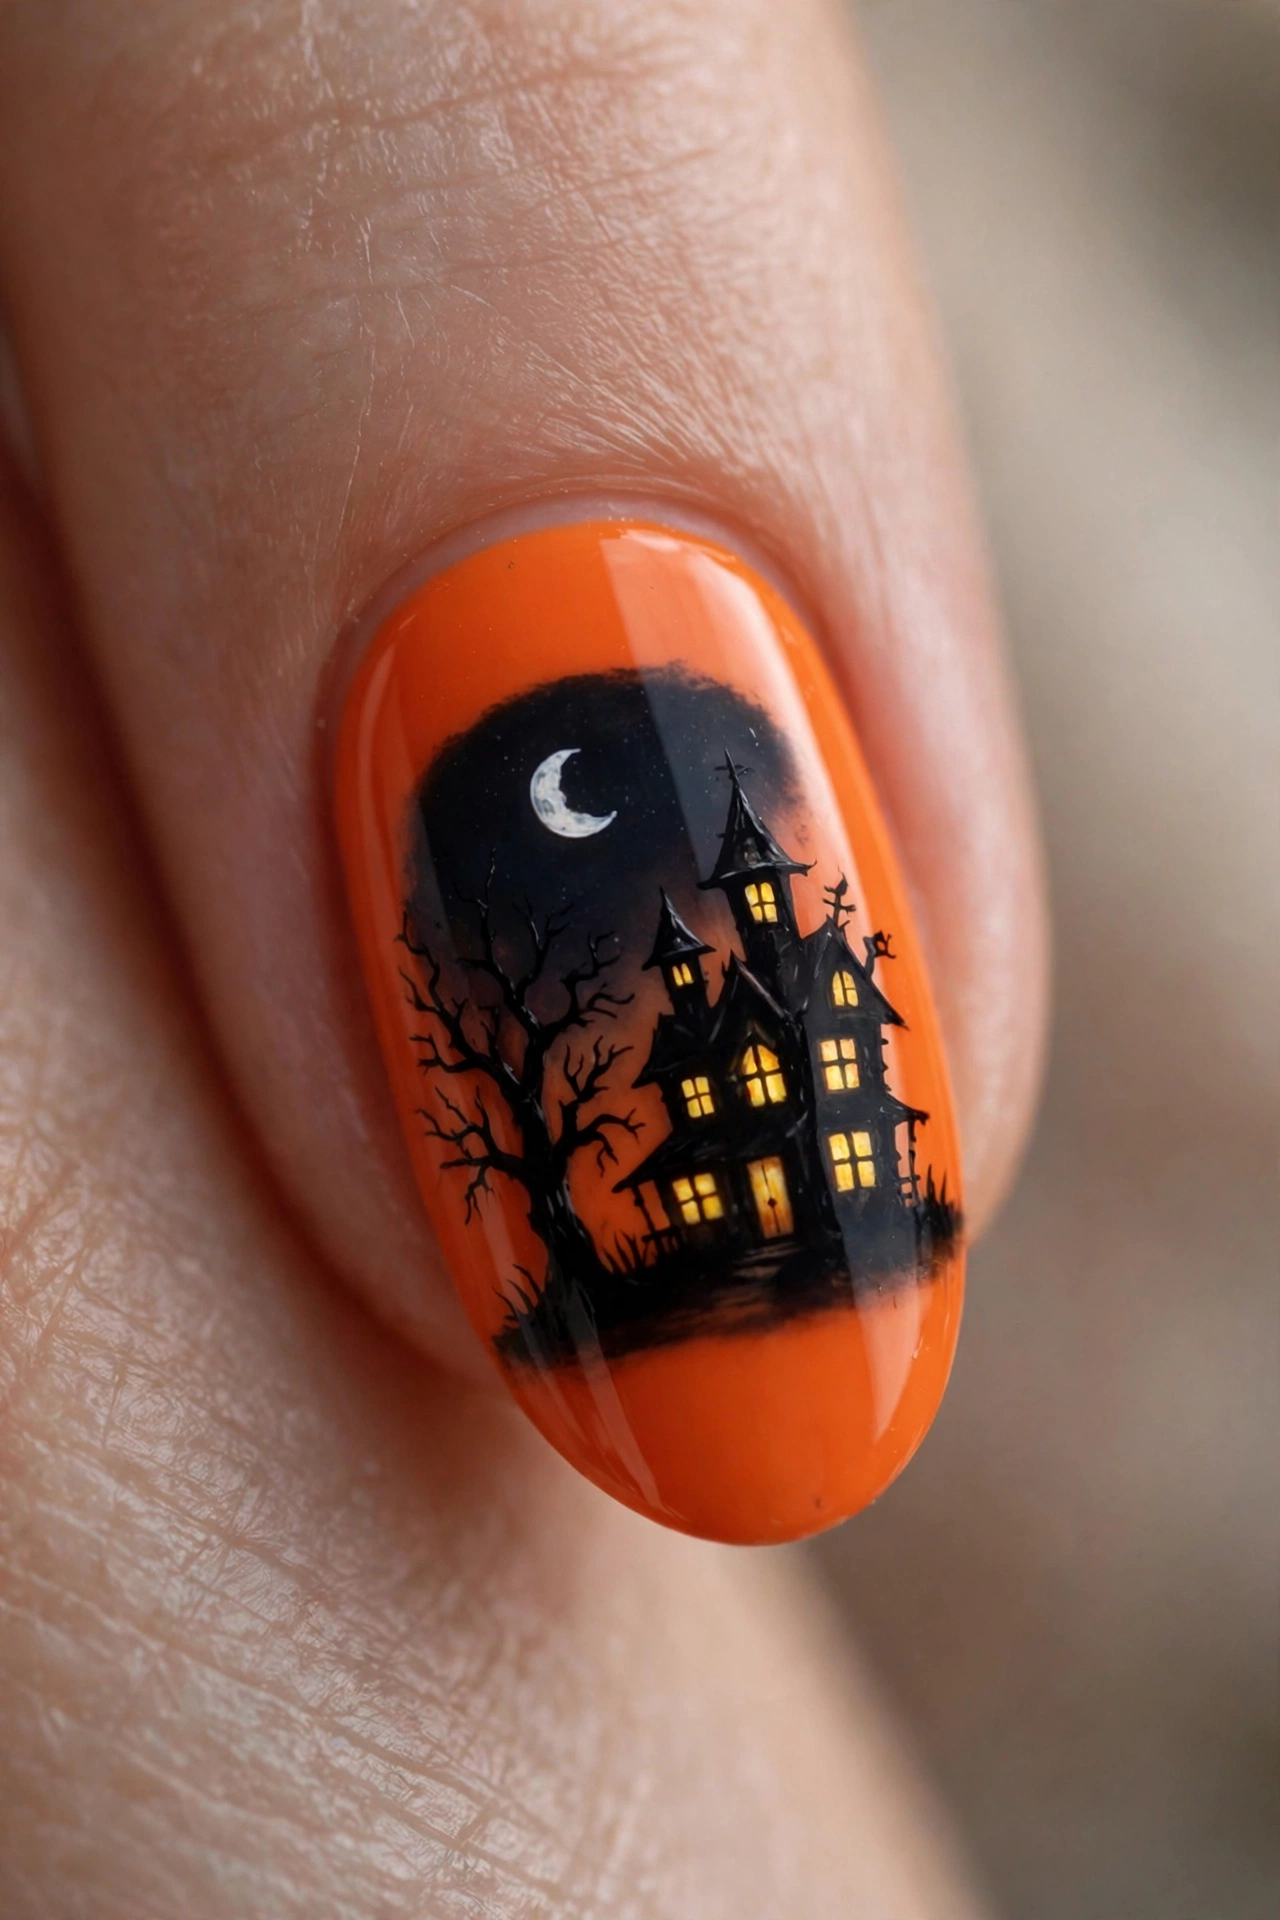
17. Haunted House Silhouette
Skill level: Intermediate | Time: 45 minutes | Key products: orange or purple polish, black polish, yellow polish, detail brush
Paint two coats of orange or deep purple and dry. With a detail brush and black polish, paint a simple haunted house silhouette near the cuticle: a rectangle with a triangle roof, one crooked chimney, and a dead tree beside it (a vertical line with 3 branch flicks). Add 2 tiny yellow squares as lit windows. Keep the house small — one-third of the nail — with the moon (a white or yellow circle) in the upper corner. Silhouettes forgive shaky lines; crooked is correct for haunted houses. Top coat.
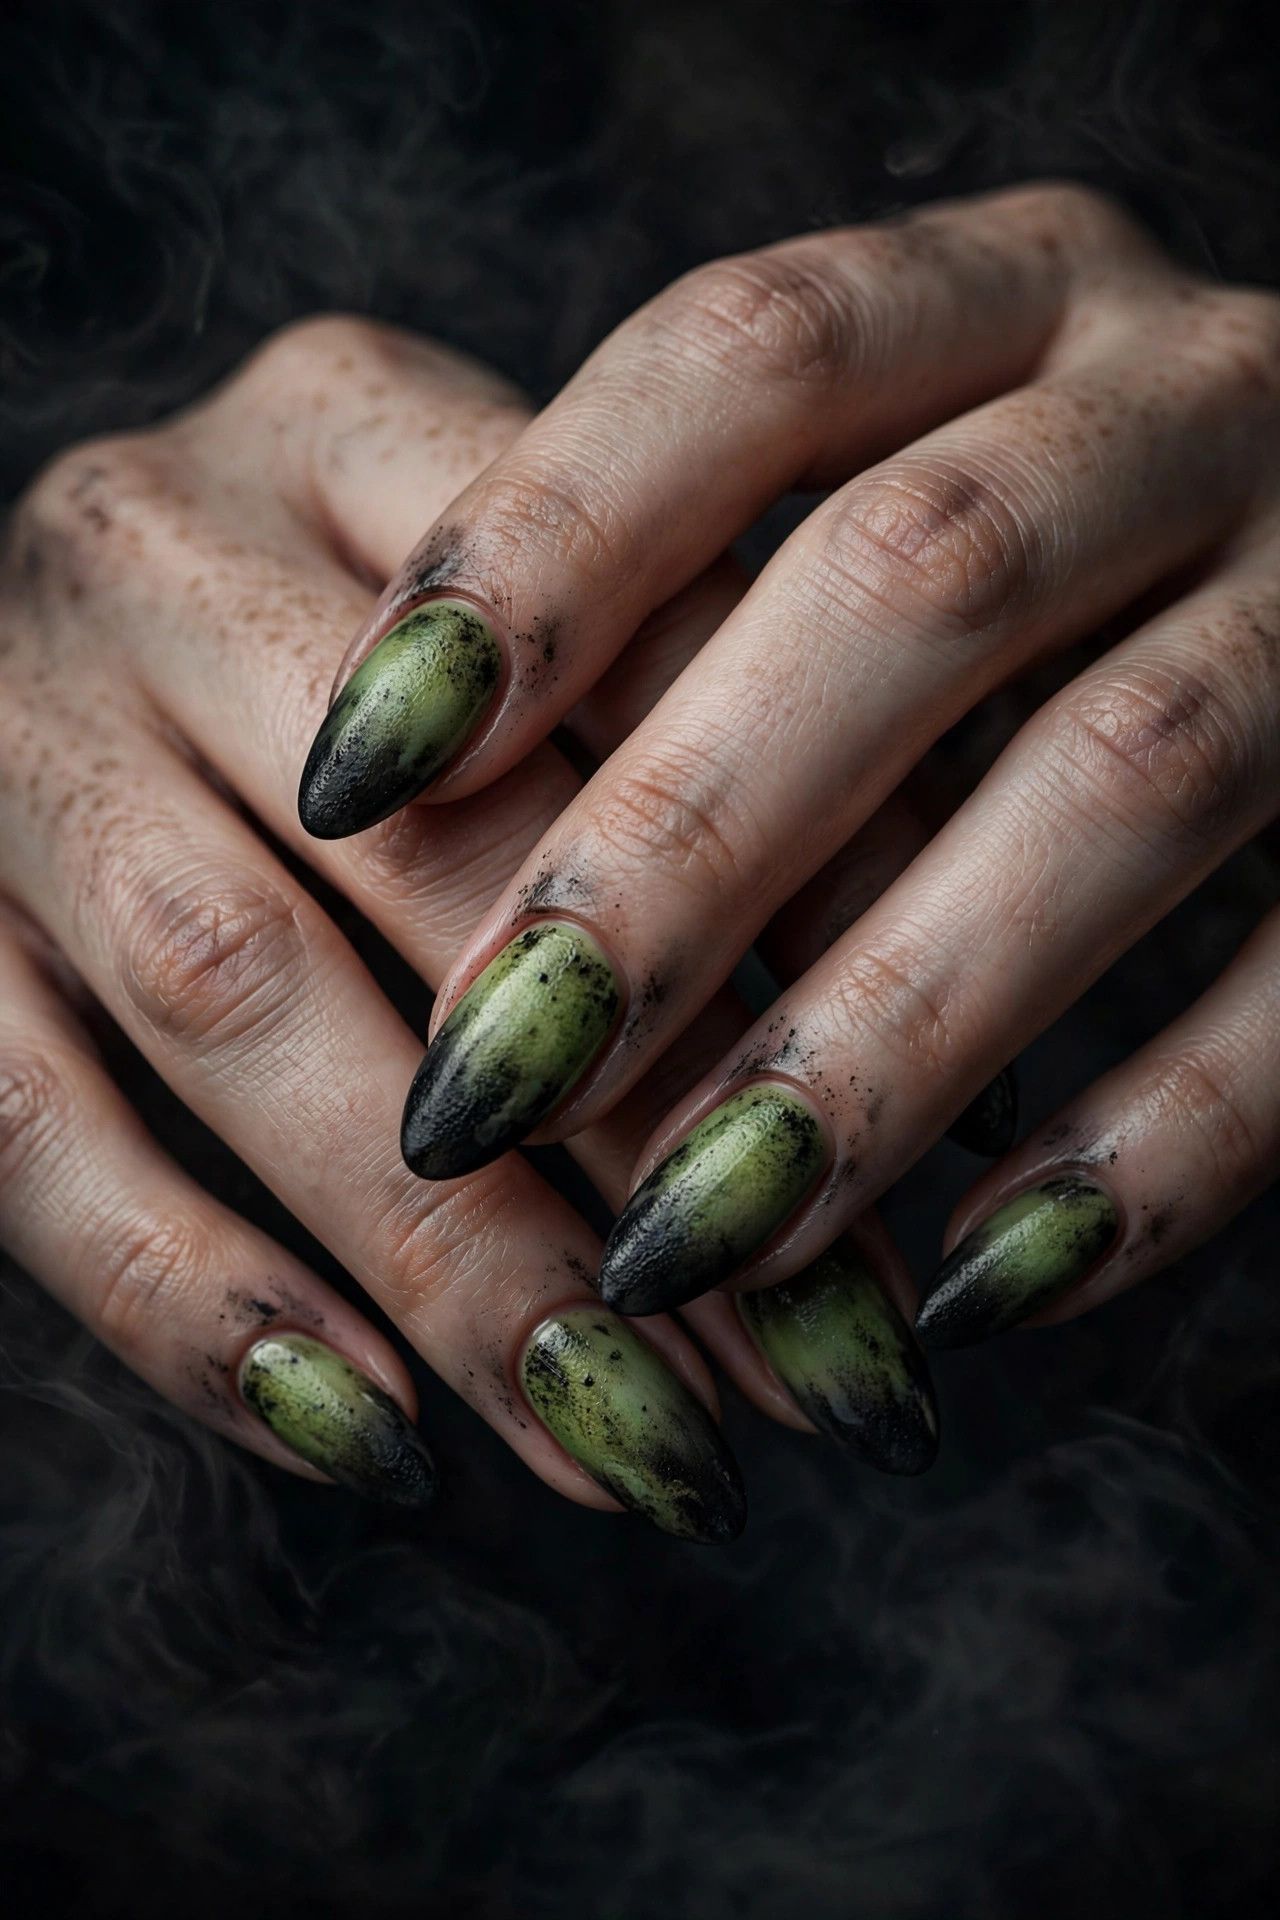
18. Zombie Ombre
Skill level: Beginner | Time: 30 minutes | Key products: green polish, black polish, makeup sponge
Paint two coats of green and dry. On a makeup sponge, paint a stripe of black and a stripe of green side by side. Sponge the black onto the tips of each nail, fading into the green — a decaying gradient. Reapply polish to the sponge every 2 nails. The sponged edge is naturally mottled, which suits zombies perfectly. Add black crack lines with a toothpick on 2 accent nails if you want extra decay detail. Two top coats smooth the texture. No precision required anywhere in this design.
19. Mismatched Halloween Mix
Skill level: Intermediate | Time: 45 minutes | Key products: black, white, orange, purple, and green polishes
Paint each nail a different design from this guide: ghost on one, pumpkin on another, web on a third, solid black, solid orange, and so on. The only rule is keeping the palette to Halloween colors so it reads as intentional. Mismatched manicures are a genuine 2026 trend — Pinterest’s trend forecasters have flagged mismatched, two-toned nail looks as a defining style for the year (Adweek, on Pinterest Predicts 2026). This is also the fastest way to try 10 designs in one sitting. Top coat everything twice since layers vary.
20. Full Moon and Bats
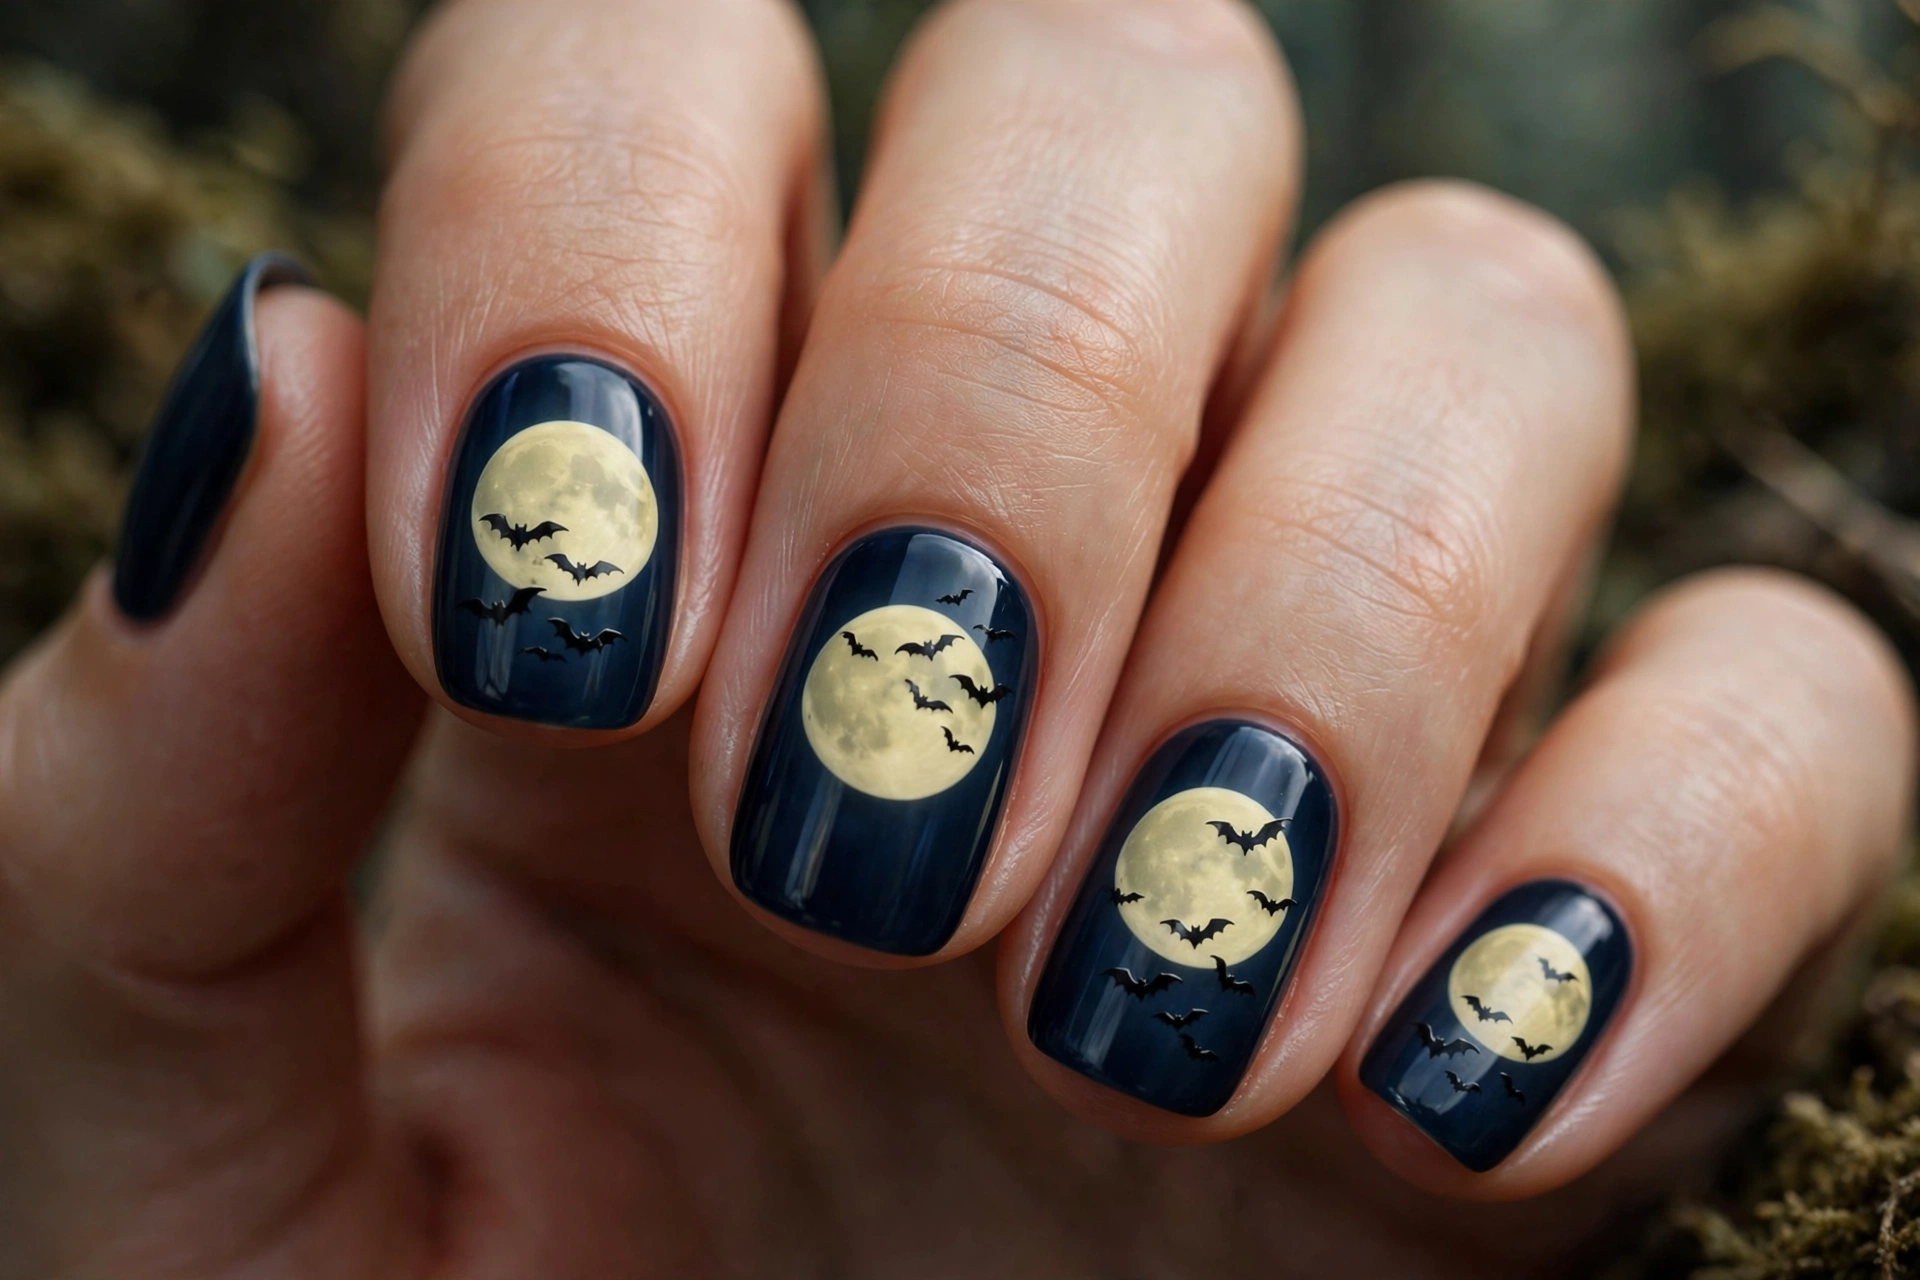
Skill level: Beginner | Time: 25 minutes | Key products: dark blue or black polish, white or pale yellow polish, dotting tool
Paint two coats of dark blue or black and dry. With the large end of a dotting tool, place one big pale yellow or white circle near the top of each nail — the full moon. With a toothpick dipped in black, add 2 tiny bat shapes (two humps) flying across the moon. Moons and bats, nothing else. This 25-minute design is the one to pick when the party is tonight and you have no time. Top coat.
How Do You Make Halloween Nail Art Last Past the Party?
Most Halloween designs only need to survive a weekend, but these rules keep them intact through every party on your calendar:
- Double top coat on layered designs: webs, faces, and silhouettes have multiple layers with edges that lift. Two top coats seal them flat.
- Cap the free edge: run top coat along the nail tip. Dark Halloween colors show chips instantly, so this step matters more here than usual.
- Keep designs simple on your dominant hand: your dominant hand takes more wear. Put the intricate web or haunted house on your non-dominant hand’s nails and simpler solids or dots on the dominant hand.
- Do a trial run: if you are attempting an advanced design for a specific party, practice it once the weekend before. Halloween designs are forgiving, but muscle memory helps.
Want a Halloween set that survives the whole season instead of one weekend? Acrylics hold detailed art for 2 to 3 weeks. Start with what acrylic nails are to understand the system, then follow our guide to doing acrylic nails — and do your Halloween art on top of the finished acrylic set.
What Are the Biggest Halloween Nail Art Mistakes?
Halloween nail art is forgiving, but these five mistakes still ruin sets every October. Avoid them and your designs will look deliberate instead of accidental.
Painting details over tacky base coats
The number one killer of Halloween designs is impatience. Black details dragged through a tacky orange base create gray smears that no top coat can fix. The fix is boring but effective: after your base color, set a timer for 10 full minutes before adding any detail work. Touch the pinky nail lightly — if it leaves any fingerprint at all, wait longer. Quick-dry drops help, but they do not replace actual drying time on thick dark colors.
Using too many designs on one hand
Ten different designs on ten nails looks chaotic rather than creative unless you keep a strict palette. The rule: maximum 3 designs per hand, all in the same color family. A proven formula is 6 nails in solid Halloween colors (black, orange, purple), 2 accent nails with a detailed design (web, haunted house), and 2 with a simple motif (ghost, moon). This looks curated and takes half the time of ten unique designs.
Skipping base coat under dark colors
Black, dark purple, and blood red are the worst staining polishes in existence. Without two coats of base, your nails will carry a gray or pink shadow for weeks after Halloween. This is not a step to skip when you are in a hurry — it is the step that matters most when you are in a hurry, because stained nails are the price of rushing.
Drawing details too small
Beginners consistently draw Halloween details too tiny, and tiny details blur into blobs at arm’s length. The fix: make every element 30% bigger than your instinct says. Ghost faces, spider bodies, and pumpkin features should each occupy at least half the nail. Bold and simple always reads better than small and fiddly, especially in dim party lighting where nobody sees fine detail anyway.
Forgetting the cleanup step
Black and dark polish on the surrounding skin makes the whole manicure look messy, no matter how good the art is. After every design step, dip a small angled brush in remover and trace around each cuticle and sidewall. This 3-minute cleanup pass is the single biggest difference between DIY nails that look homemade and DIY nails that get asked about.
Are Halloween Nail Designs Trending This Year?
Yes, and the data backs it up. Pinterest’s 2026 trend forecast specifically calls out gothic and vampire-inspired beauty, with searches for gothic coffin nails up 180% and dark romantic makeup up 160% (Pinterest Newsroom, Pinterest Predicts 2026). Halloween nail art sits right at the intersection of both trends, which means this year’s spooky season is bigger than usual for dark, moody manicures.
Frequently Asked Questions
1. What is the easiest Halloween nail design for beginners?
Ghost faces (design 1) and blood drips (design 5). Ghosts are white blobs with dot eyes — there is nothing to get wrong. Blood drips use the wet-drag technique, which takes 30 seconds to learn. Both take well under 30 minutes for a full set.
2. Can I do Halloween nails without any nail art tools?
Yes. A toothpick handles webs, fangs, faces, and fine lines; a bobby pin makes perfect dots. The only designs that genuinely benefit from a real detail brush are the witch hat and black cat silhouettes. Everything else in this guide works with household items.
3. How do I stop black polish from staining my nails and skin?
Use two coats of base coat under black or dark polish — one is not enough for heavy pigments. Clean up skin around the nails with remover on a small brush immediately after painting, before the polish dries. If staining happens, soak fingertips in warm soapy water for 5 minutes and buff gently.
4. How long before Halloween should I do my nails?
For regular polish, 1 to 2 days before your main event — the art stays fresh for 5 to 7 days. If you have parties across two weekends, do them the weekend before the first party and refresh the top coat mid-week. Acrylic-based Halloween sets can be done up to 2 weeks early.
5. Can I do Halloween nail art on short nails?
Yes — most of these designs suit short nails well. Ghosts, skulls, pumpkins, and moons all scale down nicely. The designs that need length are spider webs and haunted houses, which benefit from extra nail real estate. On very short nails, do detailed designs on 1 to 2 accents and keep the rest simple.
6. What colors do I need for Halloween nails?
Black, white, and orange cover the majority of Halloween designs. Add blood red and slime green for gore and monster looks, purple for night skies, and one glitter for accents. Six to seven polishes total handle all 20 designs in this guide.
7. How do I remove Halloween nail art with lots of layers?
Soak-off is the answer: acetone-soaked cotton pads wrapped in foil for 10 to 15 minutes, then gentle pushing with a cuticle pusher. Do not peel layered art — the multiple layers bond harder than single-color polish, and peeling pulls up nail surface with it. Moisturize with cuticle oil afterward since acetone is drying.
8. Are glow-in-the-dark Halloween nails safe?
Standard glow-in-the-dark nail polishes from reputable brands are formulated for cosmetic use and are safe when used as directed. Apply them as an accent layer over regular polish rather than directly on the nail, and always use a base coat underneath. Avoid craft-grade glow paints, which are not formulated for skin and nail contact and can cause irritation. If you have sensitive skin or a history of cosmetic allergies, patch-test the glow polish on one nail a day before doing the full set.
9. Can I wear Halloween nail art to work?
Stick to the subtle designs: cobweb French tips (design 15), mummy wraps (design 9), or solid black, deep purple, or blood red with no art. These read as seasonal rather than costumey from a normal distance. Save the gore and faces for the weekend.
10. What nail shape is best for Halloween designs?
Coffin and stiletto shapes amplify spooky designs — the sharp edges suit webs, fangs, and claws. Almond is the most versatile if you want the designs without the drama, and short square works well for cute designs like ghosts and pumpkins. Our nail shaping guide walks through filing each shape at home with nothing more than a standard nail file.